
K 2500 Suburban 4WD V8-5.7L VIN R (1999)
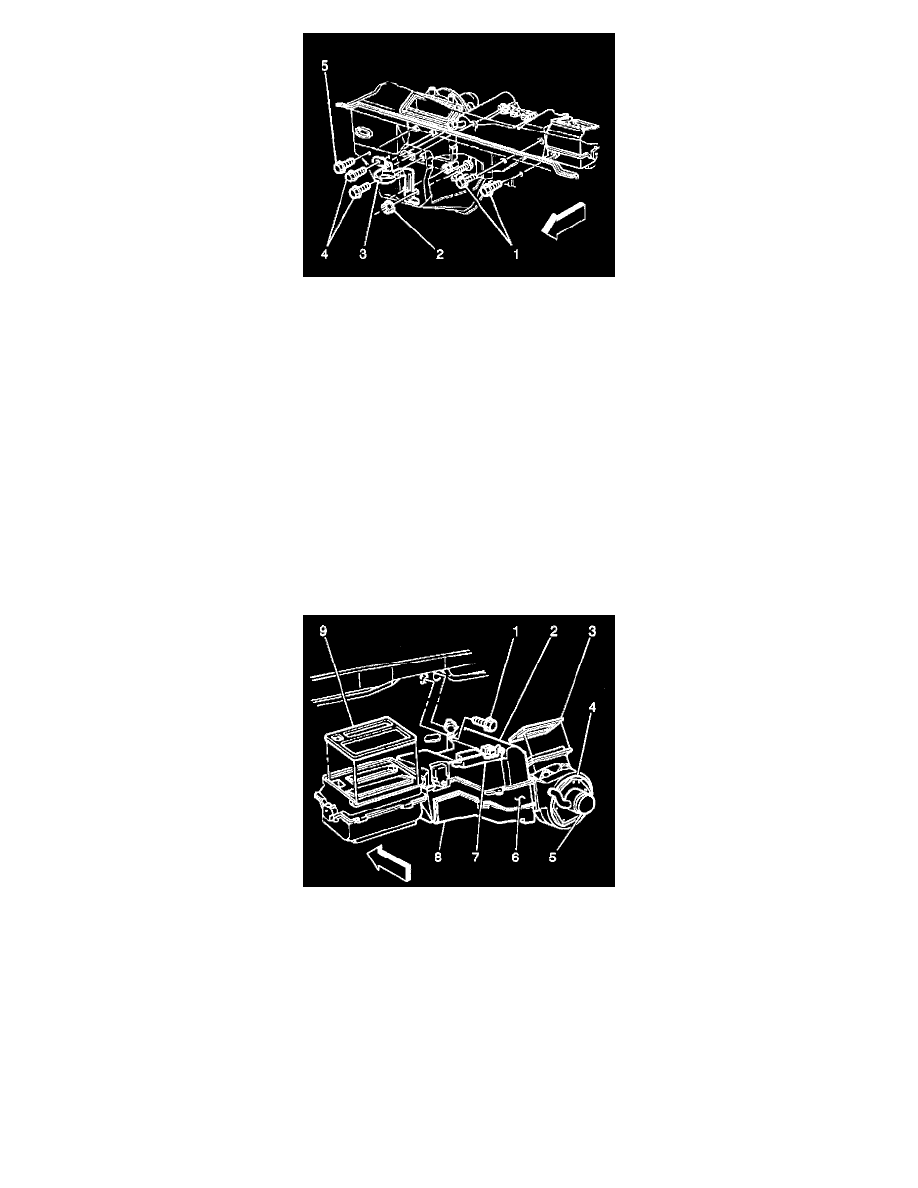
7. Install the nut (2).
8. Install the screws (1, 4).
NOTE: Refer to Fastener Notice in Cautions and Notices.
9. Tighten the following fasteners:
Tighten
-
Tighten the module mounting screw to 11 N.m (97 lb in).
-
Tighten the nut (2) to 2.8 N.m (25 lb in).
-
Tighten the screws (1,4) to 1.9 N.m (17 lb in).
10. Install the accumulator.
11. Connect the evaporator tube.
12. Connect the heater hoses.
13. Install the coolant recovery reservoir.
14. Install the instrument panel.
15. Install the steering column.
16. Install the blower motor (5).
17. Install the blower motor cover.
18. Install the hinge pillar trim panels.
19. Install the powertrain control module and the mounting tray.
20. Install the floor air outlet.
21. Connect the electrical connectors, as necessary.
22. Add the engine coolant.
23. Connect the negative battery cable.
24. Charge the system. See: Refrigerant/Service and Repair
25. Inspect the system for leaks. See: Testing and Inspection/Component Tests and General Diagnostics