
K 2500 Suburban 4WD V8-5.7L VIN R (1999)
Accumulator: Service and Repair
Automatic Transmission - 4L80-E
Removal Procedure
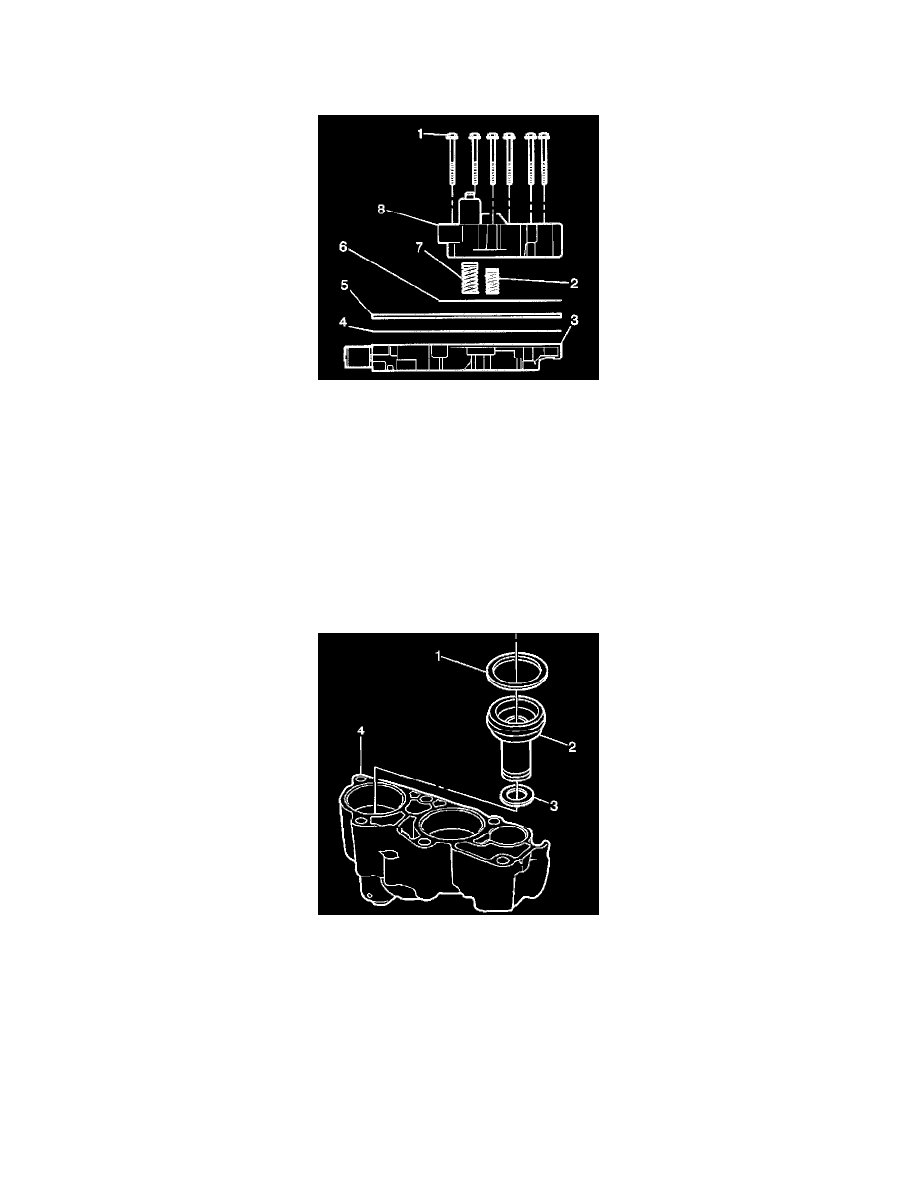
1. Remove the 3rd and 4th clutch accumulator housing bolts (1).
2. Remove the 3rd and 4th clutch accumulator housing (8).
3. Remove the accumulator housing gasket (6). The accumulator housing gasket may be stuck to the spacer plate (5).
4. Remove the 3rd clutch accumulator piston spring (7).
5. Remove the 4th clutch accumulator piston spring (2).
6. Remove the control valve body spacer plate (5).
7. Remove the control valve assembly to spacer plate gasket (4) from the spacer plate (5).
Third and Forth Clutch Accumulator Disassembly
Important: Apply low pressure compressed air to the hole at the top of the accumulator housing to assist with the piston removal.
Remove the 3rd clutch accumulator piston (2).
1. Remove the 3rd clutch accumulator piston seals (1 and 3 ).