
K 2500 Suburban 4WD V8-5.7L VIN R (1999)
Slip Yoke: Service and Repair
Removal Procedure
^
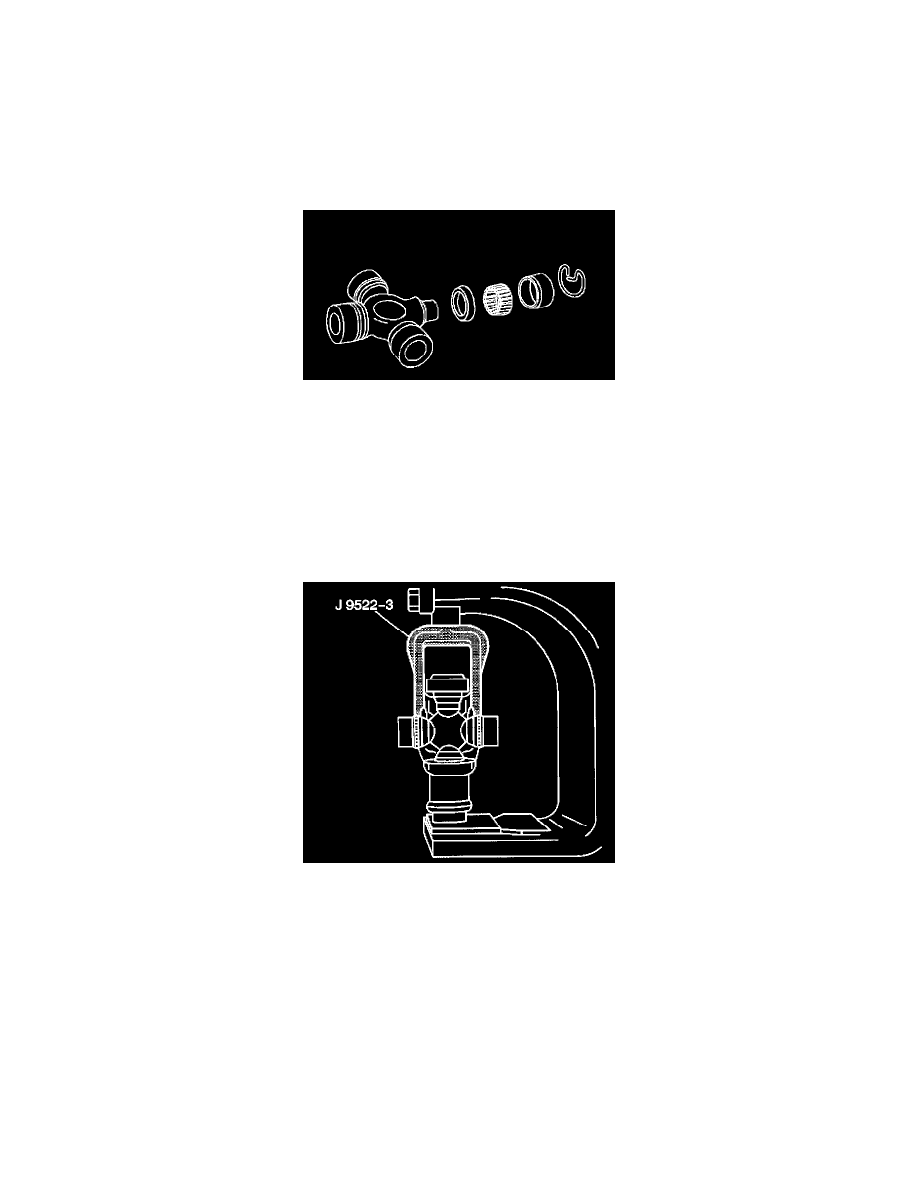
Tools Required
-
J 9522-3 U-Joint Bearing Separator
-
J 9522-5 U-Joint Bearing Spacer Remover
Notice: Whenever the propeller shaft slip yoke is replaced, the adjoining universal joint must also be replaced. Otherwise, damage to the slip yoke
may result.
1. Remove the propeller shaft.
Notice: Never clamp propeller shaft tubing in a vise. Clamping propeller shaft tubing in a vise could dent or deform the tube causing an imbalance or
unsafe condition. Always clamp on one of the yokes and support the shaft horizontally. Avoid damaging the slip yoke sealing surface. Nicks may
damage the bushing or cut the lip seal.
2. Support the propeller shaft in a line horizontal with the table of a press.
3. Mark the propeller shaft in order to show which end connects to the transmission and which end connects to the rear axle.
4. Remove the snap rings, if equipped.
^
Pinch the ends of the snap ring together with pliers and remove the snap ring from the yoke.
5. If a snap ring does not readily snap out of the groove in the yoke, tap the end of the bearing cup lightly to relieve the pressure from the ring.
^
Place the universal joint so that the lower ear of the propeller shaft yoke is supported on a 30 mm (1 1/8 inch) socket.
6. Press the lower bearing cup out of the propeller shaft yoke ear. This will also remove the plastic retaining ring on propeller shafts equipped with
the production nylon injected ring type universal joint. Use the J 9522-3.