
K 2500 Truck 4WD V8-305 5.0L VIN M SFI (1998)
-
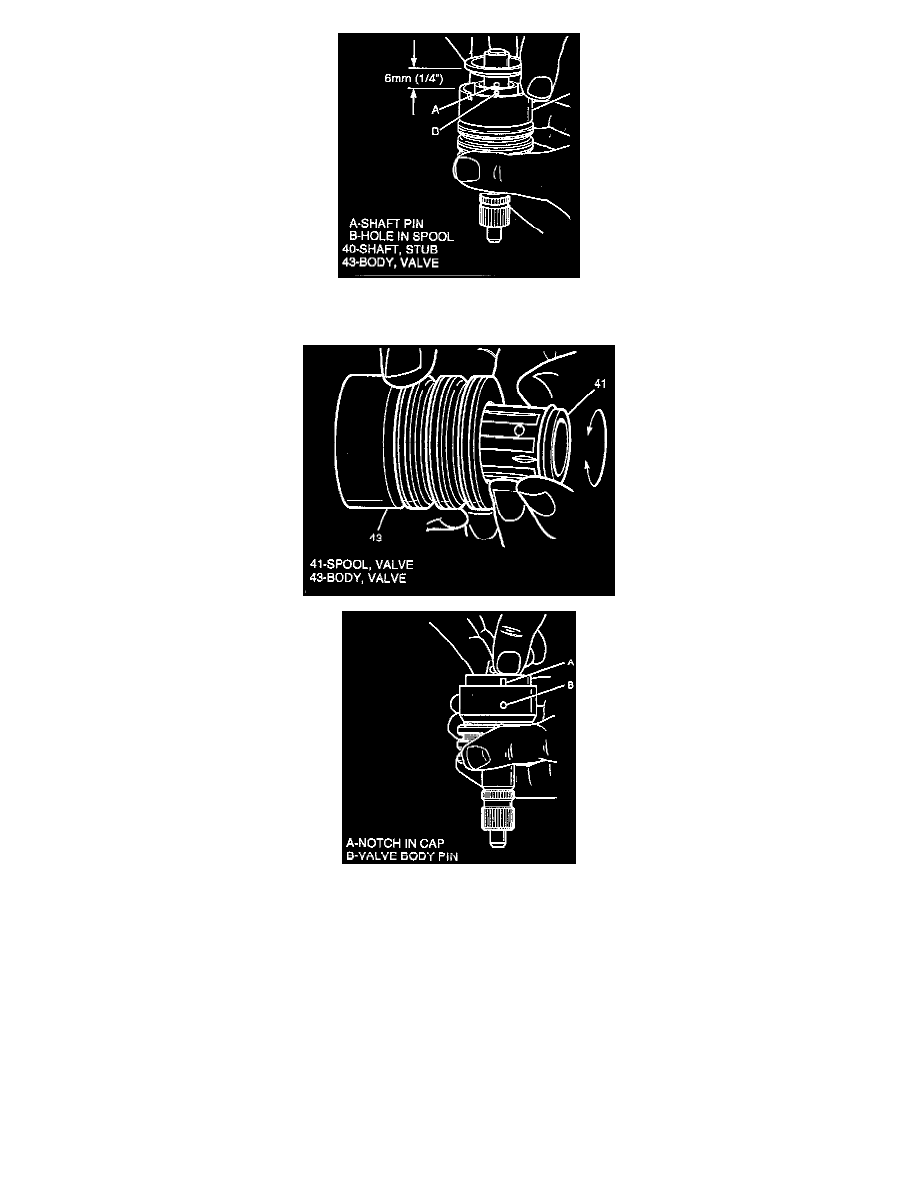
Pull cap and valve spool (41) out from valve body (43) 6 mm (1/4 inch) and disengage stub shaft pin from hole in valve spool (41).
4. Valve assembly, if necessary.
-
Remove valve spool (41) by pulling and rotating from valve body (43).
-
Remove valve spool O-ring seal (42).
-
Remove valve body teflon rings (46) and O-ring seals (45).
ASSEMBLE
1. Valve assembly, if necessary.
-
Install valve spool O-ring seal (42) to valve spool (41).
-
Lubricate valve spool (41) and O-ring seal (42) with power steering fluid.
-
Install valve spool (41) to valve body (43) by pushing and rotating until hole in valve spool (41) for stub shaft pin is accessible from opposite
end of valve body (43).
2. Stub shaft (40) to valve spool, if necessary and insert pin.
-
Notch in stub shaft cap must fully engage valve body pin and seat against valve body shoulder.
-
Install O-ring seals (45) and teflon rings (46) to valve body (43).
-
Lubricate O-ring seals (45) and teflon rings (46) with power steering fluid.
3. Stub shaft (40) and valve assembly to worm shaft (13), fitting pin on worm shaft (13) to slot in the valve assembly.