
K 2500 Truck 4WD V8-379 6.2L DSL VIN C FI (1989)
PROM - Programmable Read Only Memory: Service and Repair
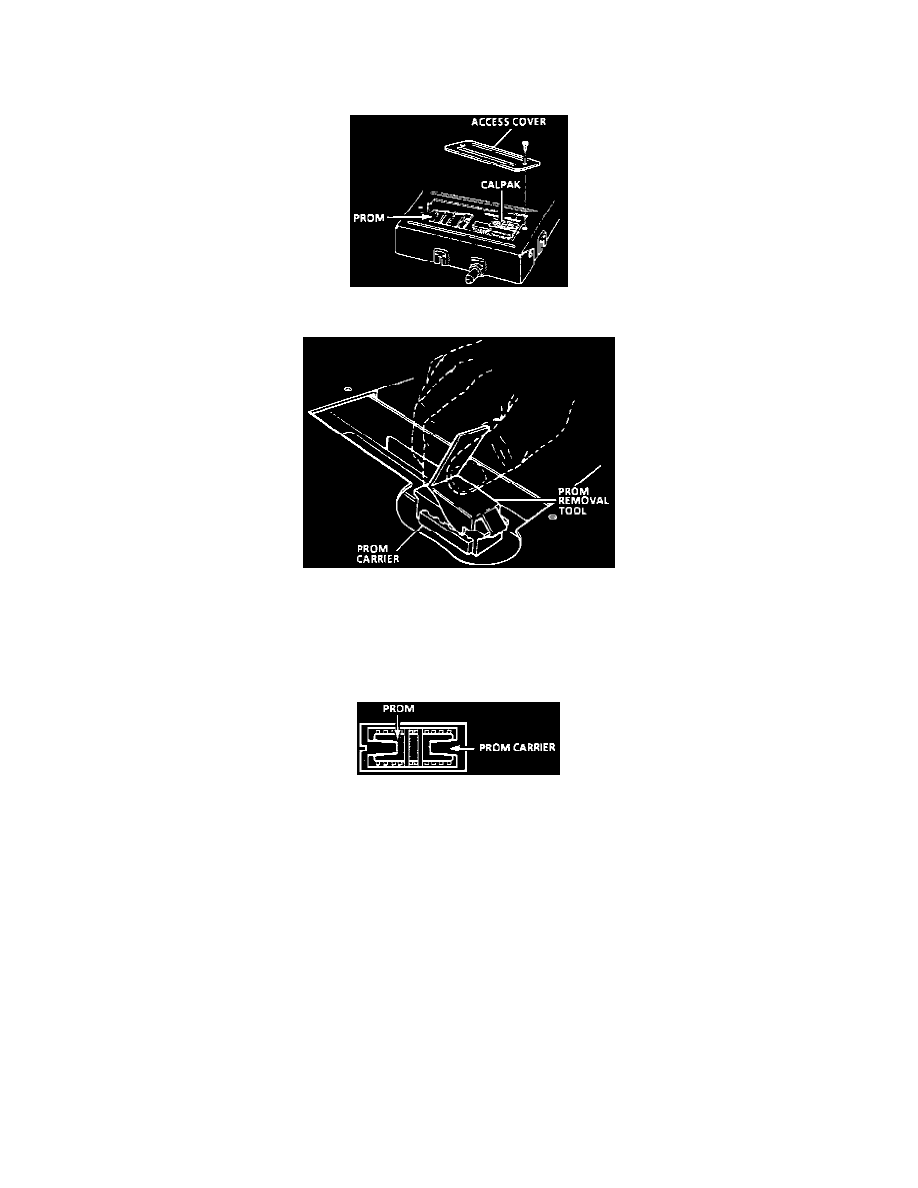
PROM
1. Remove ECM from vehicle.
2. Remove ECM access cover.
PROM Removal
3. Remove PROM using the rocker-type PROM removal tool shown. Engage one end of the PROM carrier with the hook end of the tool. Press on
the vertical bar end of the tool and rock the engaged end of the PROM carrier up as far as possible. Engage the opposite end of the PROM carrier
in the same manner and rock this end up as far as possible. Repeat this process until the PROM carrier and PROM are free of the PROM socket.
The PROM carrier with the PROM in it should lift off of the PROM socket easily.
4. Inspect the reference end of the PROM carrier and carefully set aside. Do not remove the PROM from the carrier to confirm PROM correctness.
The notch in the PROM is referenced to the small notch in the carrier. The small notch of the carrier must be aligned with the small notch in the
socket.
CAUTION:
ANY TIME THE PROM IS INSTALLED BACKWARDS AND THE IGNITION SWITCH IS TURNED ON, THE PROM IS DESTROYED.
5. Install PROM by pressing on the PROM carrier until it is firmly seated in the socket. Do not press on the PROM, only the carrier.
6. Install ECM access cover.
7. Install ECM and perform a DIAGNOSTIC CIRCUIT CHECK to confirm proper installation.