
K 2500 Truck 4WD V8-379 6.2L DSL VIN C FI (1989)
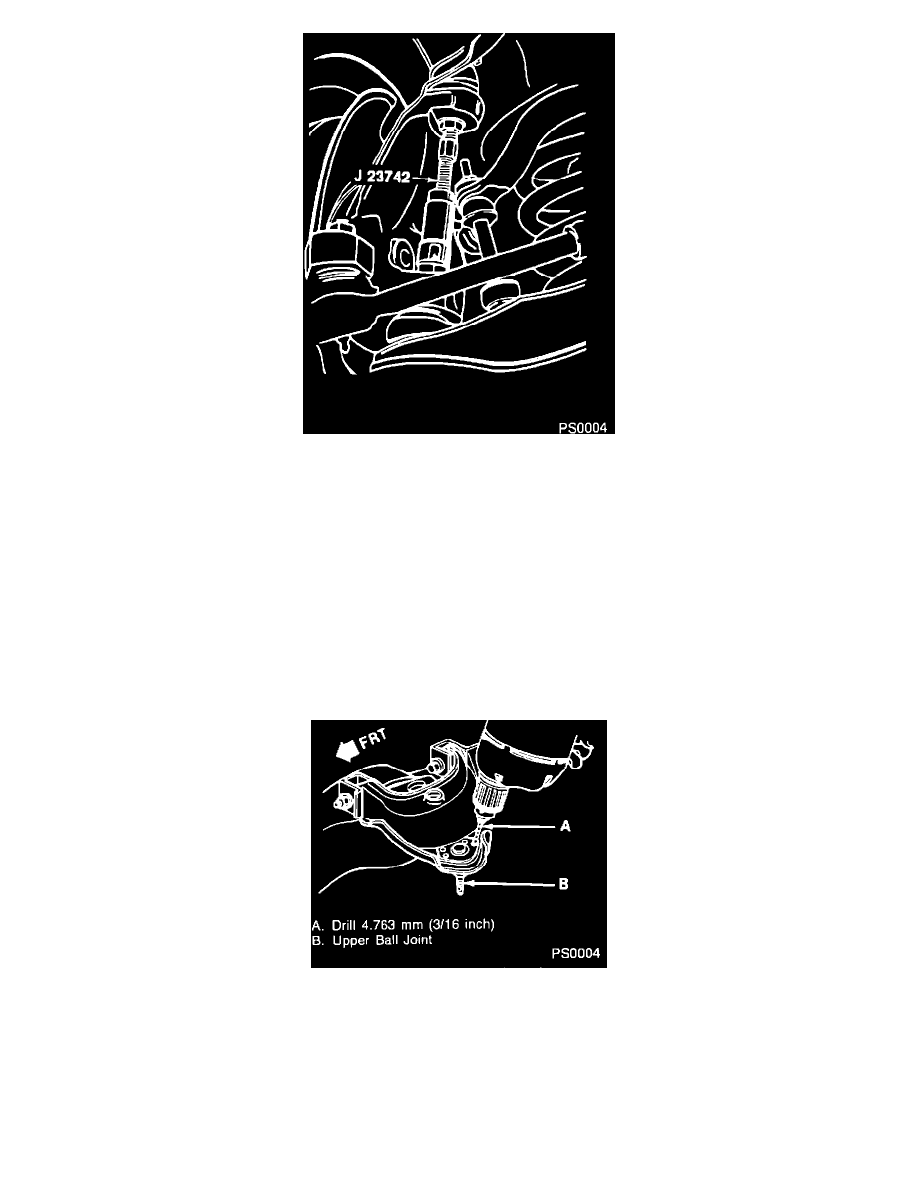
Figure 3 - Disconnecting the Ball Joint
Important
Support the caliper with a piece of wire to prevent damage to the brake line.
4. Cotter pin (68) and stud nut (67) from the upper ball joint (66).
5. Upper ball joint (66) from knuckle.
-
Support the knuckle assembly.
-
Use J 23742 as shown in figure 3.
-
Inspect the tapered hole in the knuckle and remove any dirt. If the hole is out of round, deformed or damaged, the knuckle must be replaced.
Figure 4 - Drilling the Ball Joint Rivets
6.
Rivets from upper ball joint (66).
-
If ball joint has been previously replaced, remove bolts and skip to step 7.
-
Center punch the top of the rivets.
-
Use a 4.763 mm (3/16-inch) drill to cut a 6.35 mm (1/4-inch) deep hole in the center of each rivet (figure 4).