
K 2500 Truck 4WD V8-379 6.2L DSL VIN C FI (1989)
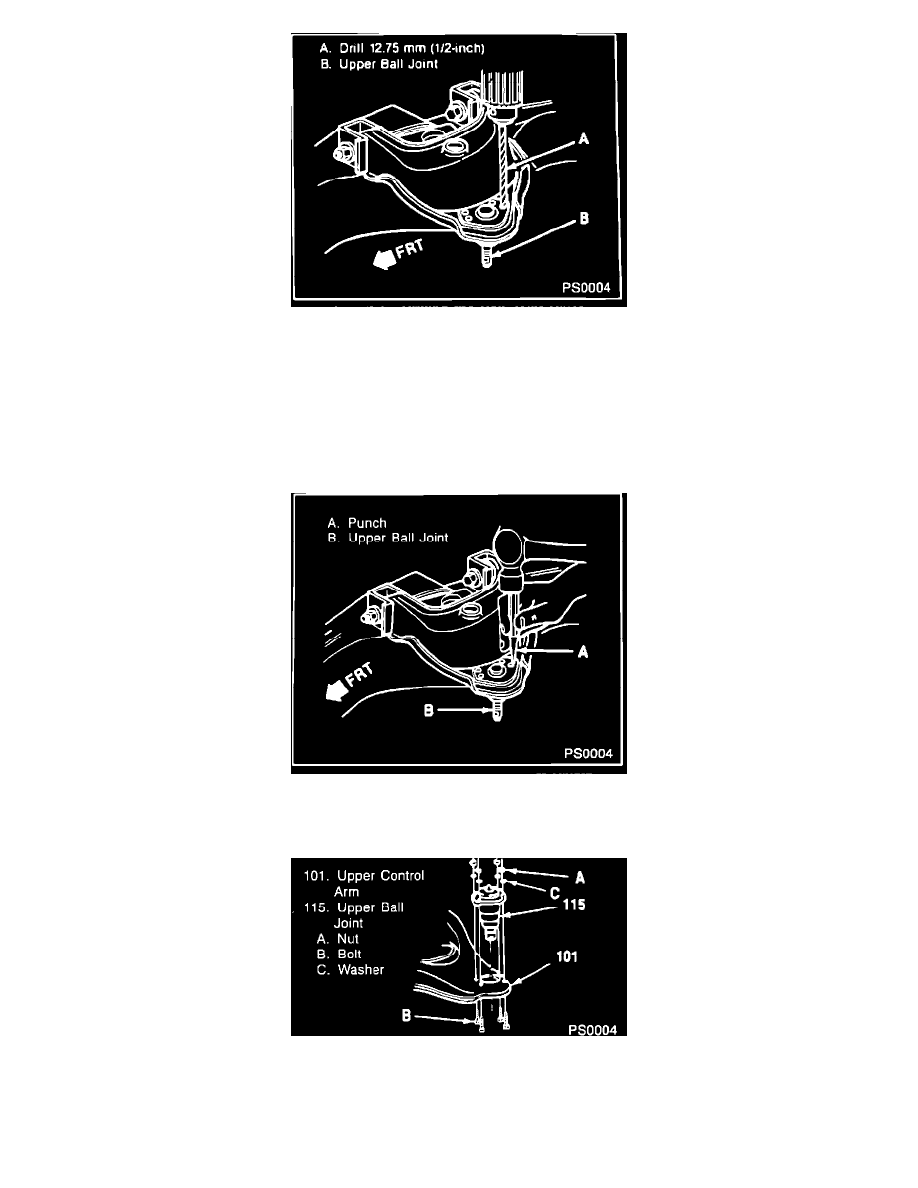
Figure 5 - Drilling the Ball Joint Rivet Heads
-
Drill the rivet heads away using a 12.7 mm (1/2-inch) drill (figure 5).
6.
Upper ball joint (115) from the upper control arm (101). Rivets will remain in control arm.
Important
Do not damage the upper control arm mounting surface when removing the ball joint or rivets. Remove remaining rivet shanks flush with control arm.
Figure 6 - Removing the Ball Joint Rivets
-
Support the upper control arm and punch the rivets out using a punch (figure 6).
Figure 12 - Installing the Upper Ball Joint
Install (figure 12)
1.
New upper ball joint (115) to the upper control arm (101) (C truck arm shown, K truck arm typical).