
K 2500 Truck 4WD V8-379 6.2L DSL VIN C FI (1989)
-
Position four attaching bolts pointing upward, washers and nuts.
-
Tighten nuts (A) to 23 N-m (17 lbs.ft.).
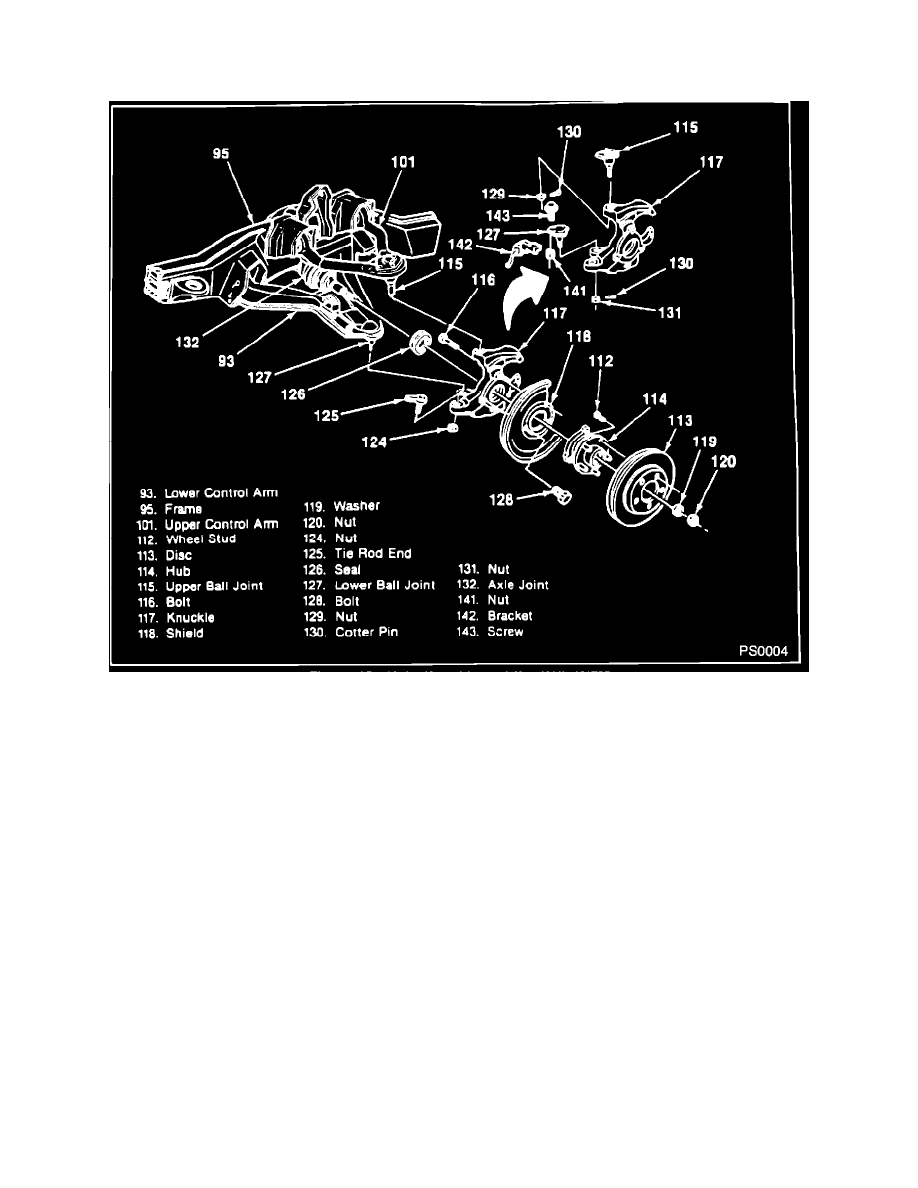
Figure 10 - Hub. Knuckle and the Ball Joints
Remove (figure 10)
1. Drive axle shaft nut (120) and washer (119) from the hub assembly (114).
2. Cotter pin (130) and stud nut (131) from the
lower ball joint (127).
3. Lower ball joint (127) from the knuckle (117).
-
Support the knuckle assembly.
-
Use J 24319-01.
-
Drive axle must be removed from hub assembly at the same time.
-
Move knuckle aside and support.
-
Move drive axle aside and support.
-
Inspect the tapered hole in the knuckle and remove any dirt. If the hole is out of round, deformed or damaged, the knuckle must be replaced.
4.
Rivets from lower ball joint (127). (Figure 13)
-
If ball joint has been previously replaced, remove bolts and skip to step 5.