
K 2500 Truck 4WD V8-379 6.2L DSL VIN C FI (1989)
-
Center punch the top of the rivets.
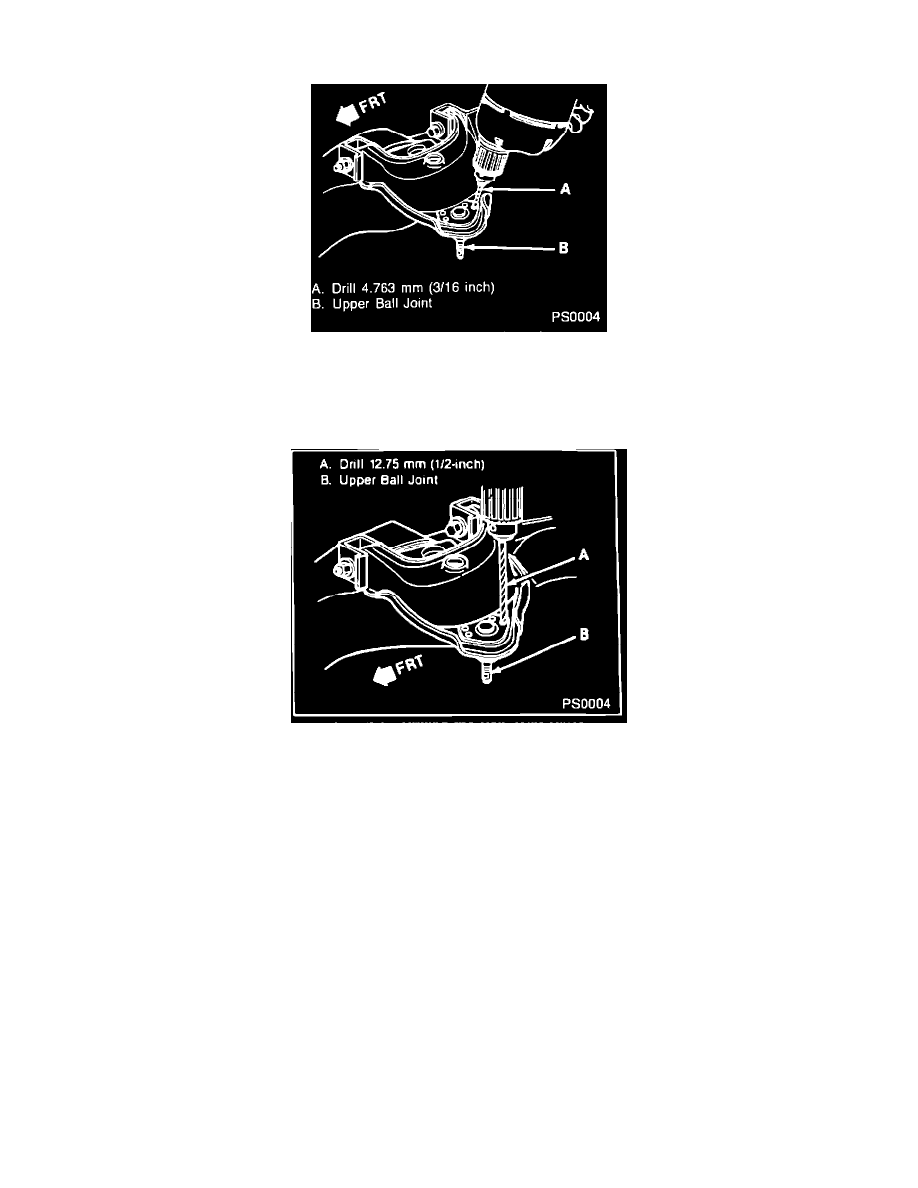
Figure 4 - Drilling the Ball Joint Rivets
-
Use a 4.763 mm (3/16-inch) drill to drill through the center of each rivet (figure 4).
-
Use a 7.938 mm (5/16-inch) drill to enlarge the hole through the center of each rivet.
Figure 5 - Drilling the Ball Joint Rivet Heads
-
Drill rivet heads away using a 12.7 mm (1/2-inch) drill (figure 5).
Important
Use caution to avoid drilling through rivet head and into lower control arm.
-
Use a chisel and hammer to remove any remaining rivet head.
-
Punch out the rivets using a punch (figure 6).
5.
Lower ball joint (127) from the lower control arm (93).
Parts & Warranty Information
PARTS INFORMATION
PART NUMBER
MODEL
YEAR
DESCRIPTION
QUANTITY/
TRUCK
15657212
C 1, 2, 3
1988-89
Lower Control Arm Ball Joint Kit
2
15634942
K 1, 2, 3
1988-90
Lower Control Arm Ball Joint Kit
2
15659518
C/K 1, 2 & C5Z
1988-90
Upper Control Arm Ball Joint Kit
2
15634909
C/K 2 & C6P, 3
1989-90
Upper Control Arm Ball Joint Kit
2