
K 2500 Truck 4WD V8-379 6.2L DSL VIN C FI (1989)
6.
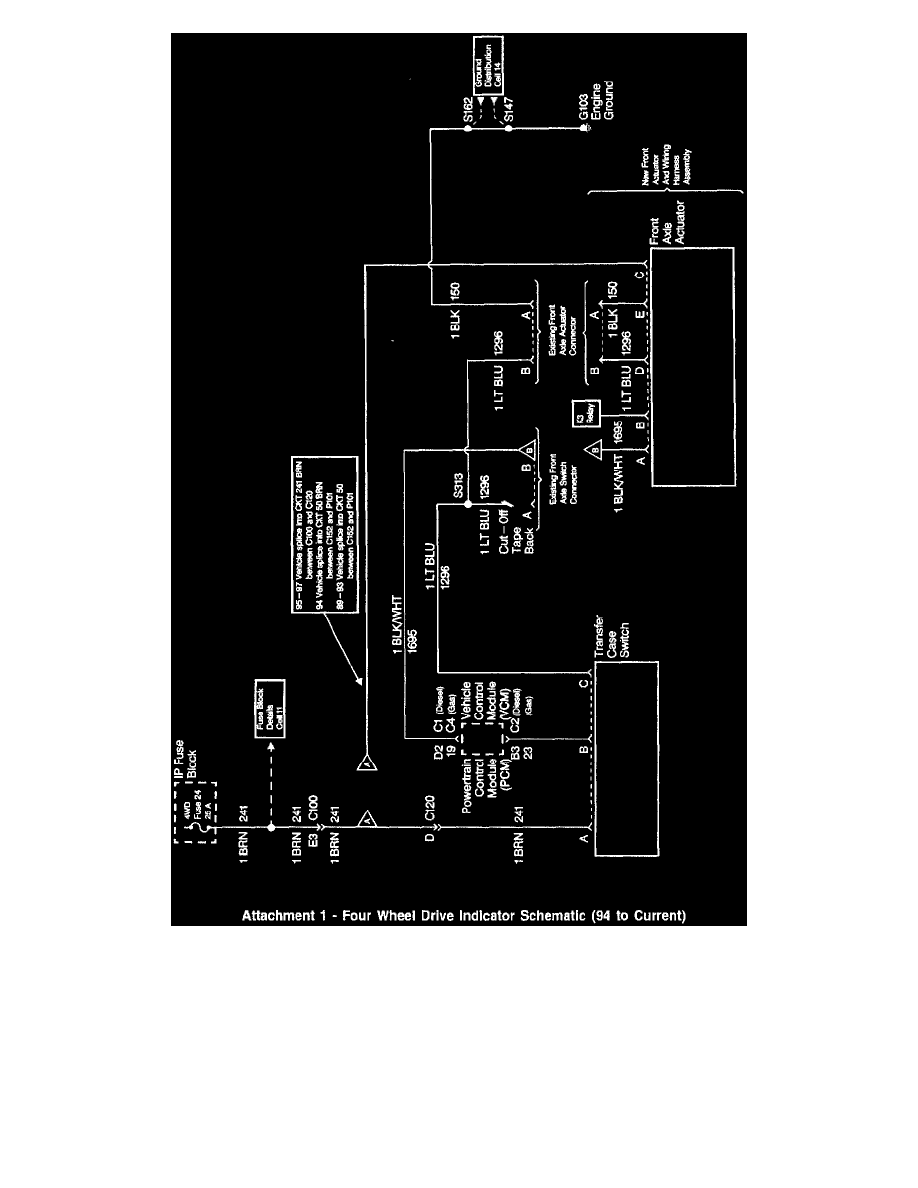
Connect the service harness connector to the actuator and connect the 2-pin connector to the mating connector at the axle. For 1994 to current
models, in the case of a complete axle replacement, refer to Figure 1.
7.
Route the wiring harness along the existing harness on the right side of the vehicle. Route CKT 241 (BRN) over the top and to the left of the
transmission. Secure the harness using plastic ties.
8.
For 1995-97 interim vehicles, locate the 4-wire connector (C120) on the left side of the transmission. Splice the BRN wire of the actuator harness
into cavity D of CKT 241 (BRN) on the engine side of connector C120. Follow the splicing procedure described in Section 8A (Electrical
Diagnosis Repair Procedures) of the applicable Service Manual.
Important:
The new Fast Axle Actuator requires only 1 splice.