
K 2500 Truck 4WD V8-454 7.4L VIN J SFI (1997)
Connecting Rod Bearing: Testing and Inspection
Plastic Gauge Method
1. Install the gauging plastic on the crankpin perpendicular to the connecting rod bearing.
2. Install the connecting rod cap and the connecting rod nuts.
^
Tighten the connecting rod nuts to 61 Nm (45 ft. lbs.).
3. Remove the connecting rod nuts and the connecting rod cap.
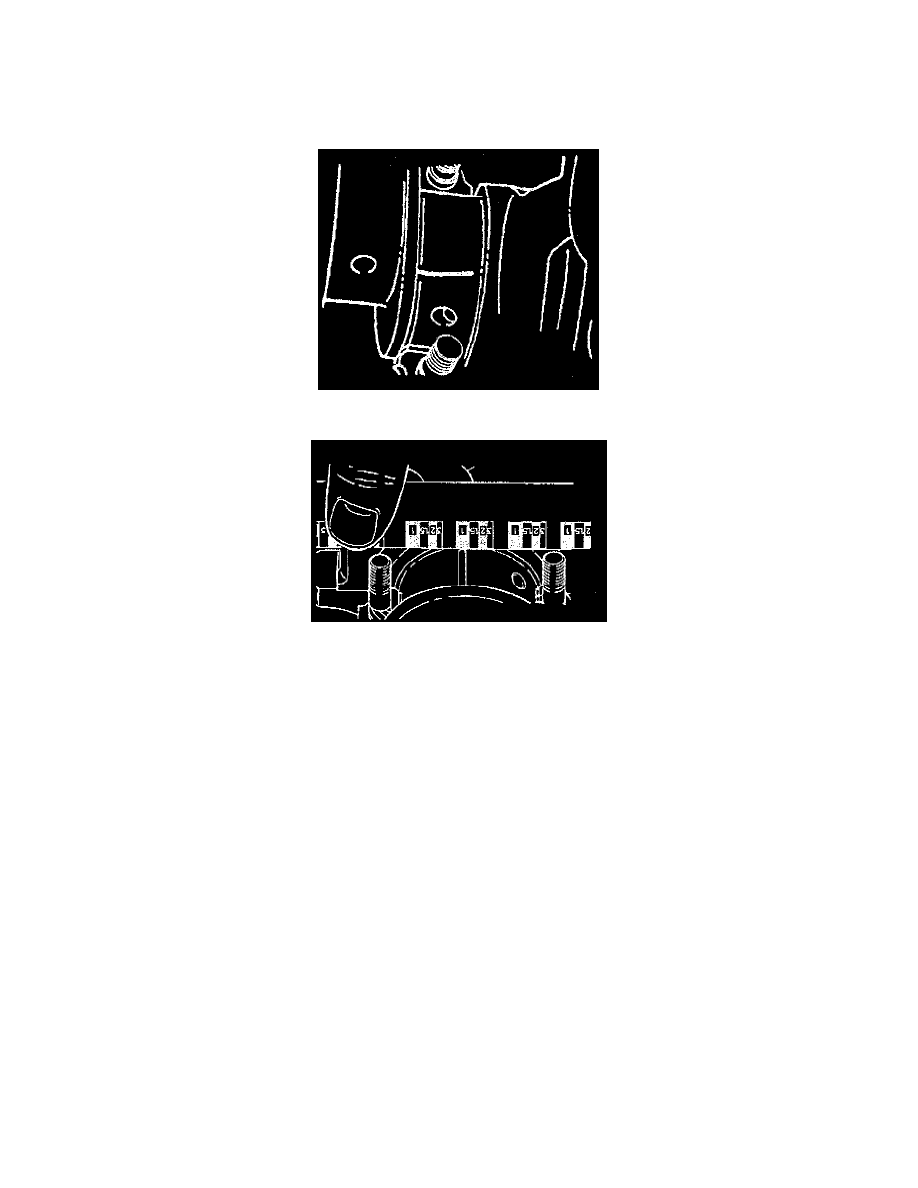
4. Measure gauging plastic.
^
Gauging plastic may adhere to either the connecting rod bearing or crankpin.
^
Without removing the gauging plastic, measure the compressed width at the widest point using a graduated scale provided on the gauging
plastic envelope.
5. If the flattened gauging plastic tapers toward the middle or the ends, there is a difference in clearance indicating taper, low spot or other
irregularity of the bearing or the crankpin.
6. Normally the crankpin bearing journals wear evenly and are not out-of-round. However, if a bearing is being fitted to an out-of-round 0.0254 mm
(0.001 inch maximum) journal, be sure to fit to the maximum diameter of the journal. If the bearing is fitted to the minimum diameter and the
journal is excessively out-of-round, the interference between the bearing and the journal will result in rapid bearing failure.
7. If the bearing clearance is within specifications, the bearing is satisfactory. If the clearance is not within specifications, replace the bearing. Always
replace both the upper and the lower bearings as a unit.
8. A standard or undersize bearing combination may result in the proper clearance. If the proper bearing clearance cannot be achieved using the
standard or the undersize bearings, it will be necessary to replace or repair the crankshaft.
9. Remove the flattened gauging plastic.
10. Install and measure the remaining connecting seals