
K 2500 Truck 4WD V8-454 7.4L VIN J SFI (1997)
Oil Cooler: Service and Repair
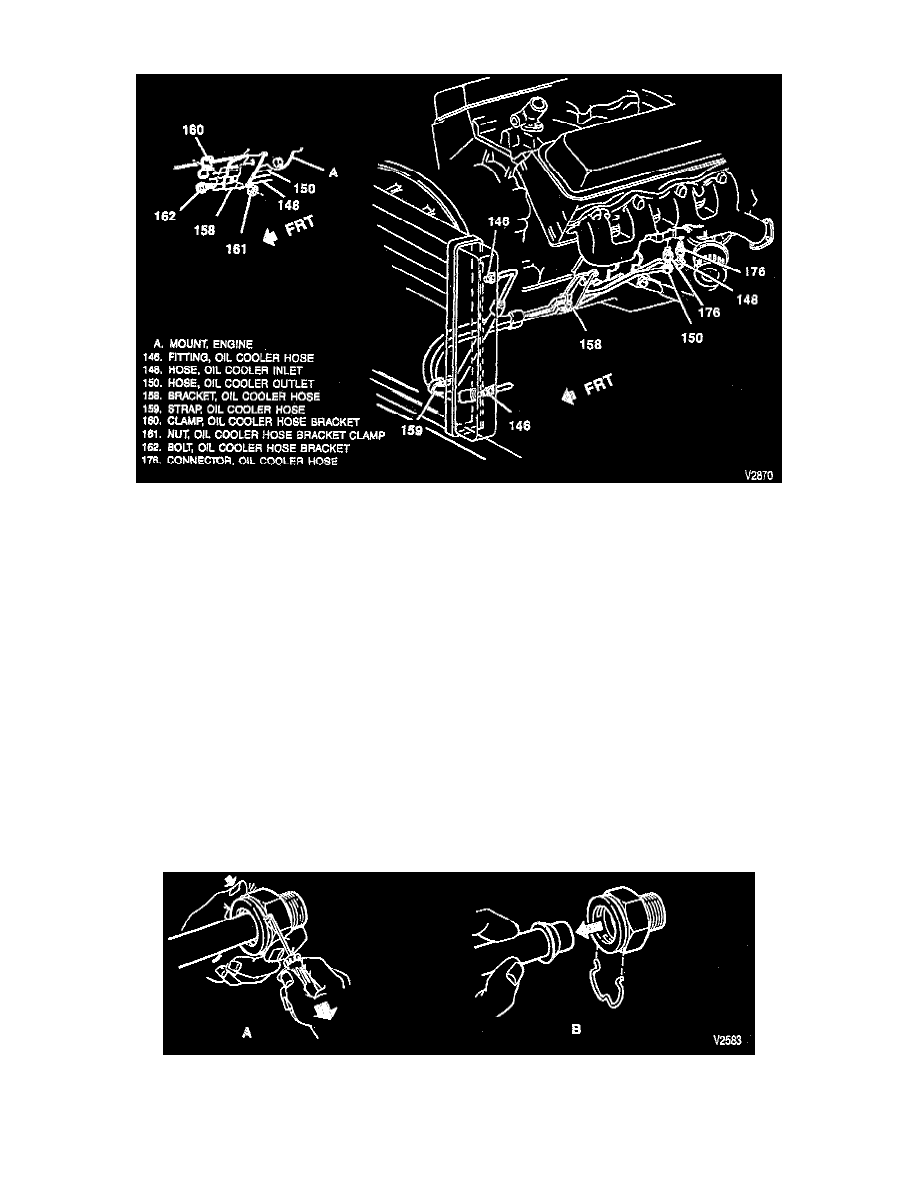
OIL COOLER SYSTEM SERVICE
NOTE: If foreign material has entered the oil cooler or if the engine has been damaged internally, flush the oil cooler, connecting lines, and filter
adapter assembly in the following manner.
Remove or Disconnect
^
Set the parking brake.
1. Remove plastic cap from connector by pulling back along the pipe.
2. Oil cooler lines from the connector
^
Use a small pick-type tool or screwdriver to release one of the open ends of the retaining ring from the connector fitting (A).
3. Rotate the retaining ring out of position on the connector fitting and remove completely. Discard the retaining ring clip (B).
CAUTION: Do not use more than 690 kPa (100 psi) air to clean the cooler and lines. Exceeding 690 kPa (100 psi) could damage the cooler
or lines.
4. Pull outward on the pipe to remove from connector fitting.
A. Using clean solvent and compressed air, back-flush the oil cooler and lines.
B. Using compressed air, remove the cleaning solvent.
C. Flush the system using the same type of oil normally circulated through the cooler.
5. Bolt and clamp from bracket.
6. Bolt from clip.
7. Oil cooler lines from the oil cooler fittings.
8. Oil filter and discard.
^
Clean all components in a suitable solvent and dry with compressed air.
^
Inspect all flutings, connectors, and cooler lines for damage or distortion.