
K 2500 Truck 4WD V8-6.5L DSL Turbo VIN S (1998)
IMPORTANT: Do not hammer the pinion flange onto the pinion stem.
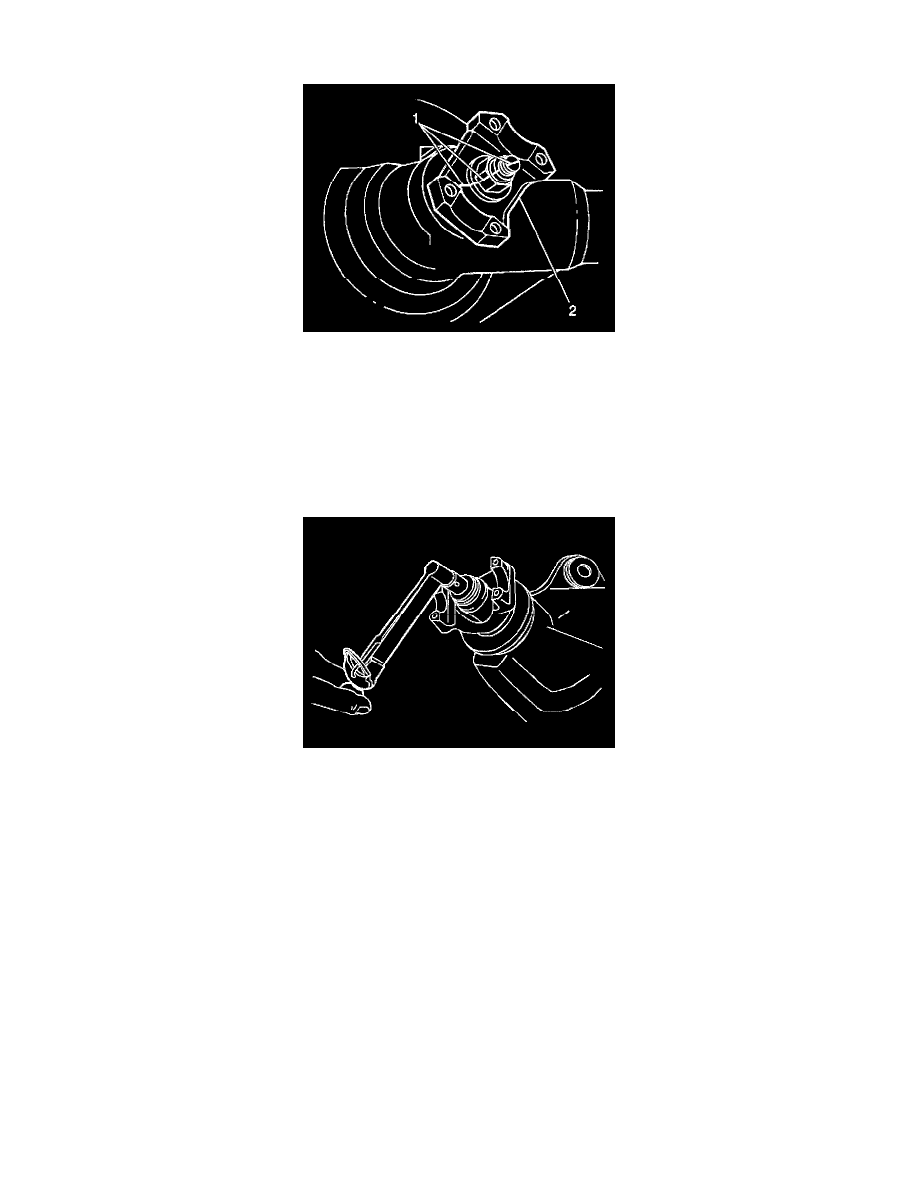
5. Use the alignment marks (1) in the installation of the pinion flange (2).
6. Install a washer and a new nut.
-
Tighten the nut on the pinion stem as close as possible to the alignment marks without going past the mark.
-
Use the record of the alignment marks and the thread count as a reference.
-
Tighten the nut a little at a time and turn the pinion flange several times after each tightening in order to set the rollers.
NOTICE: Refer to Fastener Notice in Caution and Notices.
IMPORTANT: If the preload torque value recorded earlier was less than 3 inch lbs., reset the torque specification to 3 - 5 inch lbs..
7. Measure the torque required to rotate the pinion using the J5853-B.
8. Compare the measurement of the torque with the measurement made during the removal procedure.
9. Continue tightening and measuring a little at a time until the preload is achieved.
10. Install the propeller shaft. Refer to Propeller Shaft Replacement-One-Piece or Propeller Shaft Replacement-Two-Piece.
11. Install the retainers and bolts.
-
Tighten the bolts to 20 Nm (15 ft. lbs.).
12. Install the rear wheels and brake drums.
13. Lubricate the rear axle as necessary.
Pinion Oil Seal Replacement (10 1/2 Inch Ring Gear)
REMOVAL PROCEDURE
-
Tools Required
-
J8614-01 Companion Flange Holder/Remover
-
J24384 Pinion Oil Seal Installer
-
J5853-B Torque Wrench The pinion oil seal and the companion flange may be replaced with the carrier assembly installed in the vehicle.
1. Raise the vehicle on a hoist and support with safety stands.
2. Mark the installed position of the rear propeller shaft.
IMPORTANT: Observe and mark the positions of all driveline components relative to the propeller shaft and axles prior to disassembly. These