
K 2500 Truck 4WD V8-8.1L VIN G (2001)
3. Install the master cylinder.
Notice: Refer to Fastener Notice in Service Precautions.
4. Install the master cylinder mounting nuts.
^
Tighten the nuts to 36 Nm (27 ft. lbs.).
5. Remove the pipe caps.
6. Connect the brake pipes.
^
Tighten the fittings to 25 Nm (18 ft. lbs.).
7. Connect the electrical connection at the brake fluid level sensor.
8. Bleed the brakes.
9. Release the parking brake.
Master Cylinder Overhaul
Master Cylinder Overhaul
Disassembly Procedure
1. Remove the brake master cylinder from the vehicle.
2. Secure the mounting flange of the brake master cylinder in a bench vise so that the rear of the primary piston is accessible.
3. Clean the outside of the master cylinder reservoir on and around the reservoir cap prior to removing the cap and diaphragm.
4. Remove the reservoir cap and diaphragm from the reservoir.
5. Inspect the reservoir cap and diaphragm for the following conditions. If any of these conditions are present, replace the affected component(s).
^
Cuts or cracks
^
Nicks or deformation
6. Remove the master cylinder reservoir from the master cylinder.
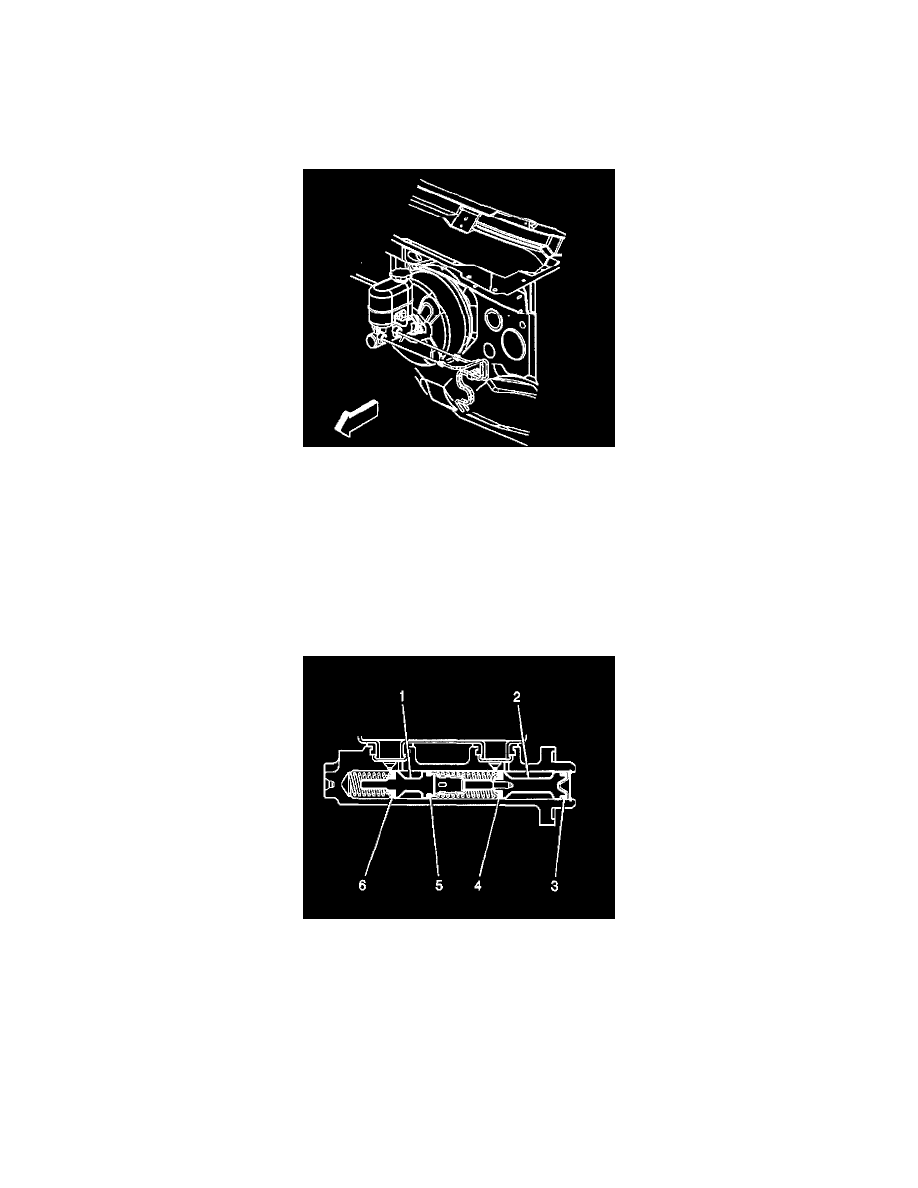
7. Using a smooth, round-ended tool, depress the primary piston (2) and remove the piston retainer.
8. Remove the primary piston assembly from the cylinder bore.
9. Plug the cylinder inlet ports and the rear outlet port. Apply low pressure, non-lubricated, filtered air into the front outlet port, in order the remove
the secondary piston (1) with the primary (6) and secondary (5) seals, and the return spring.