
K 2500 Yukon 4WD V8-6.0L VIN U (2000)
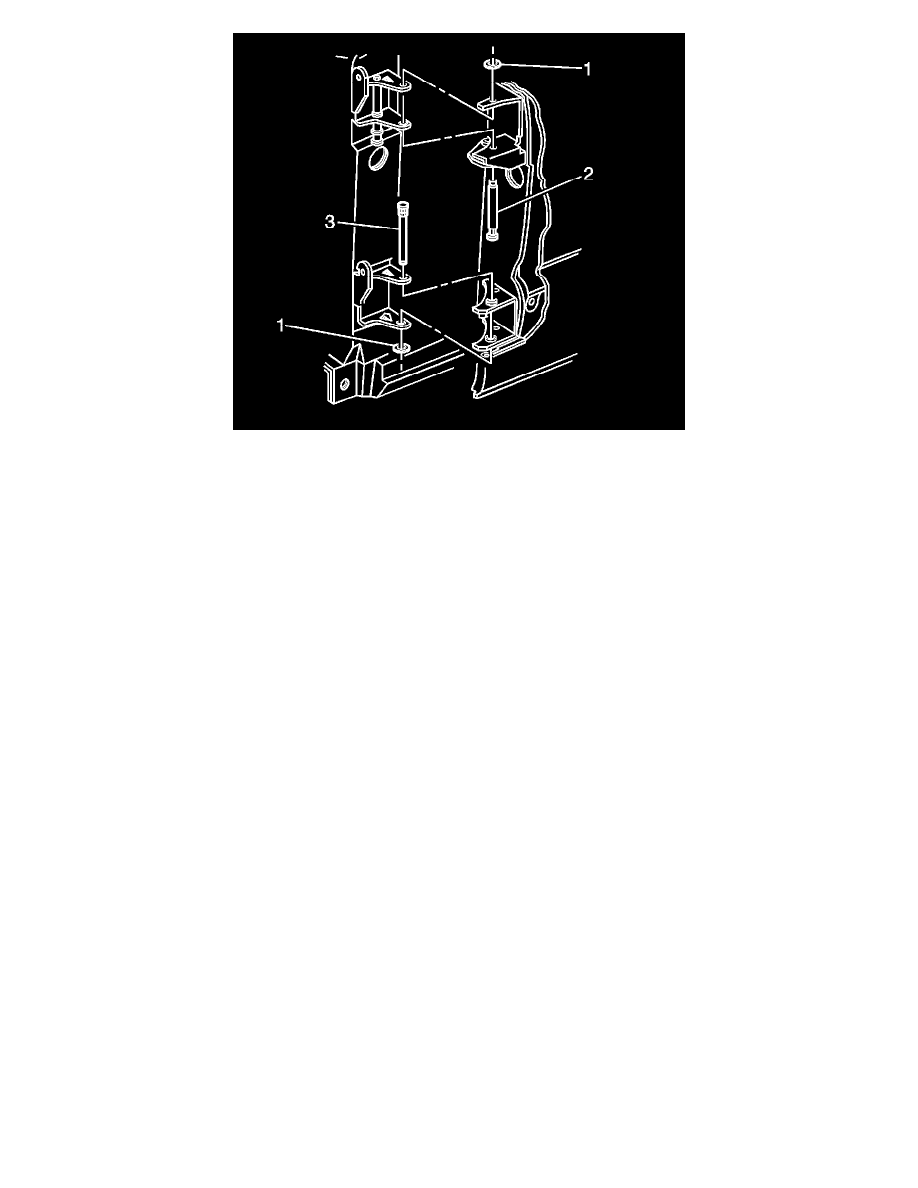
1. Install the hinge pin bushings (1) into the door side hinges.
2. Install the shorter hinge pin (3) into the bottom hole in the body side hinge.
3. Install the washer supplied in the kit and a standard 5/16 inch x 18 nut onto the replacement hinge pin.
4. Tap the shorter hinge pin (3) into the hinge as far as it will go.
5. Tighten the 5/16 inch x 18 nut with a hand wrench, drawing the hinge pin into the hinge until the pin is fully seated.
6. Replace the standard 5/16 inch x 18 nut with the lock nut supplied in the kit and finger tighten.
Notice: Refer to Fastener Notice.
7. Tighten the lock nuts.
Tighten the nuts to 19 N.m (14 lb ft).
8. Install the longer hinge pin (2) into the top hole in the body side hinge.
9. Install the washer supplied in the kit and a standard 5/16 inch x 18 nut onto the replacement hinge pin.
10. Tap the longer hinge pin (2) into the hinge as far as it will go.
11. Tighten the 5/16 inch x 18 nut with a hand wrench, drawing the hinge pin into the hinge until the pin is fully seated.
12. Replace the standard 5/16 inch x 18 nut with the lock nut supplied in the kit and finger tighten.
13. Tighten the lock nuts.
Tighten the nuts to 19 N.m (14 lb ft).
14. Install the door.
15. Lubricate the hinge pins with Goodwrench(R) Super Lube or equivalent.
Rear Side Door Hinge Replacement (Doorside)
Rear Side Door Hinge Replacement (Doorside)
Removal Procedure