
K 2500 Yukon 4WD V8-6.0L VIN U (2000)
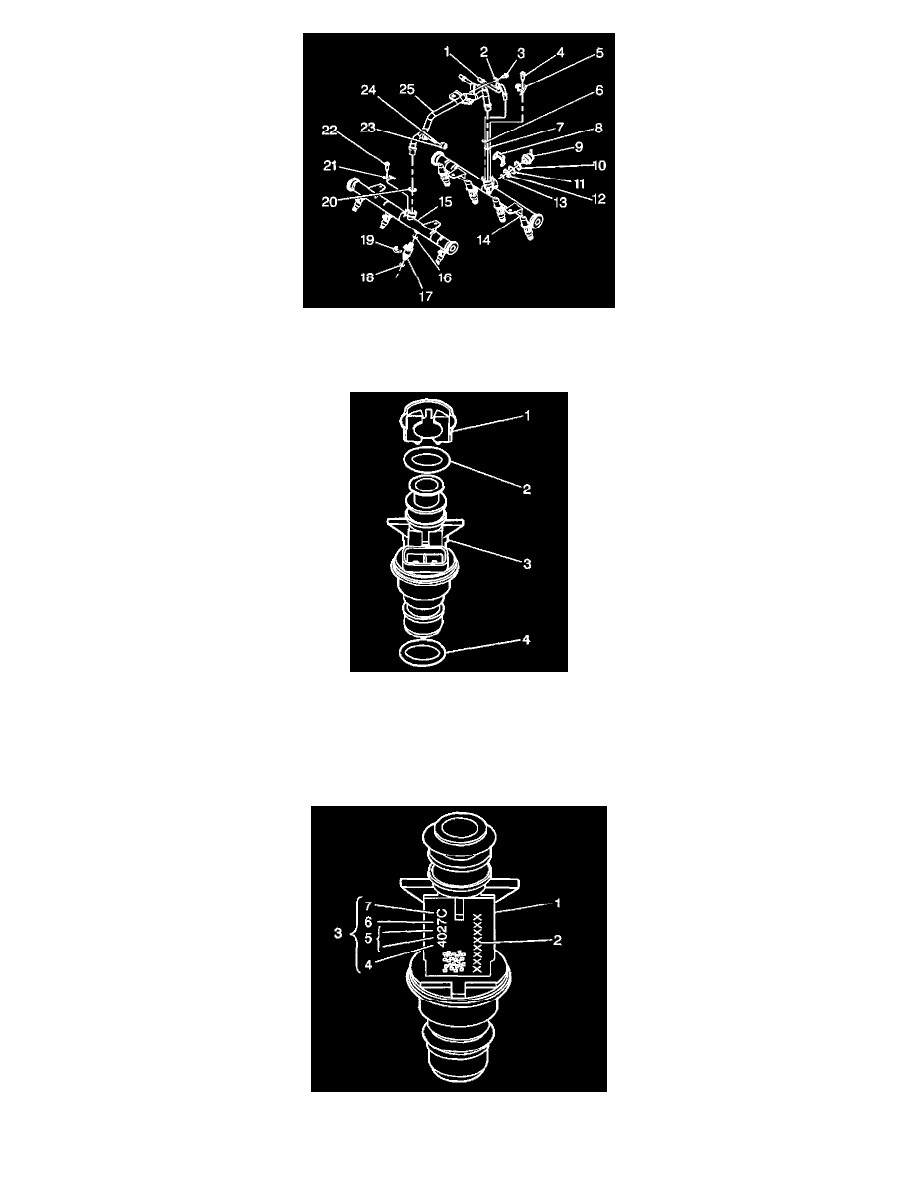
5. Remove the injector retainer clip (19).
6. Insert the fork of J 43013 fuel injector assemble removal tool behind the injector connector between the fuel rail pod and the 3 protruding retaining
clip ledges. Use a prying motion while inserting the tool in order to force the injector out of the fuel rail pod.
7. Discard the injector retainer clip (1).
8. Remove the injector O-ring seals (2), (4) from both ends of the injector. Discard the O-ring seals.
INSTALLATION PROCEDURE
IMPORTANT: When ordering new fuel injectors, be sure to order the correct injector for the application being serviced.
The fuel injector assembly (1) is stamped with a part number identification (2). A four digit build date code (3) indicates the month (4), day (5), year
(6), and the shift (7) that built the injector.