
K 3500 Truck 4WD V8-6.6L DSL Turbo VIN 1 (2001)
3.
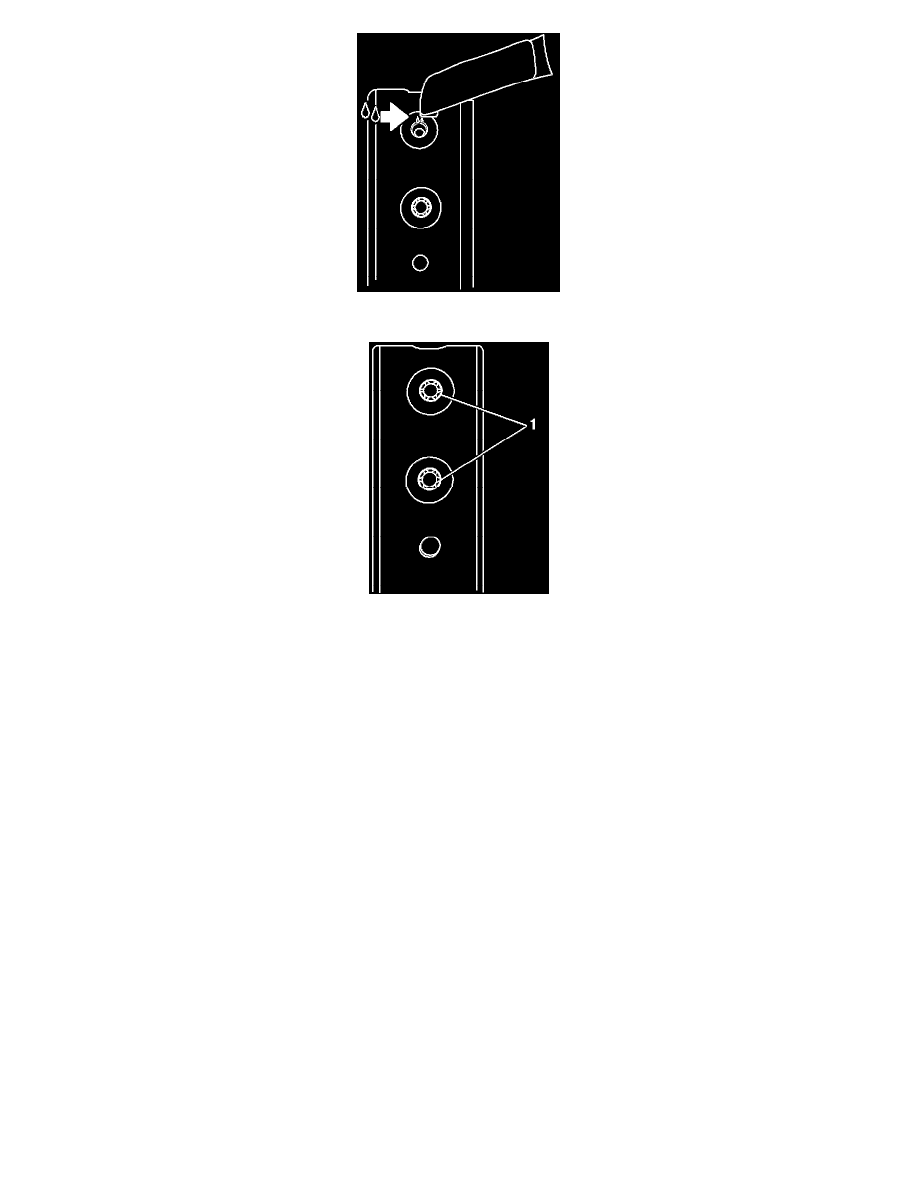
Take one of the adhesive sachets and carefully cut the flag tip off the notched end spout in line with the notch.
4.
While holding the sachet vertical, slowly dribble the adhesive into the edge of the bolt hole as shown, ensuring that the adhesive flows into the
joint between the seat rail and the zinc block. DO NOT pour the adhesive down the center of the hole. The object is to let the adhesive "wick"
between the zinc block and the seat rail in order to bond the two pieces together.
Important:
If the bolt thread strips or the proper torque cannot be achieved, then the entire seat adjuster mechanism must be replaced.
5.
Replace the previous bolt with a new M8 bolt (1) (included) and install using a "click torque wrench" preset to 9 N.m (79 lb in).
6.
Remove the second M8 mounting bolt from the rail and discard.
7.
Repeat steps 2 through 5 for the second bolt.
8.
Repeat steps 2 through 6 for the opposite mounting rail.
9.
Before installing the seat into the vehicle, verify that the seat will function correctly and does not make any unusual noises during forward and
rearward travel motion.
10.
Install the seat. Refer to the applicable Seats sub-section of SI.
11.
While sitting in the seat, verify seat function and listen for any unusual noises.