
K 3500 Truck 4WD V8-6.6L DSL Turbo VIN 1 (2001)
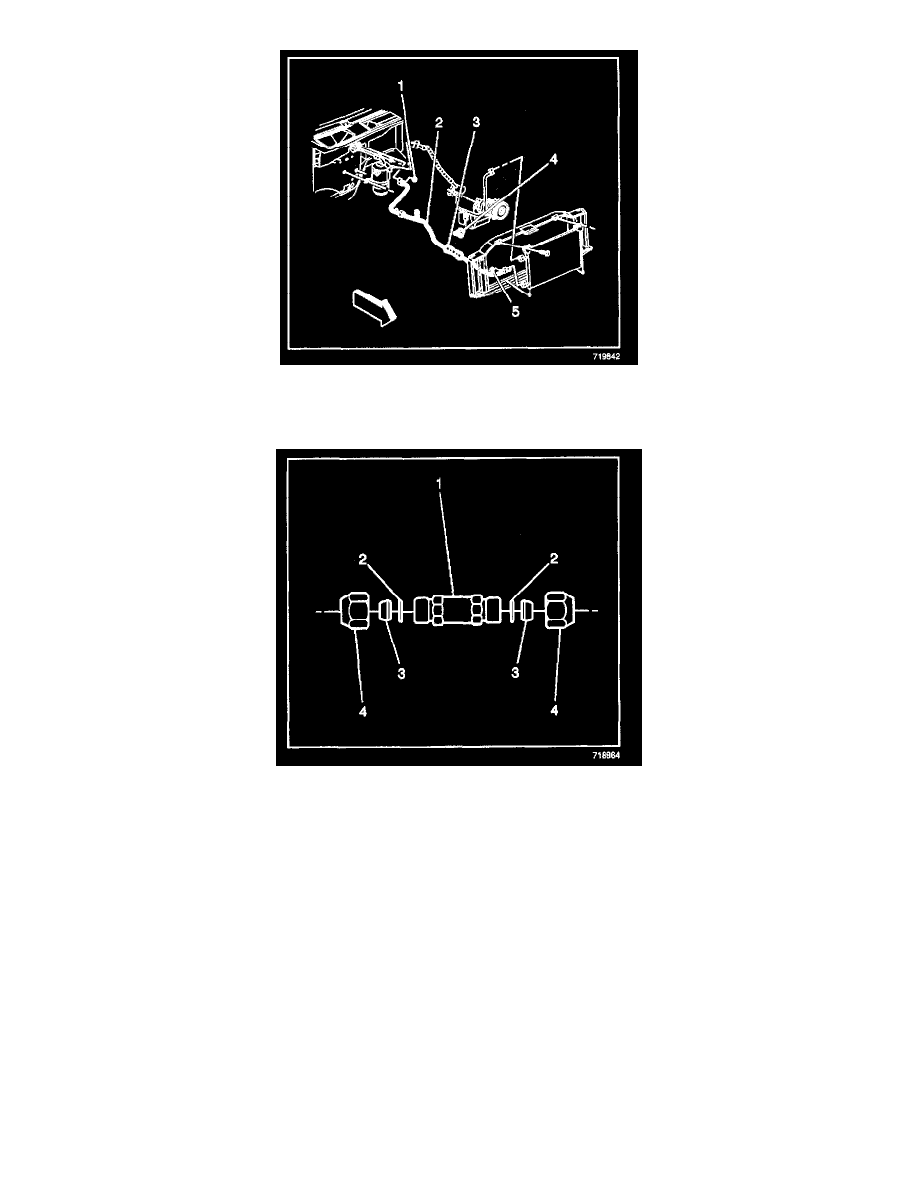
9. Install the A/C refrigerant filter (3) to the evaporator tube (2) with the flow arrow pointing towards the evaporator.
NOTE: Refer to Fastener Notice in Service Precautions.
10. While holding the evaporator tube in the A/C refrigerant filter (1), tighten the nuts (4) to the A/C refrigerant filter (1).
Tighten
Tighten the nuts to 15 N.m (11 lb ft).
11. Remove the nuts (4) from the A/C refrigerant filter (1).
12. Coat the O-rings (2) with 525 viscosity refrigerant oil.
13. Install the O-rings (2) to the evaporator tube halves.
14. Install the nuts (4) to the A/C refrigerant filter (1).
Tighten
Tighten the nuts to 15 N.m (11 lb ft).
15. Evacuate and recharge the system. Refer to Refrigerant Recovery and Recharging.
16. Leak test the fittings of the component using the J 39400-A.
17. Install the air cleaner. Refer to Air Cleaner Assembly Replacement in Computers and Controls Systems.
"For a description of the RPO Code(s) shown in this article or any of the images therein, refer to the RPO Code List found at Vehicle/Application ID".
See: Application and ID/RPO Codes