
K 3500 Truck 4WD V8-6.6L DSL Turbo VIN 1 (2001)
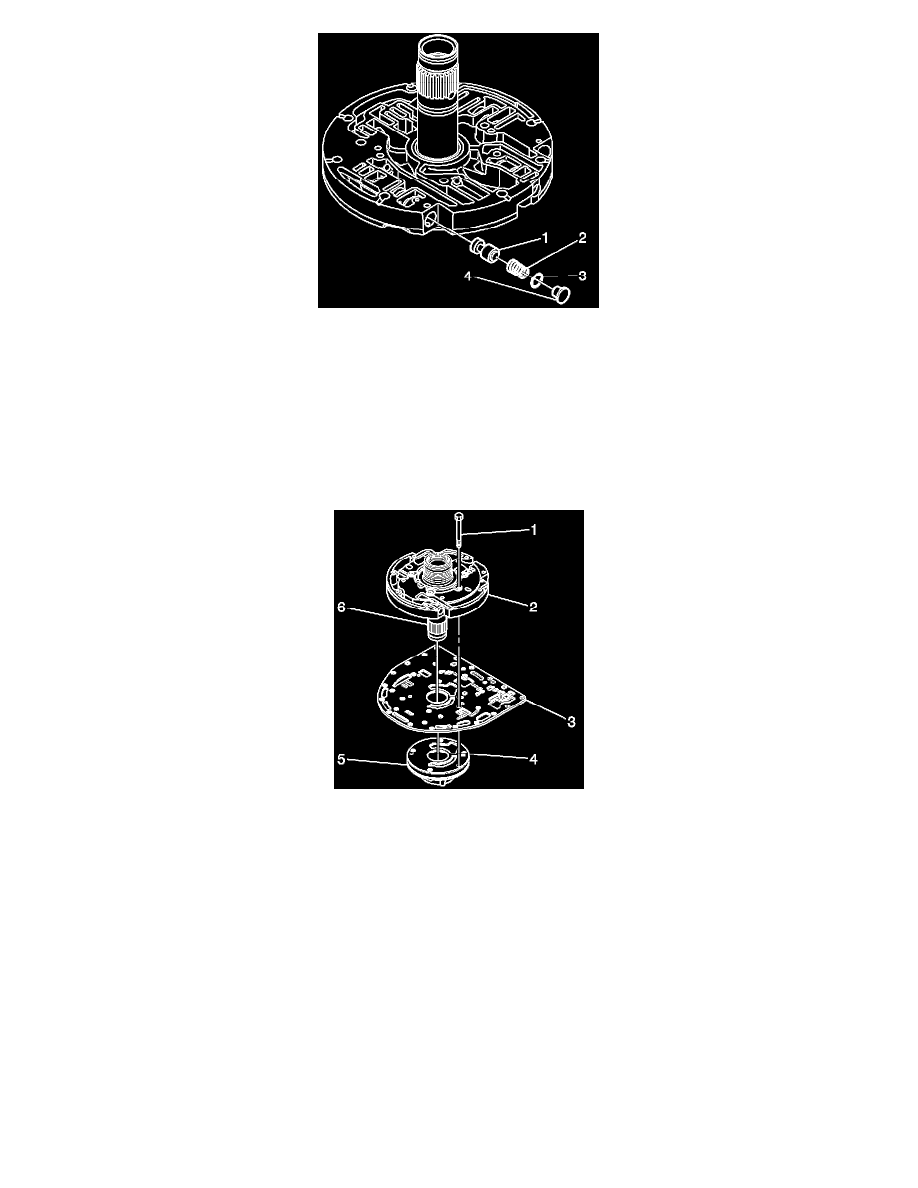
64.
Install the lube regulator valve (1) as shown above.
65.
Install the lube regulator spring (2) (blue in color, free length 31.43 mm (1.237 in)).
Important:
If the lube regulator stop 0-ring seal is cut or omitted, the transmission will not prime.
66.
Install a new 0-ring seal (3) on the lube regulator spring stop (4). Dip the lube regulator spring stop in transmission fluid. Install the stop into the
bore. Compress the lube regulator spring/stop and install the retaining pin. Ensure that the pin is below the surface of the support and the stop is
positioned against the stop pin.
67.
With the pump assembly (5) largest diameter facing upward, install the separator plate (3) to the pump with the dowel pins of the pump body
ensuring proper alignment of the separator plate.
68.
Position the support assembly (2) to the pump, aligning the dowel pins. Insert the retaining bolts (1) finger tight.
69.
Using the star pattern, tighten the five bolts.
Tighten
Tighten the five bolts to 24-29 N.m (18-21 lb ft).