
K 3500 Truck 4WD V8-6.6L DSL Turbo VIN 1 (2001)
locations. Pry only at these designated areas. The housing will need to clear the case dowel pin (4) and the parking pawl support pin (5).
23.
Remove the rear extension housing from the transmission.
24.
Remove the rear cover gasket (2) and discard.
25.
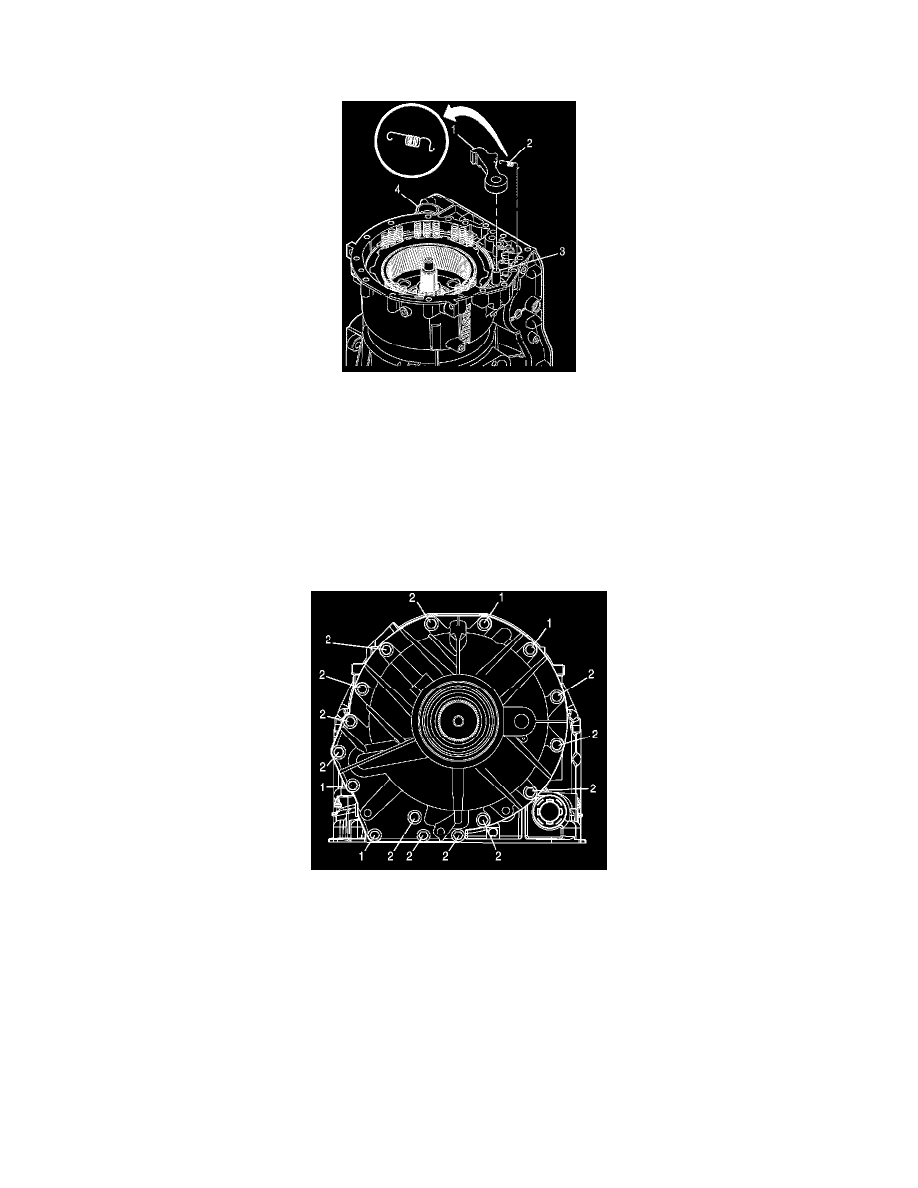
Replace the park pawl spring (2).
26.
Install a new gasket to the case.
27.
Inspect for proper positioning of the (18) clutch springs.
28.
Inspect and clean, if required, the new extension housing assembly.
29.
Install the new extension housing into position.
30.
Install the four bolts in position (1). Slowly draw down the extension housing until it is seated against the case by alternately hand tightening the
bolts.
31.
Install the twelve bolts in position (2).
Tighten
Tighten all 16 of the rear extension housing bolts to 56 N.m (42 lb ft).
Note:
The next step is determining the critical end play measurement within the transmission. Failure to follow the procedure may cause internal
failure of the transmission.
32.
With the aid of depth indicators, you must make a calculation to determine which selective shim to install before installing the new ball bearing
assembly.