
K 3500 Truck 4WD V8-6.6L DSL Turbo VIN 1 (2001)
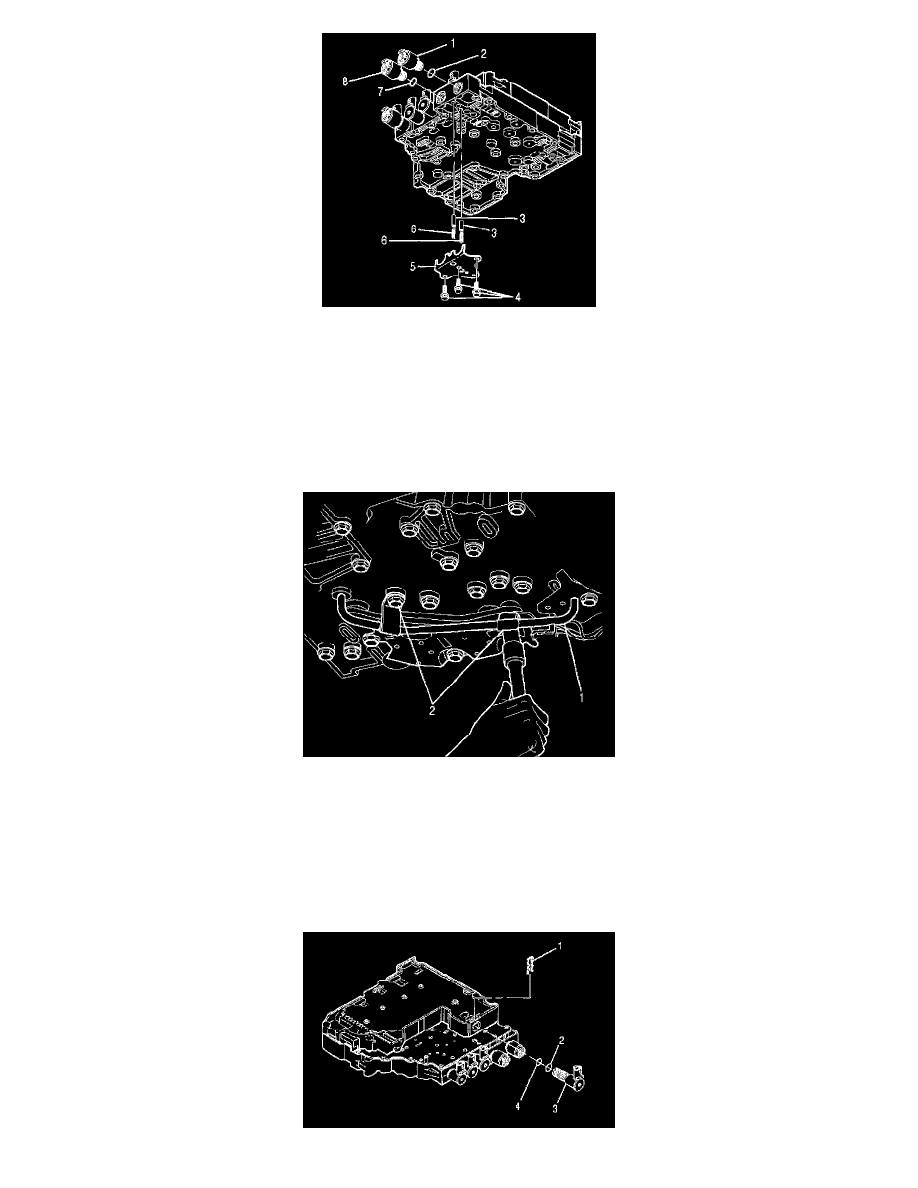
1. Obtain the new solenoid (1) or (8). Lubricate new O-ring (2) or (7) with clean transmission fluid. Install the O-ring and push the new solenoid into
the control valve body bore with the wiring harness connector in the correct position.
2. Reinstall the two accumulators (3) and springs (6) before installing the A/B solenoid bracket (5). The valve (3) goes in the bore first with the
hollow end facing outward, followed by the spring (6) which goes inside the hollow portion of the valve.
Notice: Refer to Fastener Notice in Service Precautions.
3. Reinstall the solenoid-retaining bracket (5). Install three bolts (4).
^
Tighten the bolts to 12 Nm (108 inch lbs.).
4. Install the reverse signal tube. Install the two bolts (2) that fasten reverse signal tube (1) to the control valve assembly.
^
Tighten the bolts to 12 Nm (108 inch lbs.).
5. Reconnect the internal wiring harness to the solenoid.
6. Install the oil pan and suction filter.
Control Valve Solenoid Replacement (Solenoid C, D, E, F)
Control Valve Solenoid Replacement (Solenoid C, D, E, F)
Removal Procedure