
K Yukon/Denali 4WD V8-5.7L VIN R (2000)
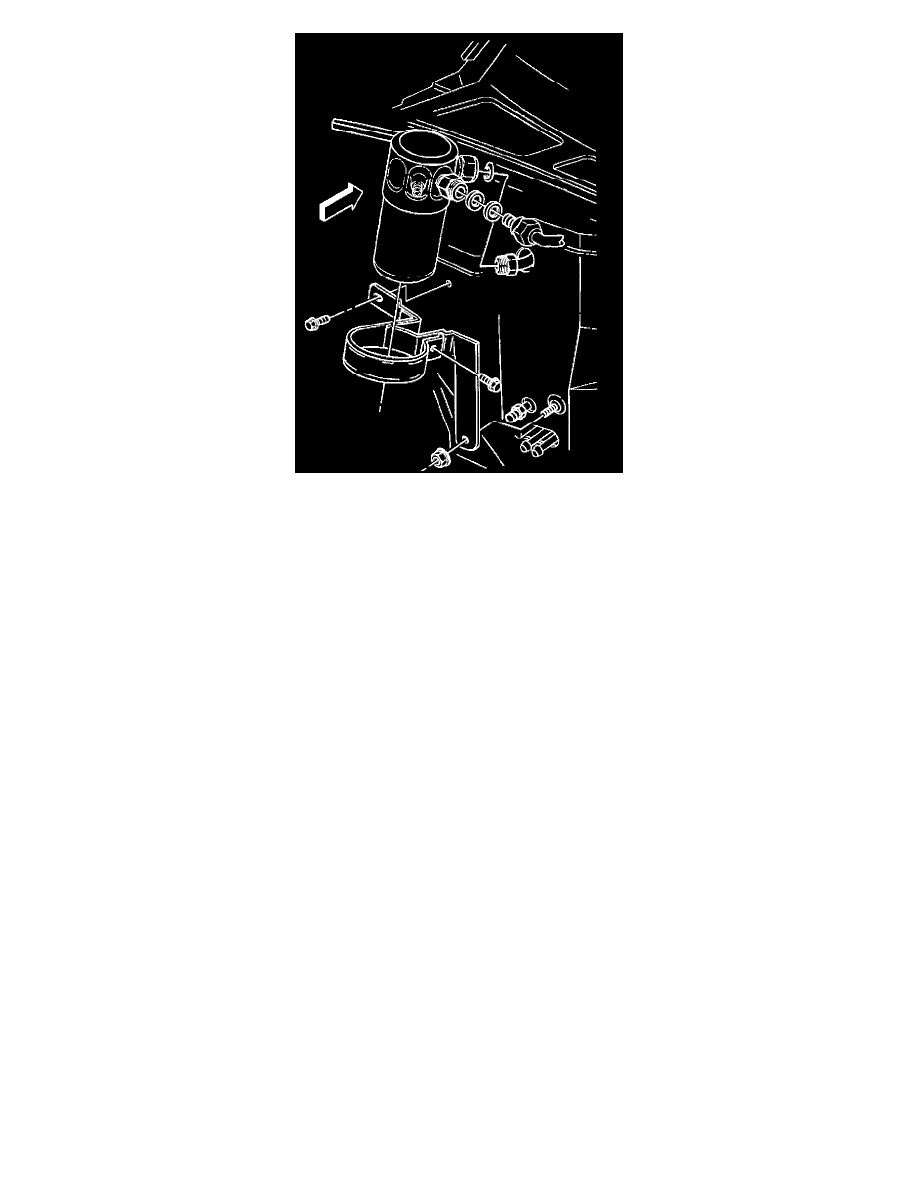
1. Install the upper and lower accumulator insulators.
2. Install the accumulator.
If the accumulator is being replaced, add oil.
Refer to Refrigerant Recovery and Recharging.
NOTE: Refer to Fastener Notice in Service Precautions.
3. Install the accumulator bracket screw.
Tighten
Tighten the screw to 6 N.m (53 lb in).
4. Coat the new O-ring seals with 525 viscosity refrigerant oil.
5. Install the new O-ring seals.
6. Connect the accumulator to the evaporator.
Tighten
Tighten the accumulator to 41 N.m (30 lb ft).
7. Connect the hose assembly to the accumulator.
Refer to the appropriate procedure from the following list:
-
Compressor Hose Assembly Replacement (Gasoline Engines)
-
Compressor Hose Assembly Replacement (Diesel Engines)
8. Connect the pressure cycling switch.
9. Connect the electrical connectors, as necessary.
10. Connect the negative battery cable.
11. Charge the system. Refer to Refrigerant Recovery and Recharging.
12. Inspect the system for leaks. Refer to Leak Testing.