
K Yukon/Denali 4WD V8-5.7L VIN R (2000)
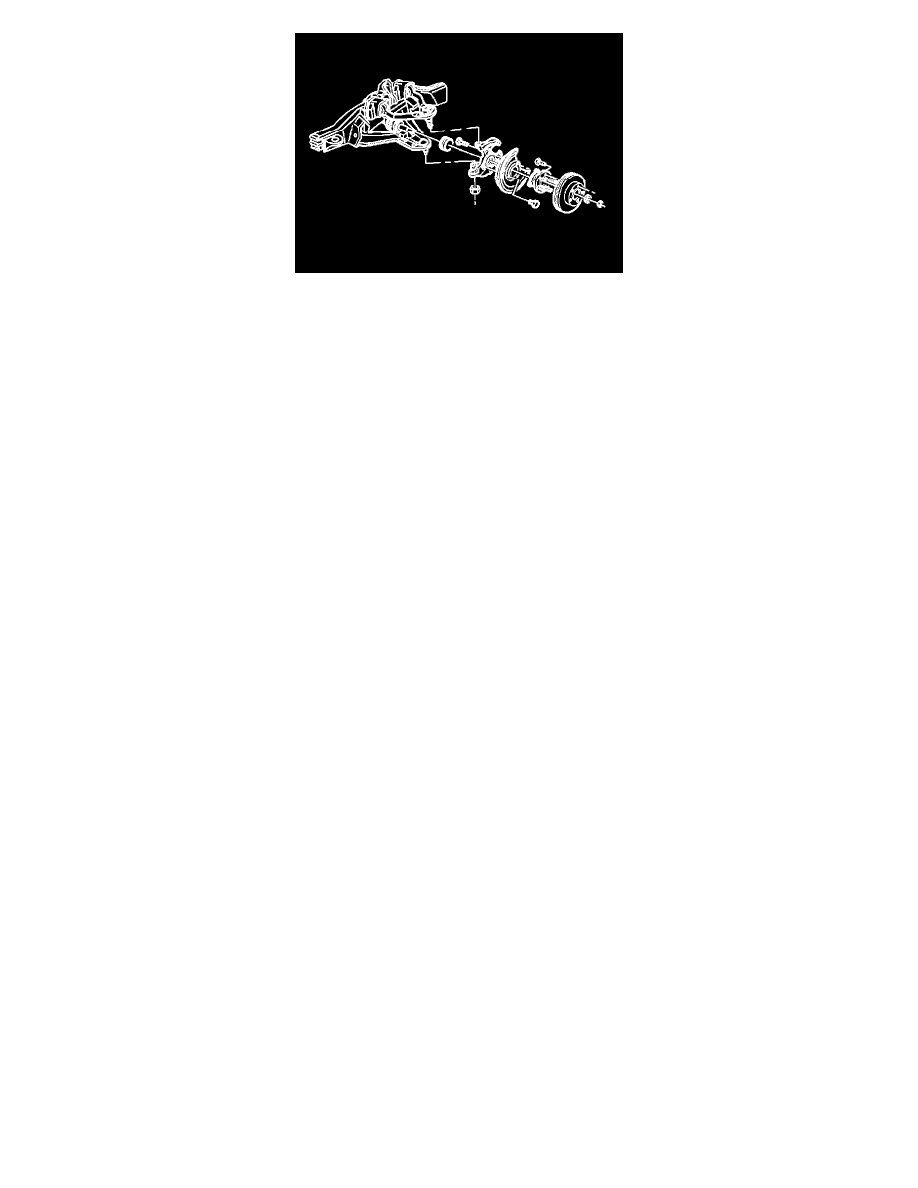
1. Using the J 36605, install the seal into the knuckle.
2. Connect the knuckle to the upper and the lower ball joint.
Notice: Refer to Fastener Notice in Service Precautions.
3. Install the ball joint stud nuts.
3.1.
Tighten the lower stud nut to 128 Nm (94 ft. lbs.).
3.2.
Tighten the upper stud nut to 100 Nm (74 ft. lbs.).
3.3.
Tighten the nuts in order to align the cotter pin. Do not tighten more than 1/6 turn.
4. Install new cotter pins. Bend the pin ends against the nut.
5. Install the splash shield. Properly align the splash shield.
6. Install the splash shield bolts.
^
Tighten the bolts to 26 Nm (19 ft. lbs.).
7. Prelube the steering knuckle seal.
8. Install the halfshaft. Refer to Wheel Drive Shafts Replacement.
9. Install the hub and bearing assembly. Align the threaded holes.
10. Install the bolts.
^
Tighten the bolts to 180 Nm (133 ft. lbs.).
11. Connect the tie rod end to the knuckle. Refer to Tie Rod Replacement (All Except C3500HD) in Steering.
12. Install the tie rod nut.
^
Tighten the nut to 48 Nm (35 ft. lbs.).
13. Install the washer.
14. Install the drive axle nut.
^
Tighten the nut to 225 Nm (165 ft. lbs.).
15. Install the brake rotor. Refer to Brake Rotor Replacement (K Models Below 8600 GVW) or Brake Rotor Replacement (K Models Above 8600
GVW) in Brakes and Traction Control.
16. Install the brake caliper. Refer to Brake Caliper Replacement (Front Delco) in Brakes and Traction Control.
17. Install the tire and wheel assembly. Refer to Tire and Wheel Removal and Installation (Single Front or Rear Wheels) in Wheels, Tires and
Alignment.
18. Remove the jack stand.
19. Lower the vehicle.
20. Check the vehicle trim height. Adjust if necessary. Refer to Trim Height Inspection Procedure in Suspension.