
K Yukon/Denali 4WD V8-5.7L VIN R (2000)
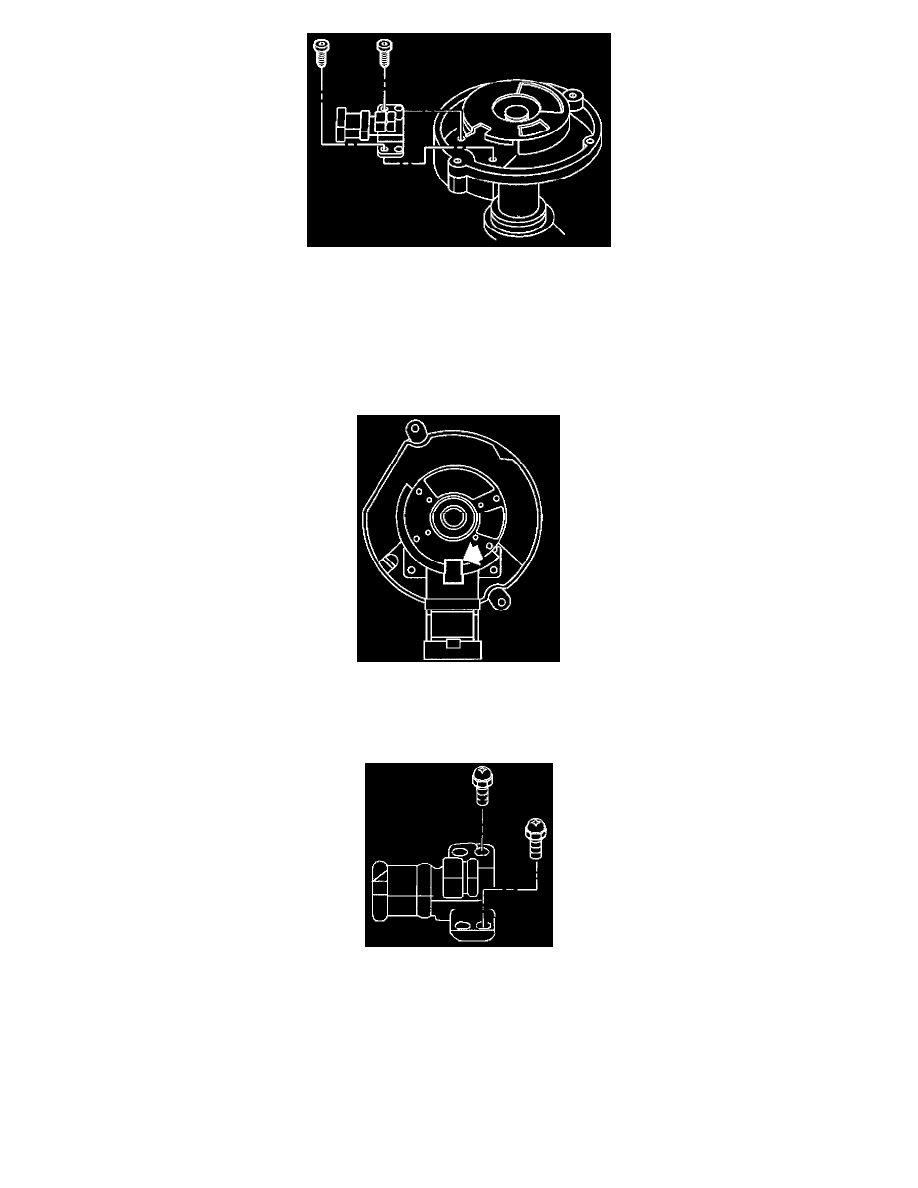
9. Remove the CMP sensor fasteners.
10. Remove the CMP sensor.
INSTALLATION PROCEDURE
IMPORTANT: Do not use the old cap screws, CMP sensor screws, or rotor screws. Use replacement screws that have been coated with a thread
locking compound. Precoated replacement distributor cap and CMP sensor screws can be acquired using P/N 10475922 (pkg of 10 screws). Precoated
replacement rotor screws can be acquired using P/N 10475924 (pkg of 10 screws).
1. Align the square slot in the reluctor wheel with the CMP sensor.
2. Insert the CMP sensor through the reluctor wheel slot.
NOTE: Refer to Fastener Notice in Service Precautions.
3. Install new CMP sensor mounting screws.
Tighten
Tighten the screws to 1.6-2.8 N.m (14-25 lb in.).
IMPORTANT: The locating tabs on the rotor are necessary for correct alignment of the rotor. If the tabs are missing or damaged, replace the rotor.