
K Yukon/Denali 4WD V8-5.7L VIN R (2000)
24. Install the top half of J36652 onto the lower half of the tool, over the CV joint boot (3) and the CV joint assembly (1).
25. Align the swage ring (2) and the swage ring clamp.
26. Insert the bolts into J36652. Hand tighten the bolts until the bolts are snug.
Tighten each bolt 180 degrees at a time. Alternate between the bolts until both sides of the top half of J36652 touch the bottom half of the tool.
27. Loosen the bolts and remove the halfshaft assembly from J36652.
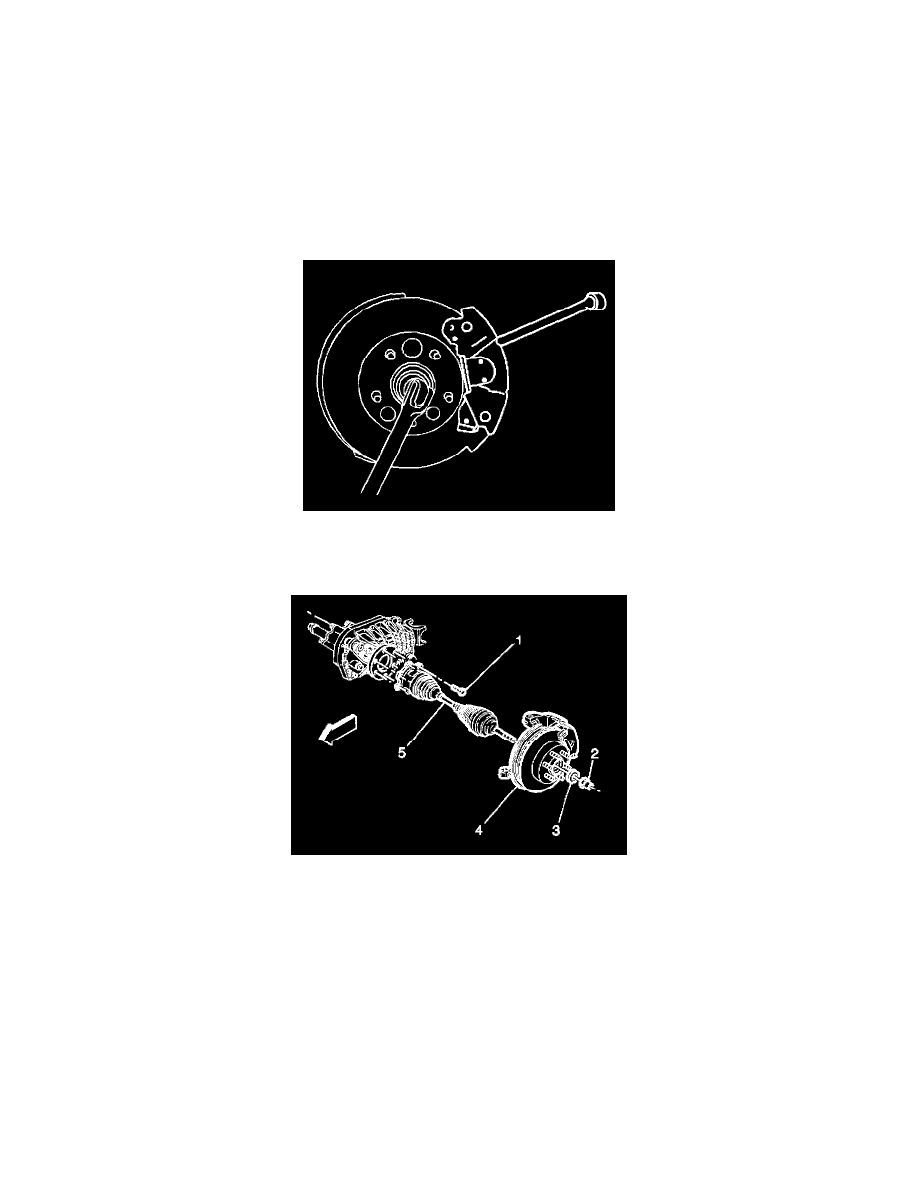
Wheel Drive Shaft Replacement
FRONT DRIVE AXLE REPLACEMENT
Removal Procedure
1. Raise and support the vehicle. Refer to Vehicle Lifting.
2. Remove the wheel and tire assembly.
3. Insert a drift or large screwdriver through the brake caliper into one of the brake rotor vanes in order to prevent the wheel drive shaft from turning.
4. Remove the wheel drive shaft nut (2) and washer (3).
Notice: Wheel drive shaft boots, seals and clamps should be protected from sharp objects any time service is performed on or near the wheel
drive shaft(s). Damage to the boot(s), the seal(s) or the clamp(s) may cause lubricant to leak from the joint and lead to increased noise and possible
failure of the wheel drive shaft.
5. Loosen, but do not remove, the 6 bolts (1) securing the inboard C/V joint drive flange to the output shaft companion flange.
6. Remove the drift.