
K Yukon/Denali 4WD V8-5.7L VIN R (2000)
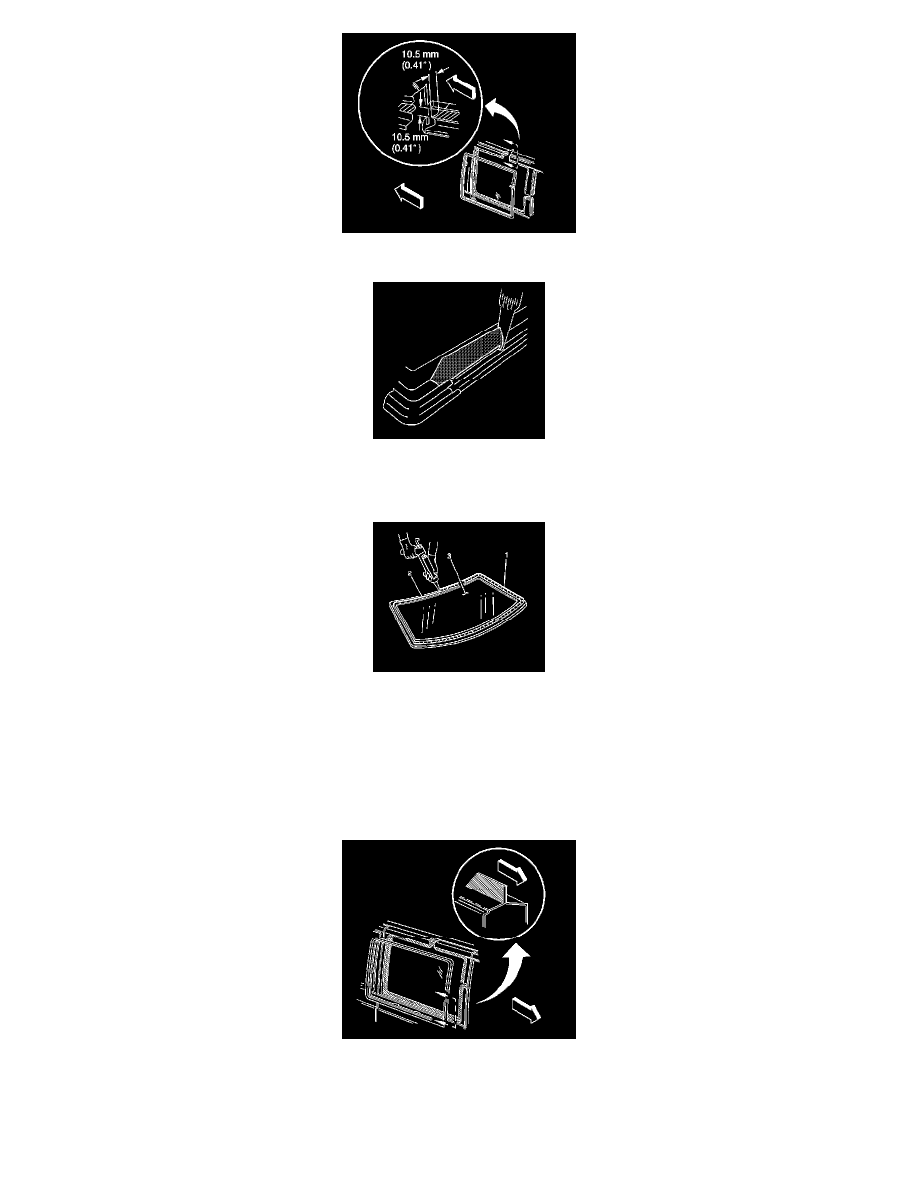
22. If using the extended method, cut the applicator nozzle in order to provide a bead 10.5 mm (0.14 in.) wide and 10.5 mm (0.14 in.) high.
23. Use a cartridge type caulking gun to apply a smooth, continuous bead of urethane adhesive around the edge of the stationary window where the
primer was applied.
24. When using the short method, apply the urethane adhesive to the existing bead of urethane adhesive on the body.
25. When using the extended method, use the edge of the stationary window or the inside edge of the reveal molding as a guide for the nozzle in order
to apply the (2) urethane adhesive to the inner surface of the (3) stationary window.
Caution: Refer to Glass and Sheet Metal Handling Caution in Service Precautions.
Caution: Refer to Repair Material Curing Caution in Service Precautions
26. Use suction cups and, with the aid of an assistant, install the stationary window into the opening.
27. Align the tape on the stationary window and the body.
28. Press the stationary window firmly into place.
29. Tape the stationary window to the body in order to minimize movement.
1. Clean any excess urethane adhesive from the body.