
K Yukon/Denali 4WD V8-6.5L DSL Turbo VIN S (1999)
4.
Remove the rear window upper garnish molding.
5.
Remove the endgate opening weatherstrip from the pinchweld flange.
6.
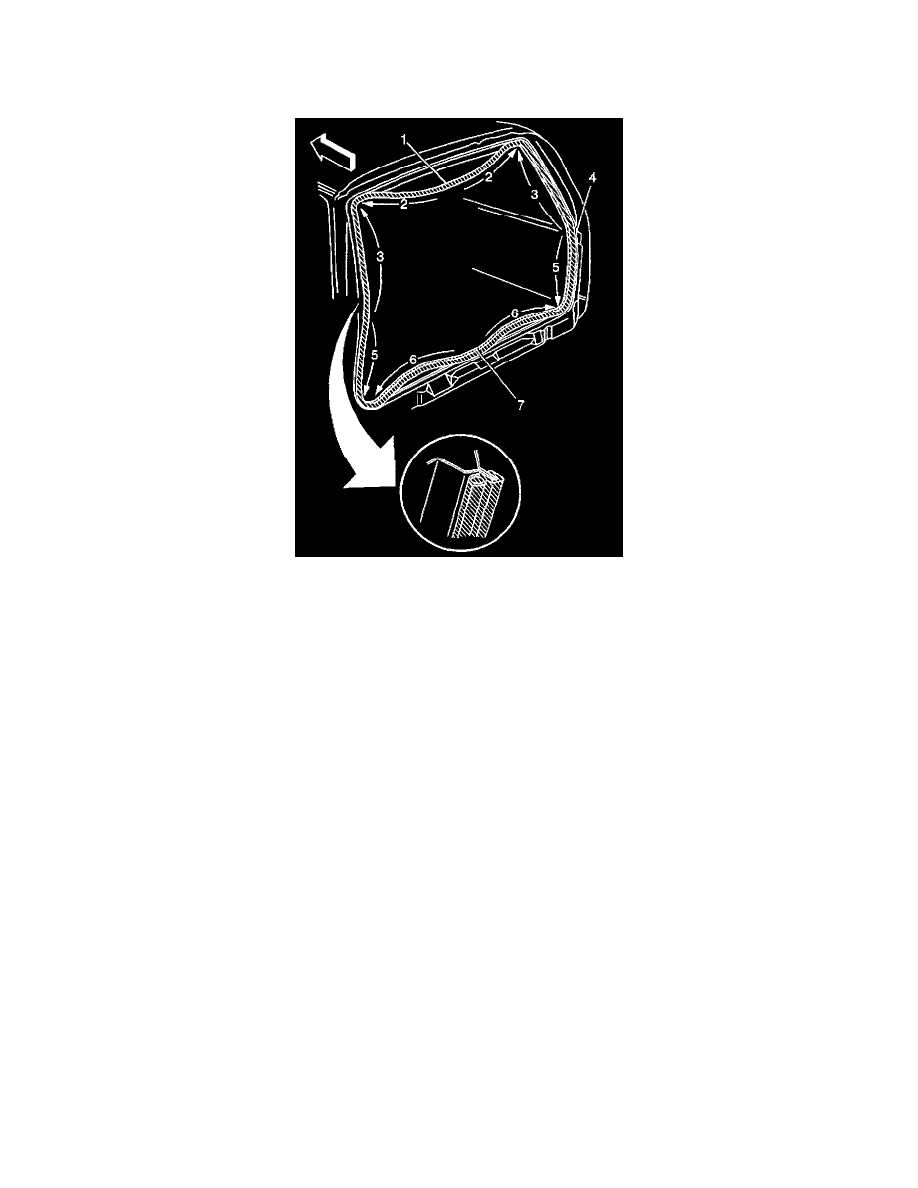
Install the endgate opening primary weatherstrip using the following procedure:
^
Align the marks on the weatherstrip with the top trim edge of the door frame reinforcement (4).
^
Push the weatherstrip onto the LH and the RH flange working upward to upper corners (3).
^
Push the weatherstrip upward to the center of the upper flange (1).
^
Push the weatherstrip from the upper center flange to the outer upper corners (2).
^
Return to the weatherstrip marks as described in step 1. Push the weatherstrip downward on lower flange to the lower corners (5). Ensure that
the weatherstrip is secure in the corners.
^
Install the weatherstrip to the center of the lower door opening flange (7).
^
Push the excess loops of the weatherstrip from the center of the lower flange outward to the lower corners (6).
^
Push the weatherstrip securely around the perimeter of the door opening flange.
7.
Install the rear window upper garnish molding.
8.
Install the LH and the RH rear corner lower garnish moldings.
9.
Install the LH and the RH rear corner upper garnish moldings.
10.
Install the rear floor rear trim plate.
Parts Information
Part NumberDescription
15758706
Weatherstrip Asm - Rear Door
15758707
Weatherstrip Asm - Endgate