
K Yukon/Denali 4WD V8-6.5L DSL Turbo VIN S (1999)
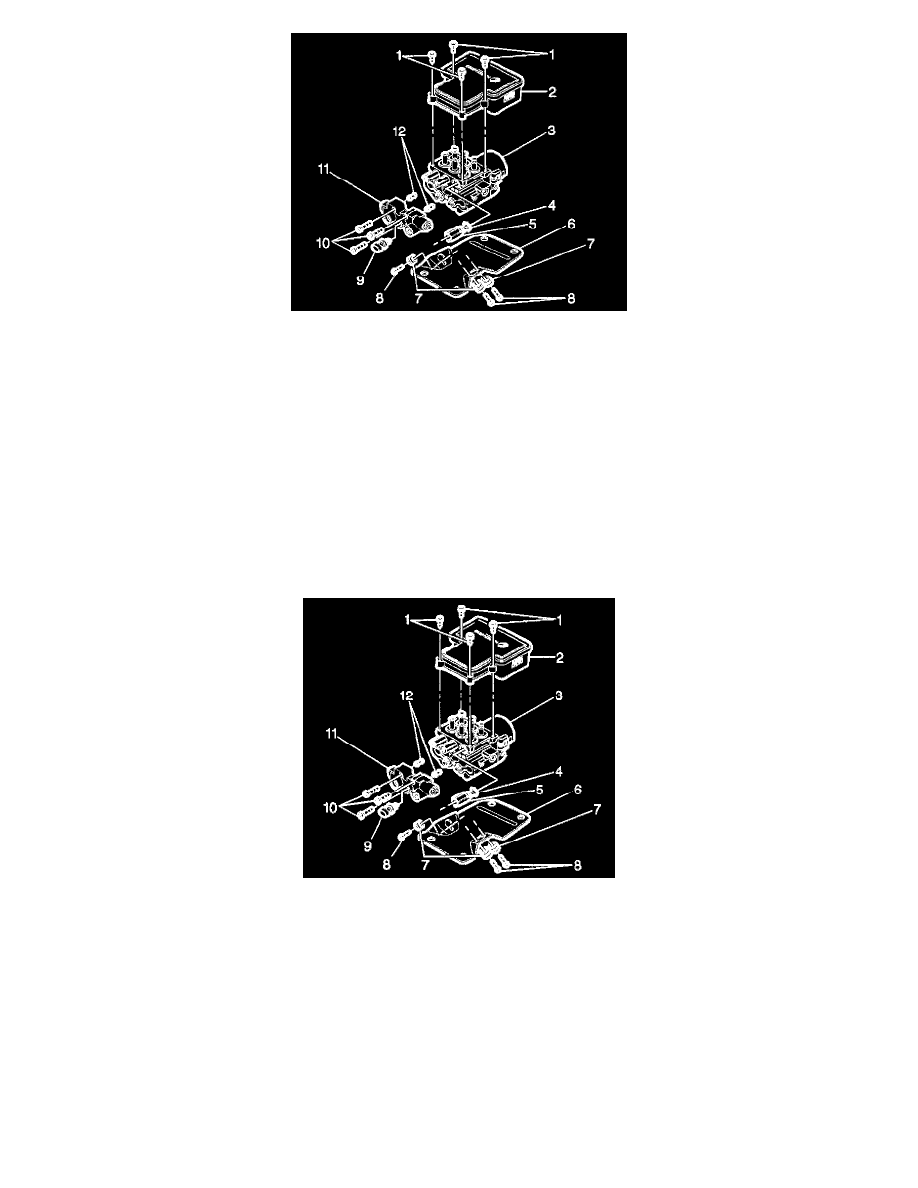
9. Remove the combination valve (111).
IMPORTANT: Do not reuse the transfer tubes. Always install new transfer tubes.
10. Remove the two transfer tubes (12).
11. Remove the three 13 mm bolts (9) that fasten the EHCU mounting bracket (6) to the BPMV (3).
12. Remove the four T-25 Torx bolts (1) from the EBCM (2).
IMPORTANT: Do not use a tool to pry the EBCM or the BPMV. Excessive force will damage the EBCM.
IMPORTANT: Do not reuse the EBCM mounting bolts (1). Always install new bolts.
13. Remove the EBCM (2) from the BPMV (3). Removal may require a light amount of force.
INSTALLATION PROCEDURE
1. Install the new transfer tubes (12) into the combination valve (11).
2. Install the combination valve (111) onto the BPMV (3).
3. Install the three Allen bolts (10) that fasten the combination valve (11) to the BPMV (3).
^
Tighten the three Allen bolts to 8 Nm (6 ft. lbs.), then to 16 Nm (12 ft. lbs.).
IMPORTANT: Do not use RTV or any other type of sealant on the EBCM gasket or mating surfaces.
4. Install EBCM (2) onto BPMV (3).
IMPORTANT: Do not reuse the old mounting bolts. Always install new bolts with the new EBCM.
5. Install the four EBCM bolts (1).
^
Tighten the four bolts to 5 Nm (39 inch lbs.) in an X-pattern.
6. Install BPMV (4) to bracket (6).