
S15/T15 2WD Jimmy V6-173 2.8L (1988)
Fuel Injector: Service and Repair
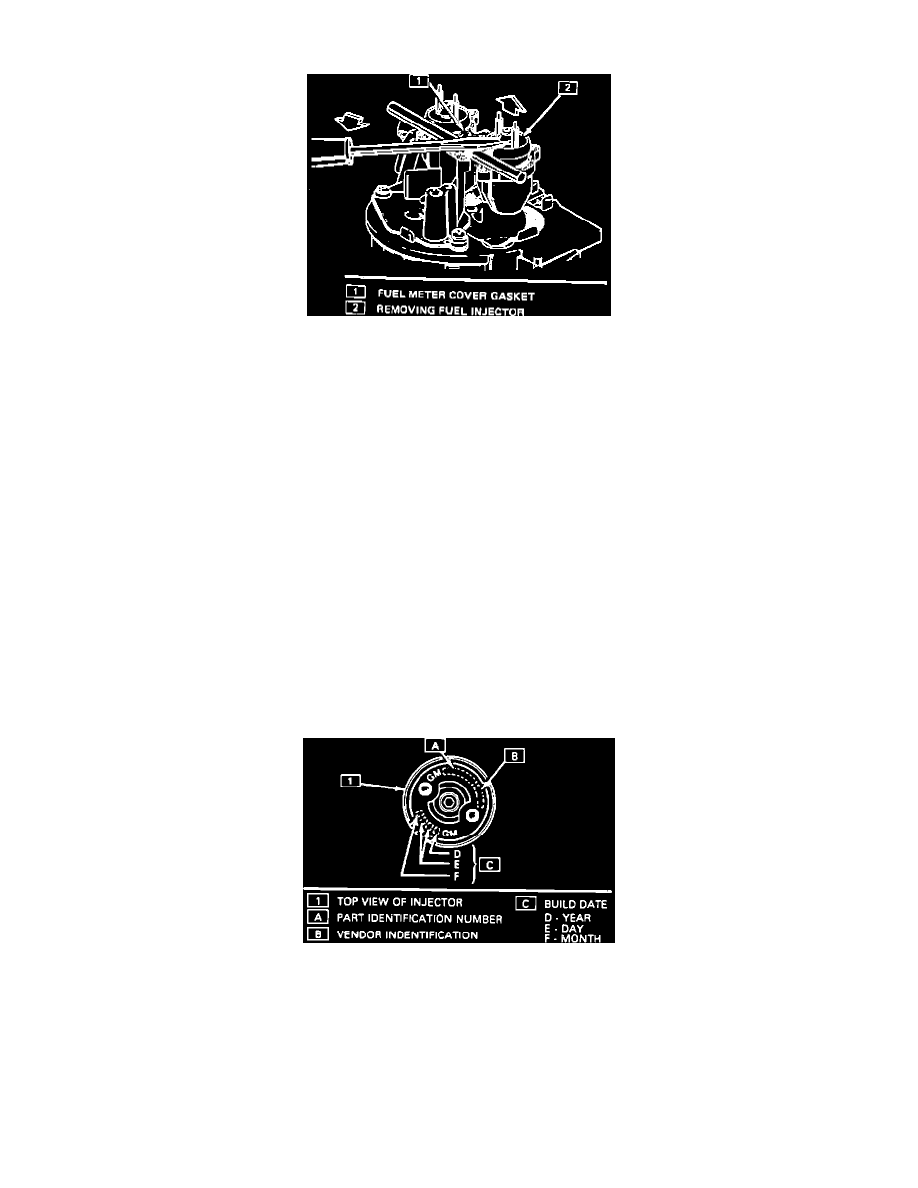
Fuel Injector Removal
NOTE:
a. Each fuel injector is serviced as a complete assembly only.
b. Use care in removing the fuel injectors to prevent damage to the electrical connector terminals, the injector filter, and the fuel nozzle. The fuel
injector is serviced as a complete assembly only. Also, since the injectors are electrical components, they should not be immersed in any type of
liquid solvent or cleaner as damage could occur.
REMOVAL:
1.
Disconnect electrical connectors to fuel injectors. (Squeeze plastic tabs and pull straight up.)
2.
Remove fuel meter cover assembly, refer to FUEL METER COVER ASSEMBLY.
3.
With fuel meter cover gasket in place to prevent damage to casting, use a screwdriver and fulcrum to carefully lift out each injector.
4.
Remove lower (small) O-rings from nozzle of injectors and discard.
5.
Remove fuel meter cover gasket and discard.
6.
Remove upper (large) O-rings and steel backup washers from top of fuel injector cavity and discard
INSPECTION:
^
Fuel injector filter for evidence of dirt and contamination. If present, check for presence of dirt in fuel lines and fuel tank. If dirt is present refer
to MAINTENANCE PROCEDURES/FUEL SYSTEM CLEANING.
Fuel Injector Part Number Location
Be sure to replace the injector with an identical part. Different injectors with different flow rates will fit this unit, but are calibrated for different flow
rates.