
S15/T15 2WD Jimmy V6-173 2.8L (1988)
C. Support fuel tank and remove tank supports (5).
D. Lower tank sufficiently to disconnect sender unit connector, fuel lines, and ground terminal.
E. Remove fuel tank.
F. Remove front bolts from tank upper straps and move straps to rear out of the way.
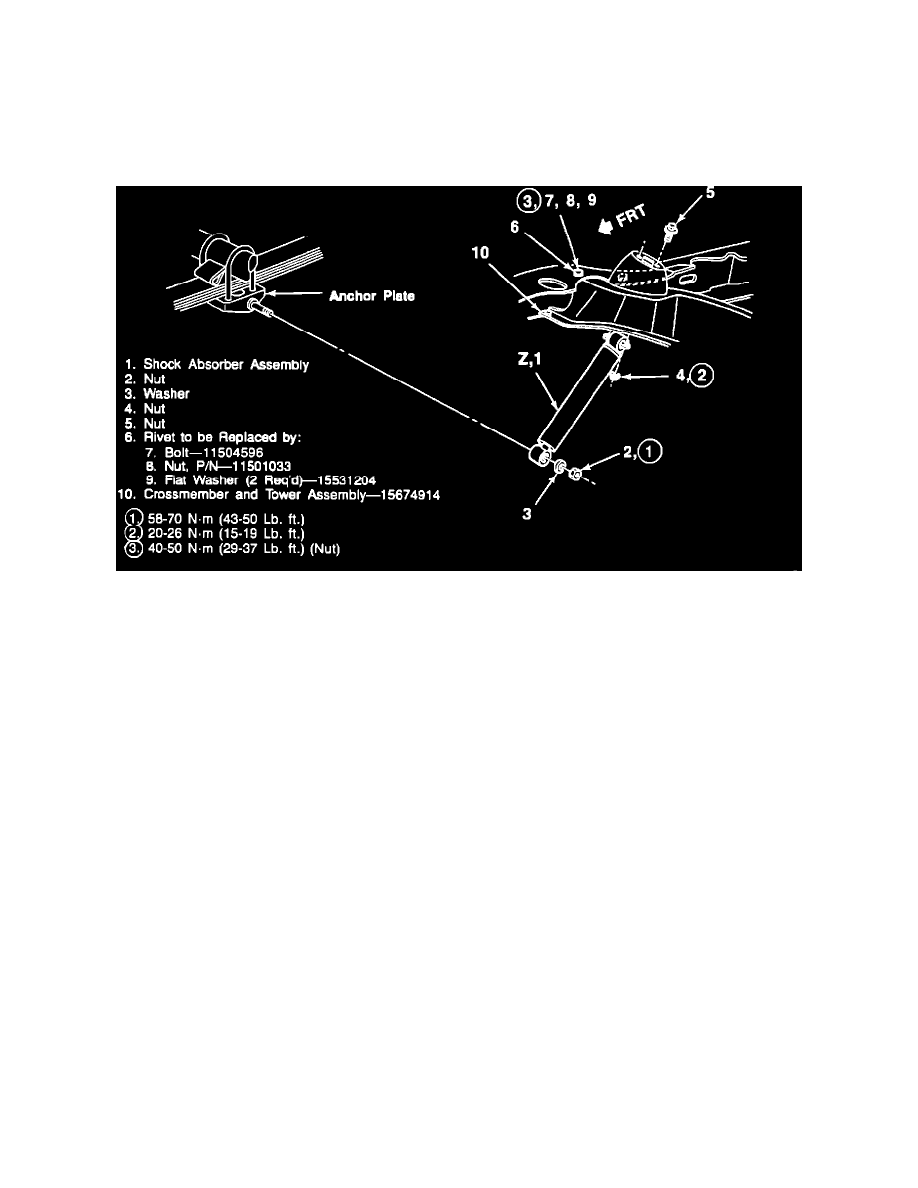
Figure 2 - Shock Absorber Installation
5.
Remove shock absorbers (Figure 2).
A.
Remove shock absorber to tower bolts and nuts.
B.
Remove shock absorber to anchor plate nut and washer.
C.
Remove shock absorber from vehicle.
6.
Remove rear frame crossmember and towers (Figure 2).
A.
Cut three crossmember to frame rivet heads off on each side of vehicle. Use air chisel, cutting wheel, or grinding wheel.
B.
Remove and discard crossmember and tower assembly. Before discarding, remove the two spring mounted nuts for the tank straps and install
the nuts in the new crossmember.
7.
Install new frame crossmember and tower assembly (Figure 2).
A.
Install three bolts, nuts, and six washers on each side of frame crossmember and torque nuts to 40-51 N-m (29-37 lbs.ft.) or torque bolts to
45-60 N-m (33-44 lbs.ft.).
B.
Reinstall shock absorber and torque anchor plate nut to 20-26 N-m (15-19 lbs.ft.).
C.
Bolt shock to tower and torque nuts to 58-70 N-m (43-50 lbs.ft.).
8.
Reinstall fuel tank (Figure 1).
A.
Raise tank sufficiently to install fuel tank sending unit hoses, electrical connector, and ground strap. Route strap 1 under hoses and wiring.
B.
Raise tank fully and install tank supports (5). Torque front strap nuts (9) to 27-47 N-m (20-35 lbs.ft.). Torque support nuts (7) to 40-50 N-m
(29-37 lbs.ft.).