
S15/T15 2WD Jimmy V6-173 2.8L (1988)
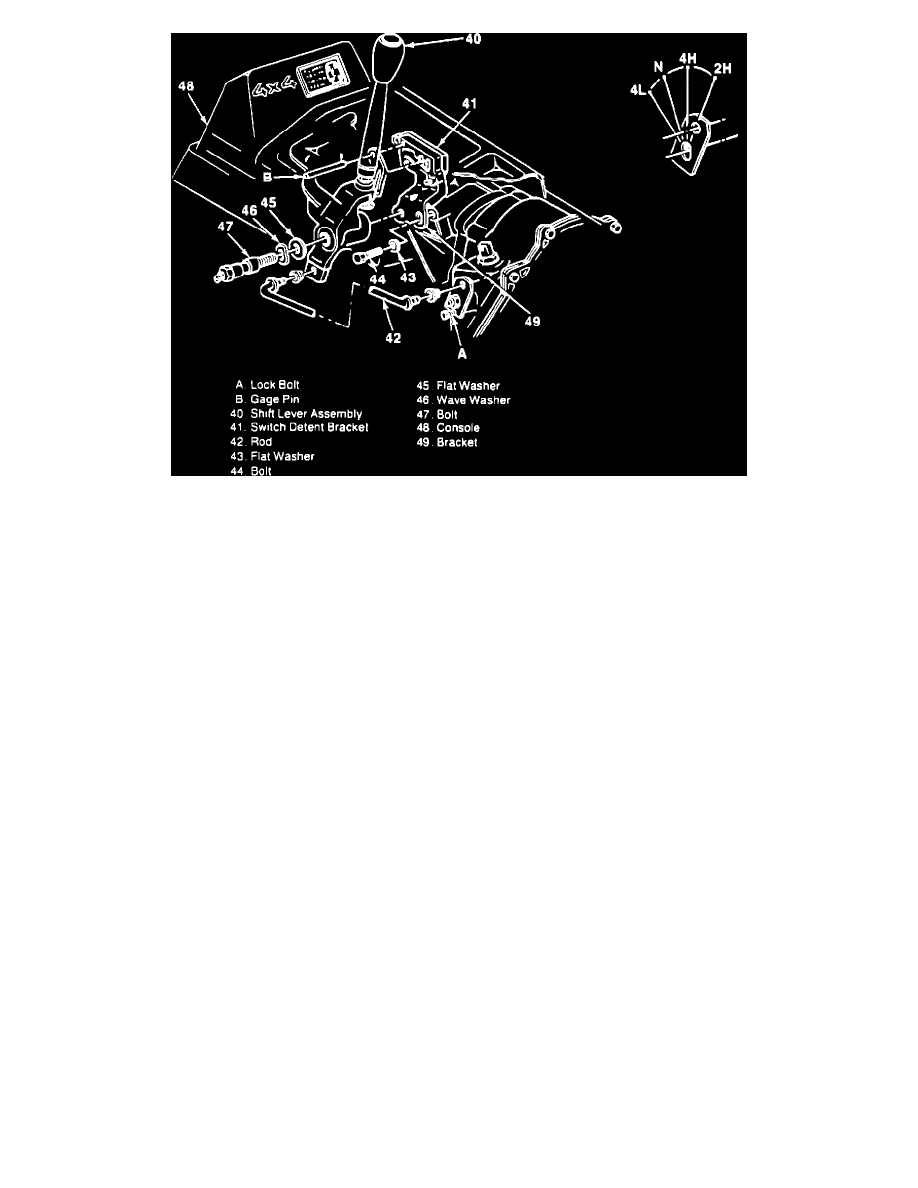
Figure No. 2 - Transfer Case Linkage Adjustment
Service Procedure:
Check to assure that the transfer case is fully engaged into the 4-High position. If hopout occurs, perform the following service procedure:
1.
Inspect the transfer case upper boot and verify that the lower convolute is not trapped beneath the console (Figure 1). Correct the boot installation
as required.
2.
Inspect the transfer case shift linkage (Figure 1). Use the following procedure to properly adjust the transfer case shift linkage (See Figure 2).
A.
Remove the console (48).
B.
Raise the shift lever boot up the shift lever.
C.
Loosen bolt (44).
D.
Loosen bolt (47).
E.
Place the shift lever (40) in 4-High position.
F.
Install a suitable bolt (A) at the shift lever on the transfer case as shown. This will lock the transfer case in 4-High.
G.
Insert an 8 mm (5/16-inch) diameter gage pin or drill bit through the hole in the shift lever into the upper comer of the switch detent bracket
(49). This aligns the switch assembly in the 4-High position.
H.
Tighten bolt (47) to 130 N-m (95 lbs/ft).
I.
Tighten bolt (44) to 40 N-m (30 lbs/ft).
J.
Remove the lock bolt (A) and gage pin or drill bit (B).
K.
Install the console and boot.