
S15/T15 2WD Jimmy V6-262 4.3L (1991)
Engine Mount: Service and Repair
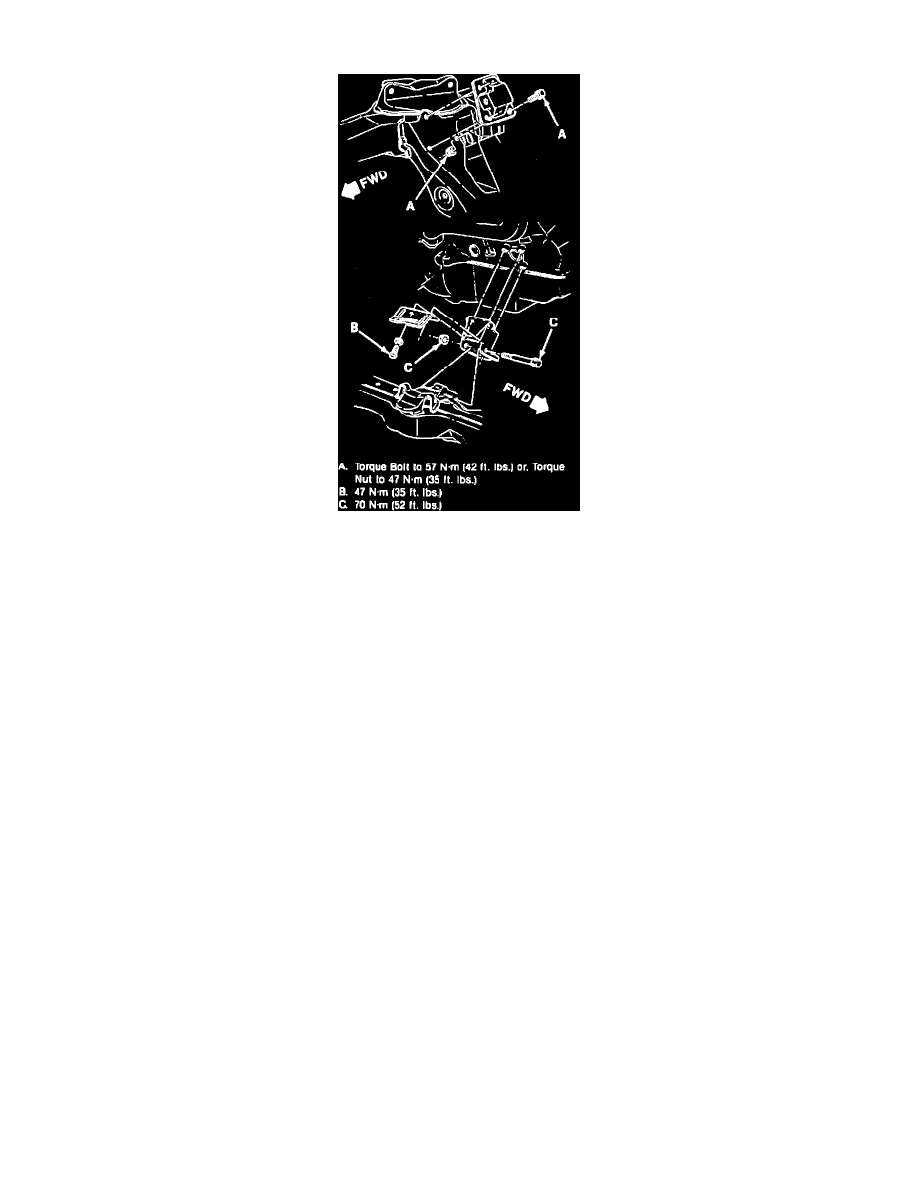
Fig. 1 Front Engine Mount Installation
FRONT ENGINE MOUNTING REPLACEMENT
Remove or Disconnect
-Raise the vehicle. Support with suitable safety stands.
1. Cab or body mounting bolts. Raise the body and block in position.
2. Engine mounting through-bolts on both sides.
NOTICE: When raising or supporting the engine for any reason, do not use a jack under the oil pan, any sheet metal, or the crankshaft pulley. Due to
the small clearance between the oil pan and the oil pump screen, jacking against the oil pan may cause it to be bent against the pump screen, resulting
in a damaged oil pickup unit.
-Raise the engine and block in position.
3. Engine mounting to frame bolts.
4. Engine mounting.
Install or Connect
NOTICE: When fasteners are removed, always reinstall them at the same location from which they were removed. If a fastener needs to be replaced,
use the correct part number fastener for that application. If the correct part number fastener is not available, a fastener of equal size and strength (or
stronger) may be used. Fasteners that are not reused and those requiring thread locking compound will be called out. The correct torque value must be
used when installing fasteners that require it. If the above condition are not followed, parts or system damage could result.
1. Engine mounting to the frame.
2. Engine mounting to frame bolts and nuts.
-Tighten bolts to 57 Nm (42 ft.lbs) or nuts to 47Nm (35 ft.lbs)
-Lower the engine.