
S15/T15 2WD Jimmy V6-262 4.3L (1991)
Tie Rod: Service and Repair
Fig. 4 Inner tie rod removal
Removal
1.
Remove outer tie rod and hex jam nut from inner tie rod.
2.
Remove tie rod end clamp and boot clamp.
3.
Mark location of breather tube on housing, then remove boot and breather tube.
4.
Disconnect shock dampener from inner tie rod and slide back on rack.
5.
Secure rack assembly and remove tie rod assembly as follows:
a.
Place wrench on flat of rack assembly, Fig. 4.
b.
Place wrench on flats of tie rod housing.
c.
Rotate housing counterclockwise until tie rod separates from rack.
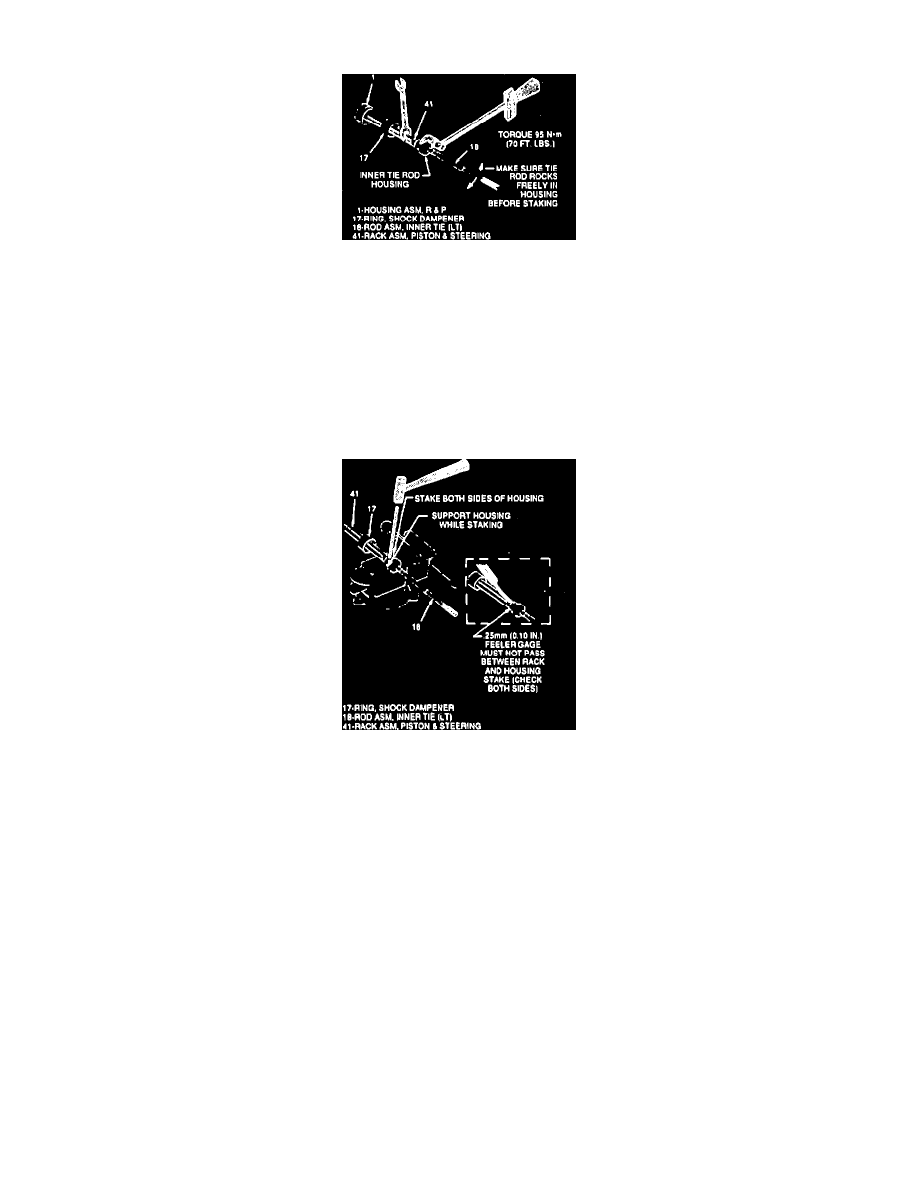
Fig. 5 Inner tie rod installation
Installation
1.
Install shock dampener, then inner tie rod and tighten to specifications.
2.
Ensure tie rod rocks freely in housing. Stake both sides of tie rod housing to flats on rack, Fig. 5.
3.
Check both stakes by inserting .010 inch feeler gage between rack and tie rod housing as shown in Fig. 5. Feeler must not pass between rack and
housing stake.
4.
Slide shock dampener over housing until it engages, then install pinion boot and new clamp.
5.
Apply grease to tie rod and housing. Install boot onto tie rod and up to housing.
6.
Align breather tube with mark made during removal. Connect elbow of boot to breather tube.
7.
Crimp boot clamp onto boot and position tie rod end clamp with pliers on boot.
8.
Install hex jam nut onto inner tie rod, then install outer tie rod.