
S15/T15 2WD Jimmy V6-262 4.3L VIN W CPI (1993)
Compressor Clutch: Service and Repair
With HR100T/HR110T-MD Compressor
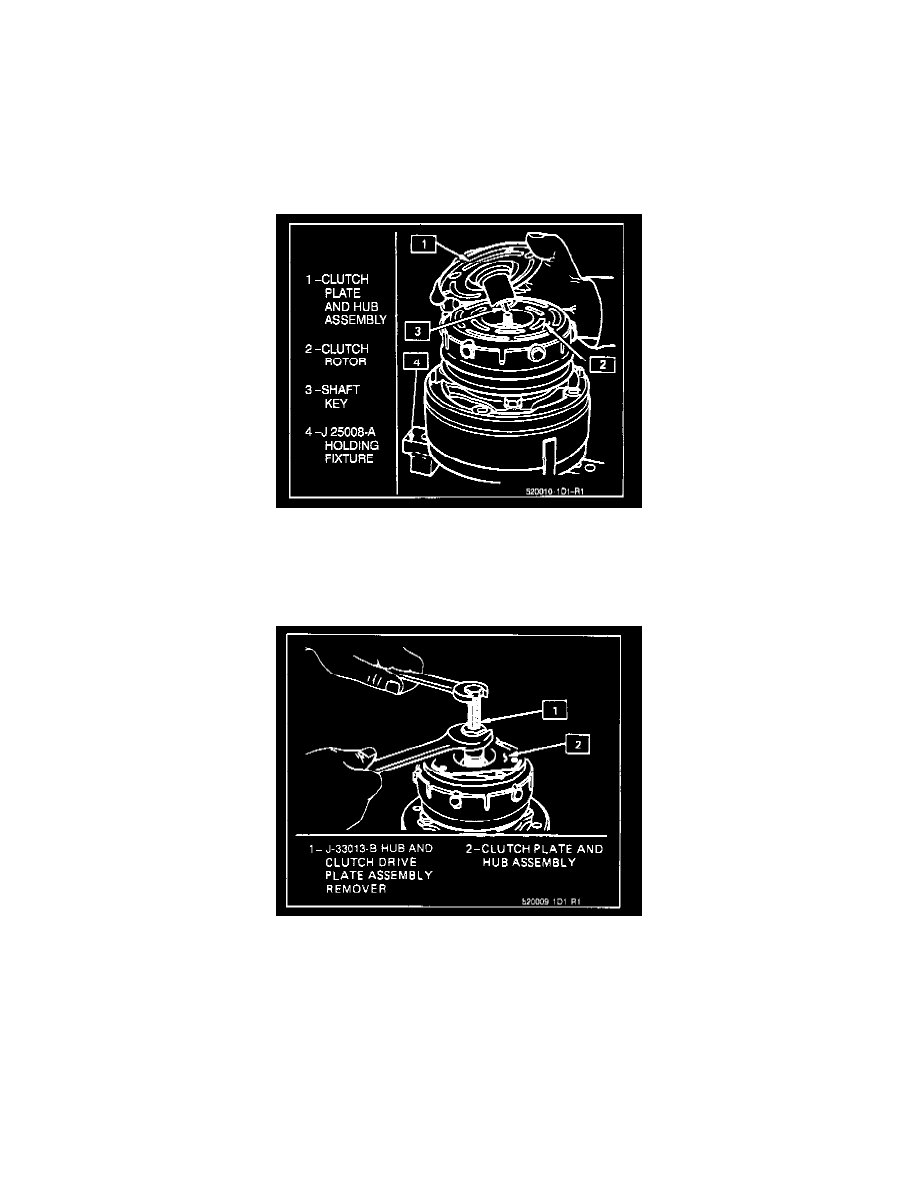
Clutch Plate and Hub Assembly
Remove or Disconnect
1. If compressor is on the vehicle, loosen compressor mounting brackets, disconnect the compressor drive belt and reposition the compressor for
access, if necessary.
Installing The Shaft Key
If compressor has been removed from the vehicle, attach the compressor to Holding Fixture J 25008-A and clamp the Holding Fixture in a vise.
-
Compressor mounting holes are metric. Use proper metric bolts with holding fixture J 25008-A.
Clutch Plate & Hub Assembly Removal
2. Thread the Clutch Plate and Hub Assembly Remover J 33013-B, into the hub. Hold the body of the Remover with a wrench and turn the center
screw into the Remover body to remove the Clutch Plate and Hub assembly.
3. Remove the shaft key.
Install or Connect
1. Install the shaft key into the hub key groove. Allow the key to project approximately 4.8mm (3/16") out of the keyway. The shaft key is curved
slightly to provide an interference lit in the shaft key groove of the hub.
2. Be sure the frictional surface of the clutch plate and the clutch rotor are clean before installing the Clutch Plate and Hub assembly.
3. Align the shaft key with the shaft keyway and place the Clutch Plate and Hub assembly onto the compressor shaft