
S15/T15 2WD P/U L4-137 2.2L DSL VIN S (1984)
Hydraulic Brake Booster: Service and Repair
Disassembly
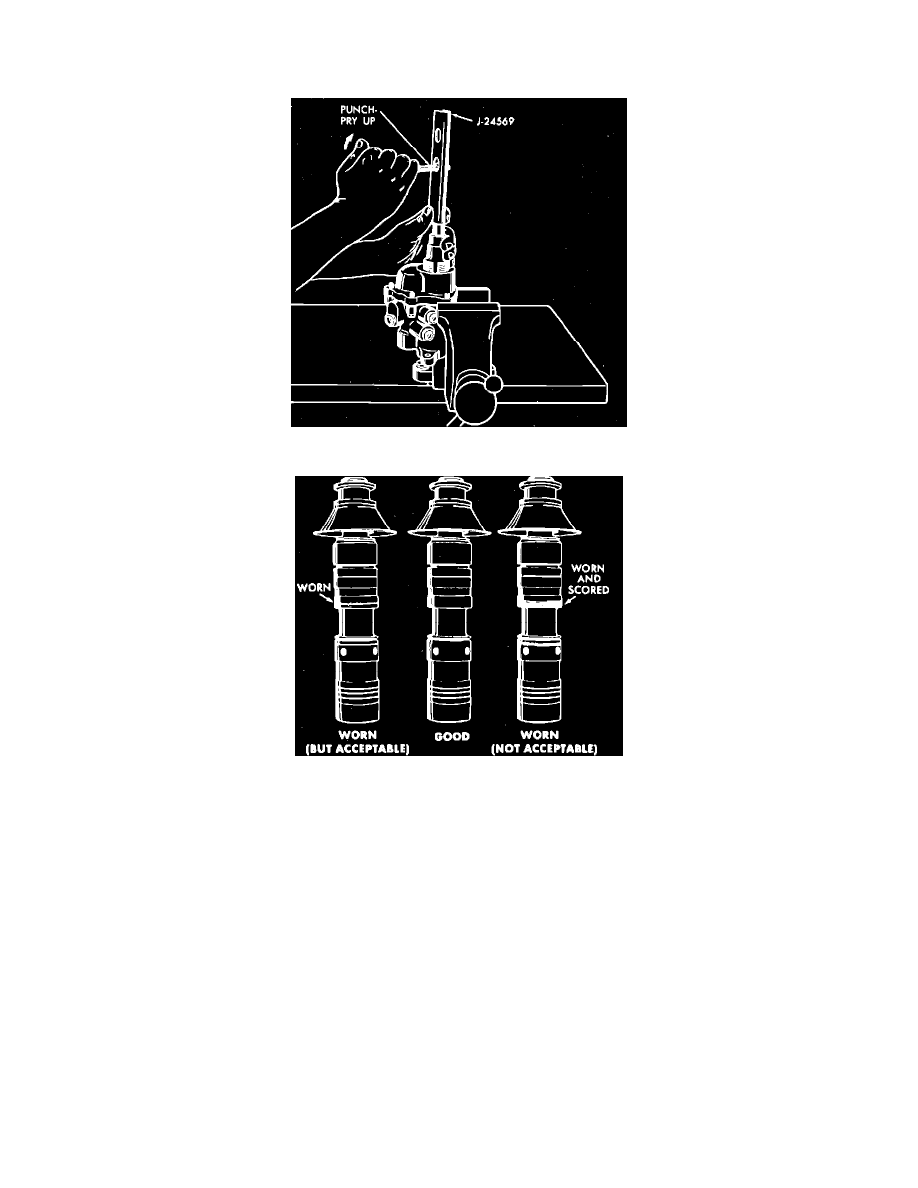
Fig. 3 Removing booster pedal rod. 1980---84
Fig. 4 Spool valve inspection
1.
Secure booster assembly in vise.
2.
On 1980---84 models, proceed as follows:
a. Using a chisel and hammer, cut the bracket nut that secures the mounting bracket to the power section. Be careful to avoid damage to the
threads on the booster hub.
b. Remove pedal rod boot, if equipped.
c. Place tool No. J-24569 around pedal rod as shown in Fig. 3, then using a suitable punch, shear pedal rod retainer and remove pedal rod.
d. Remove rubber grommet from groove near end of pedal rod and from groove inside input rod end.
3.
On 1985---87 models, proceed as follows:
a. Remove pedal rod boot, if equipped.
b. Remove mounting bracket retaining ring and nut, then saw off pedal rod eyelet and separate the input rod, lever and piston assembly from
booster cover.
4.
On all models, pry plastic guide out of the output pushrod retainer, then disengage tabs of spring retainer from ledge inside opening near master
cylinder mounting flange of booster.
5.
Remove retainer, piston return spring and output rod.
6.
Position drain pan under booster housing, then remove five housing to cover attaching screws.
7.
Remove cover from housing, using caution not to damage cover bore, then the housing seal from housing cover.
8.
Remove input rod, lever and piston assembly, then the spool valve assembly and spool return spring from the booster housing. Refer to Fig. 4 and
inspect spool valve. If spool valve is found to be defective, the valve assembly must be replaced.
9.
Remove power piston seal.