
S15/T15 4WD Jimmy L4-121 2.0L VIN Y 2-bbl (1983)
Lifter / Lash Adjuster: Service and Repair
Valve Lifter Service
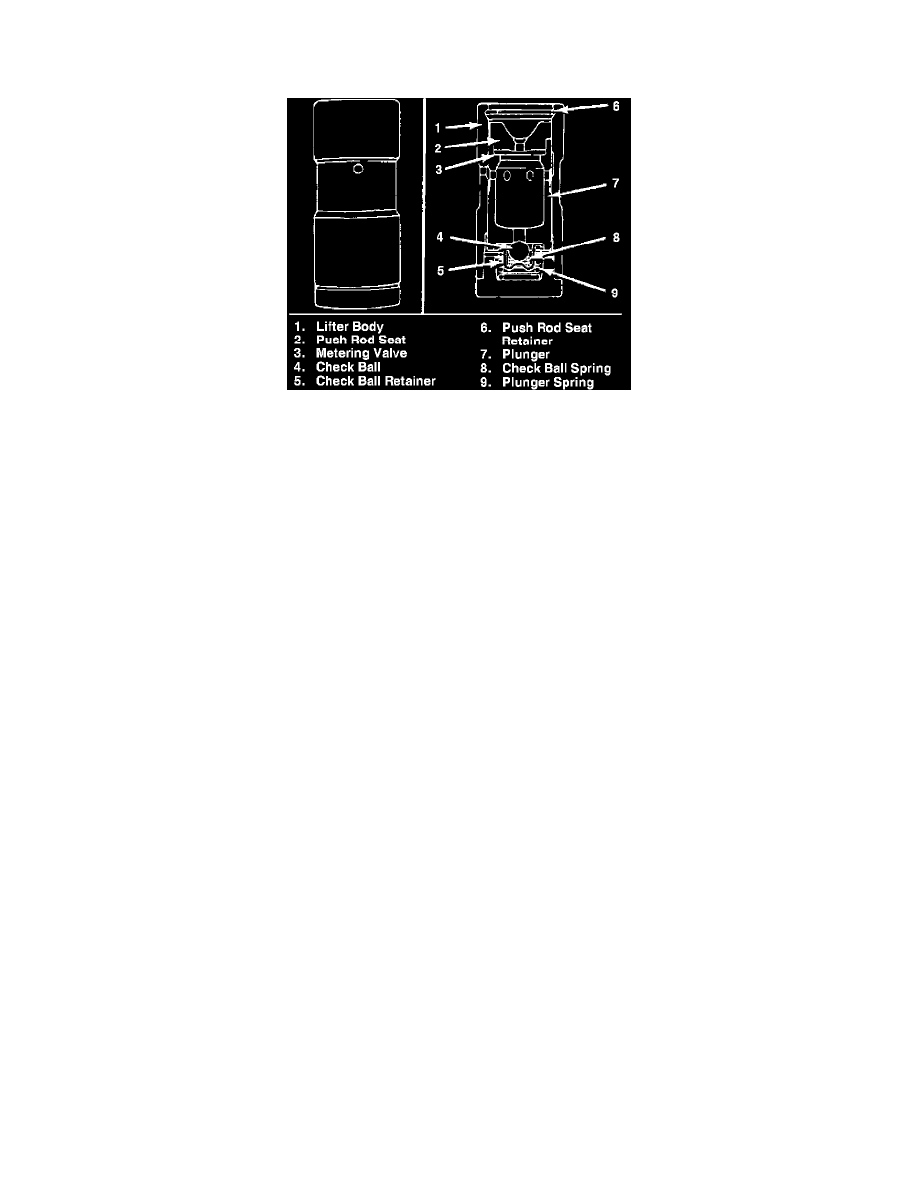
Fig. 3 Sectional view of hydraulic valve lifter
DISASSEMBLY
1.
Depress plunger with a pushrod, then remove pushrod seat retainer using a small screwdriver, Fig. 3.
2.
Remove pushrod seat, metering valve, plunger, ball check valve assembly and plunger spring.
3.
Pry ball retainer loose from plunger and remove ball check valve and spring.
CLEANING & INSPECTION
1.
Clean all parts in suitable solvent.
2.
Inspect all lifter components for wear or damage. If any one part is worn or damaged, that entire assembly must be replaced.
3.
If lifter body wall is worn, inspect cylinder block lifter bore.
4.
If bottom of lifter is worn, inspect camshaft lobe.
5.
If pushrod seat is worn, inspect pushrod.
ASSEMBLY
1.
Position check ball on small hole in bottom of plunger, then install spring and ball retainer.
2.
Install plunger spring over ball retainer, then slide lifter body over spring and plunger. Make sure oil holes in lifter body and plunger are aligned.
3.
Fill assembly with SAE 10 oil, then depress plunger with a 1/8 inch drift pin. Insert a 1/16 inch drift pin through both oil holes to hold plunger
down against spring tension.
4.
Remove the 1/8 inch drift pin and refill assembly with SAE 10 oil, then install the metering valve and pushrod seat.
5.
Install pushrod seat retainer, then push down on the pushrod seat and remove the 1/16 inch drift pin from oil holes.