
S15/T15 4WD P/U L4-121 2.0L VIN Y 2-bbl (1983)
Oil Pump: Service and Repair
REMOVAL
1.
Drain crankcase, then remove oil pan as previously described.
2.
Remove pump to rear main bearing attaching bolt, then remove pump and extension shaft.
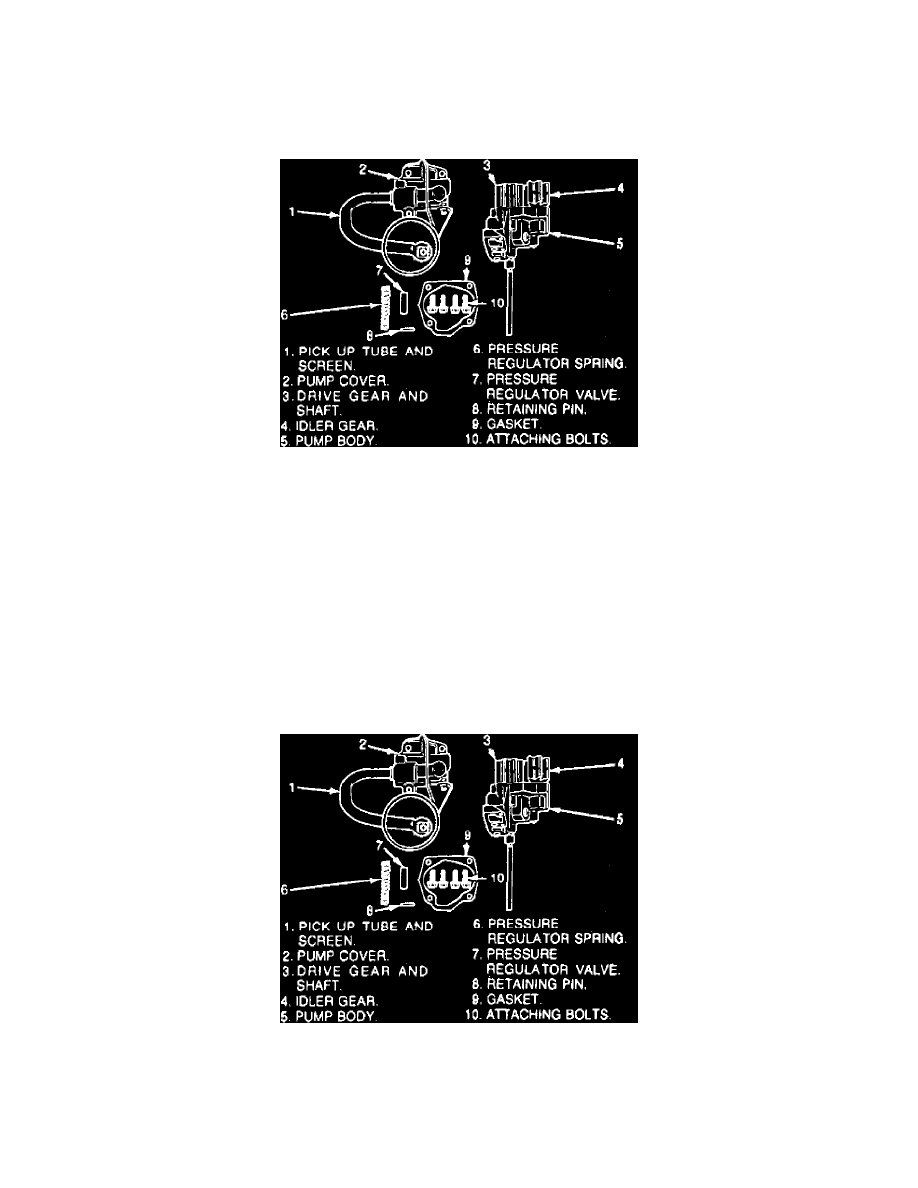
Fig. 8 Oil pump assembly
DISASSEMBLY
1.
Remove four pump cover to body attaching bolts, then remove cover, idler and drive gears and shaft, Fig. 8. Place alignment marks on oil pump
drive and idler gear teeth so they can be installed in the same position.
2.
Remove pressure regulator valve retaining pin, spring and the valve from pump body.
INSPECTION
Inspect pump components and should any of the following conditions exist, the oil pump assembly should be replaced.
1.
Inspect pump body, gears and cover for cracks or excessive wear.
2.
Check drive gear shaft for looseness in housing.
3.
Check inside of pump cover for wear that would allow oil to leak past ends of gears.
4.
Check oil pickup screen assembly for damage to screen or pickup tube.
5.
Check pressure regulator valve for fit in pump body.
Fig. 8 Oil pump assembly
ASSEMBLY
1.
Install a replacement pickup screen and tube assembly, if removed. Position pump in a soft jawed vise then apply sealer to end of tube and tap into
position using tool No. J8369 and a plastic hammer. Use care not to damage inlet screen and tube assembly when installing on pump housing.