
S15/T15 4WD P/U V6-173 2.8L (1985)
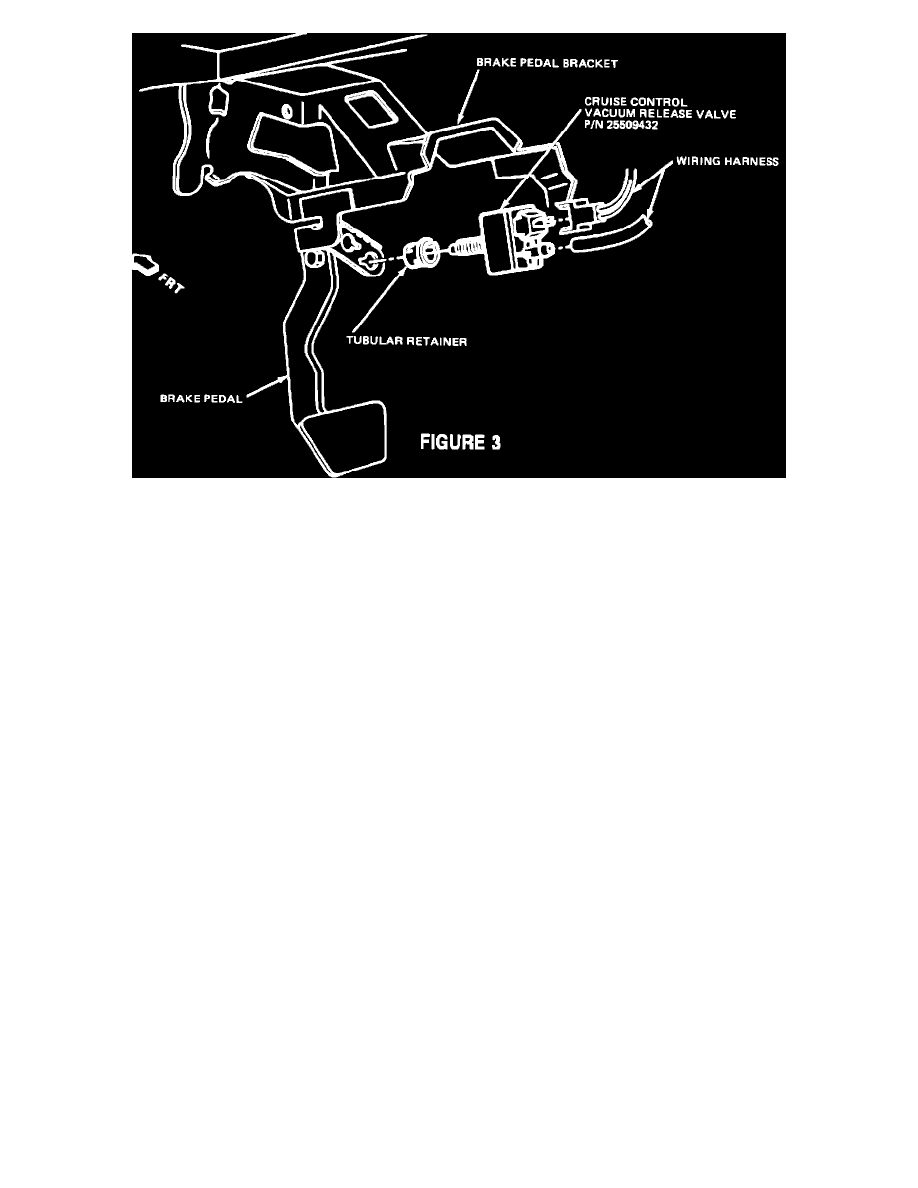
FIGURE 3
INSTALLATION PROCEDURE
1)
WITH BRAKE PEDAL DEPRESSED, INSERT CRUISE CONTROL VACUUM RELEASE VALVE INTO TUBULAR RETAINER UNTIL
SWITCH BODY SEATS ON RETAINER. NOTE THAT AUDIBLE CLICKS CAN BE HEARD AS THREADED PORTION OF SWITCH IS
PUSHED THROUGH THE RETAINER TOWARD THE BRAKE PEDAL.
2)
PULL BRAKE PEDAL FULLY REARWARD AGAINST PEDAL STOP UNTIL AUDIBLE CLICK SOUNDS CAN NO LONGER BE
HEARD. SWITCH WILL BE MOVED IN TUBULAR RETAINER PROVIDING ADJUSTMENT.
3)
RELEASE BRAKE PEDAL, AND THEN REPEAT STEP 10 TO ASSURE THAT NO AUDIBLE CLICK SOUNDS REMAIN.
Vehicle Equipped With Cruise Control (RPO K34)
1.
Disconnect vacuum hose from cruise control vacuum release valve (located adjacent to stop lamp switch). Remove vacuum release valve and
discard.
2.
Install black colored male connector plug of new wire assembly P/N 12038160, into I/P harness connector (see Figure 1).
3.
Install clear colored connector plug or new wire assembly into fuse panel cavity marked "IGN."
4.
Secure new wire assembly to I/P harness, as shown in Figure 1, with two new tie straps (P/N 11501906).
5.
Connect remaining clear colored plug of new wire assembly and cruise control vacuum hose to new cruise control vacuum release valve, P/N
25509432, (see Figure 1). Install valve into stop lamp switch mounting bracket and adjust (reference Figure 3 for instruction).
6.
Install new U-Nut on center trim panel. Reinstall center trim panel.
7.
Route remaining portion of new wire assembly under stop lamp switch and cruise control vacuum release valve. If vehicle is equipped with
noise insulator panel, route new wire assembly "ALDL" connector lead through cut out and install noise insulator panel.
8.
Position new wire assembly "ALDL" connector so that connector socket points towards the passenger side of vehicle and connector bracket
hole aligns with center trim panel, new U-Nut and noise insulator panel if equipped. While holding connector, install new screw through
connector bracket and noise insulator panel if equipped into new U-Nut and tighten.
9.
Reinstall negative battery cable, install campaign completion label and close hood.