
S15/T15 4WD P/U V6-262 4.3L VIN W CPI (1992)
Differential Axle Housing: Service and Repair
Aluminum Case
Front Differential Carrier
Removal
1. Raise Vehicle. If twin post hoist is used, place jack stands under frame and lower front post. Refer to General Information Section.
2. Remove tube and shaft assembly. Refer to Tube and Shaft removal procedure in this section. See: Tube & Shaft Assembly
3. Remove bolt securing steering stabilizer to frame. Refer to Steering section. See: Steering and Suspension
4. Scribe location of steering idler arm and then remove bolts securing arm to frame.
5. Push steering linkage toward front of vehicle.
6. Remove axle vent hose from carrier fitting.
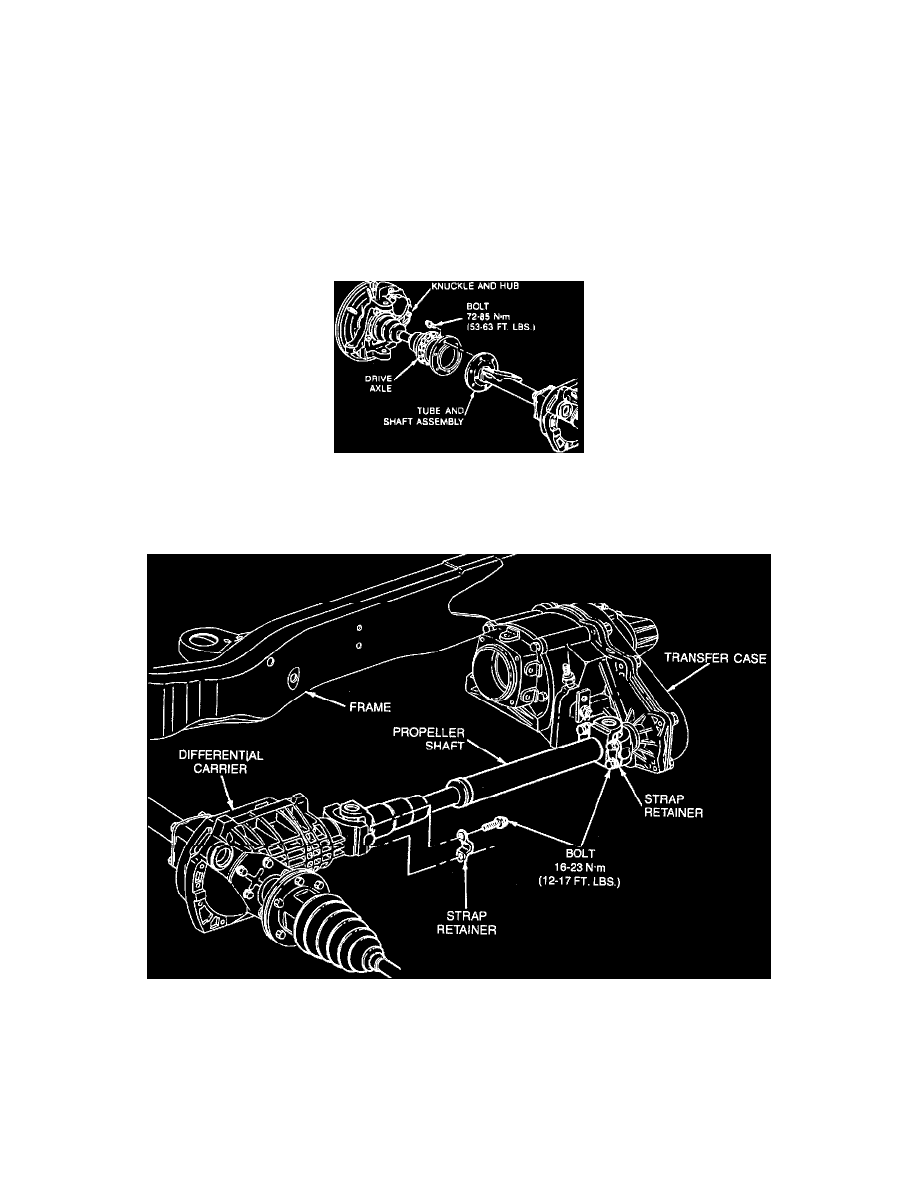
Fig. 4 Drive Axle & Tube Assembly
7. Disconnect left hand drive axle shaft from carrier by removing six bolts. Keep axle from turning by inserting a drift through opening in top of
brake caliper into corresponding vane of brake rotor.
8. Disconnect front propeller shaft.
9. Remove two mounting bolts securing carrier to frame. Hold upper nut by holding (through frame) with an 18mm combination wrench.
10. Remove carrier by tipping counterclockwise while lifting to gain clearance from mounting ears.
Installation
1. Install carrier in vehicle and install two mounting bolts.
2. Install front propeller shaft.
3. Connect left hand drive axle shaft to carrier by installing one bolt first then, rotate axle to install remaining five bolts. Tighten bolts to torque