
S15/T15 Jimmy 2WD L4-119 1.9L VIN A 2-BBL (1983)
PROM - Programmable Read Only Memory: Service and Repair
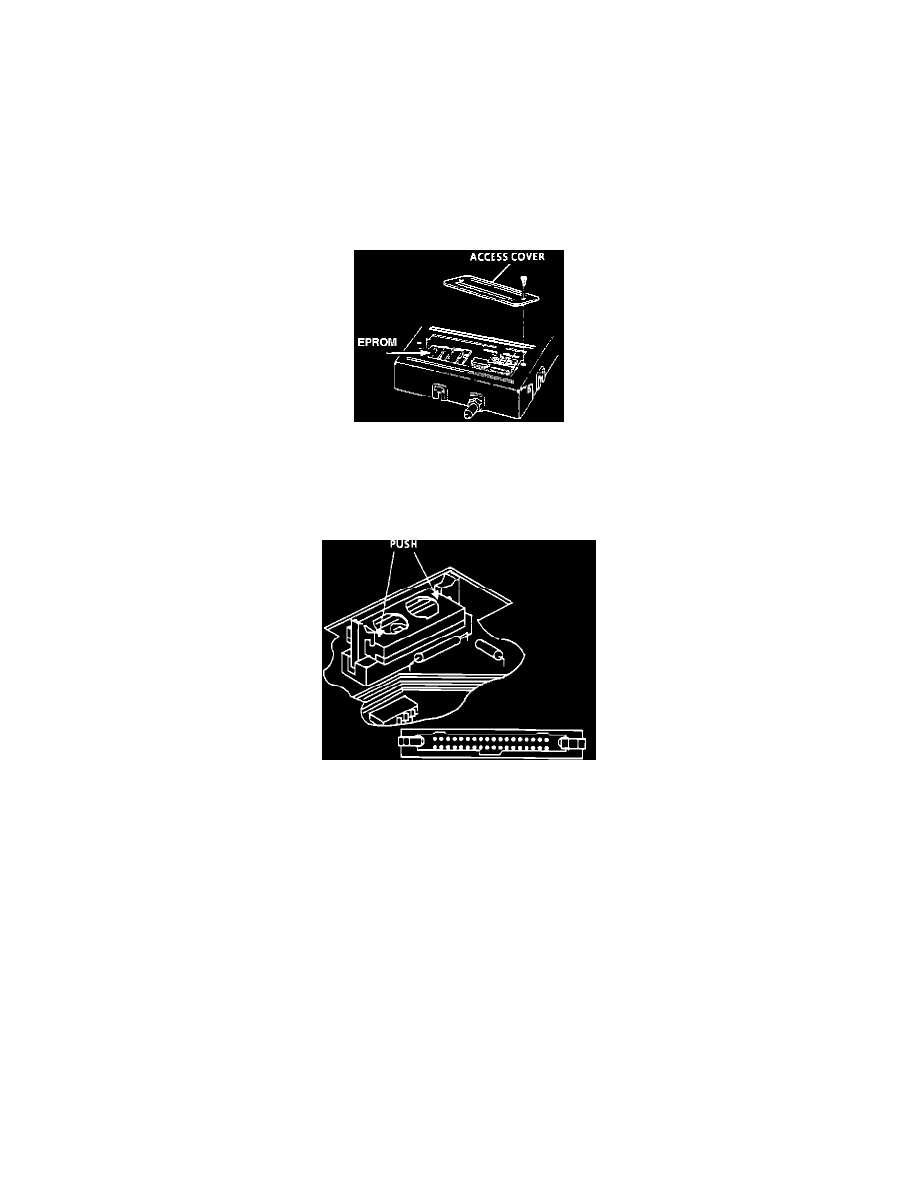
EPROM
REMOVAL:
^
DO NOT remove an EPROM from its packing material until you are ready to install it. DO NOT hold an EPROM by its pins.
^
Before entering a vehicle to remove or replace an EPROM, touch an exposed metal part of the vehicle to discharge any static charge from your
body or use anti-static wrist straps. Avoid sliding across upholstery or carpeting when removing or installing an EPROM. If this is not
possible, touch an exposed metal part of the vehicle with your free hand before removing or replacing an EPROM.
^
When available, use an antistatic grounding strap attached to your wrist and clipped to a metal part of the vehicle body to prevent static
charges from accumulating. Antistatic conductive floormats are also available.
^
It may be desirable to remove the computer for EPROM replacement.
^
Remove computer access cover.
^
Unlock the locking levers by pressing outward toward the sides of the EPROM.
^
Remove EPROM from its socket
INSTALLATION:
EPROM/MEM-CAL Unit Installation
^
Install the replacement EPROM in the same direction.
^
VERY GENTLY PRESS down on the ends of the EPROM until the locking levers are rotated toward the sides of the EPROM.
^
NOTE: To avoid Computer damage, do not press on the ends of the EPROM until the levers snap into place. Do not use any vertical force
beyond the minimum required to engage the EPROM into its socket.
^
While continuing light pressure on the ends of the EPROM, use your index fingers to press the locking levers inward until they are snapped
into place. Listen for the click.
^
Install the access cover on the computer.
^
Perform FUNCTIONAL CHECK