
S15/T15 Jimmy 2WD V6-173 2.8L VIN B 2-bbl (1983)
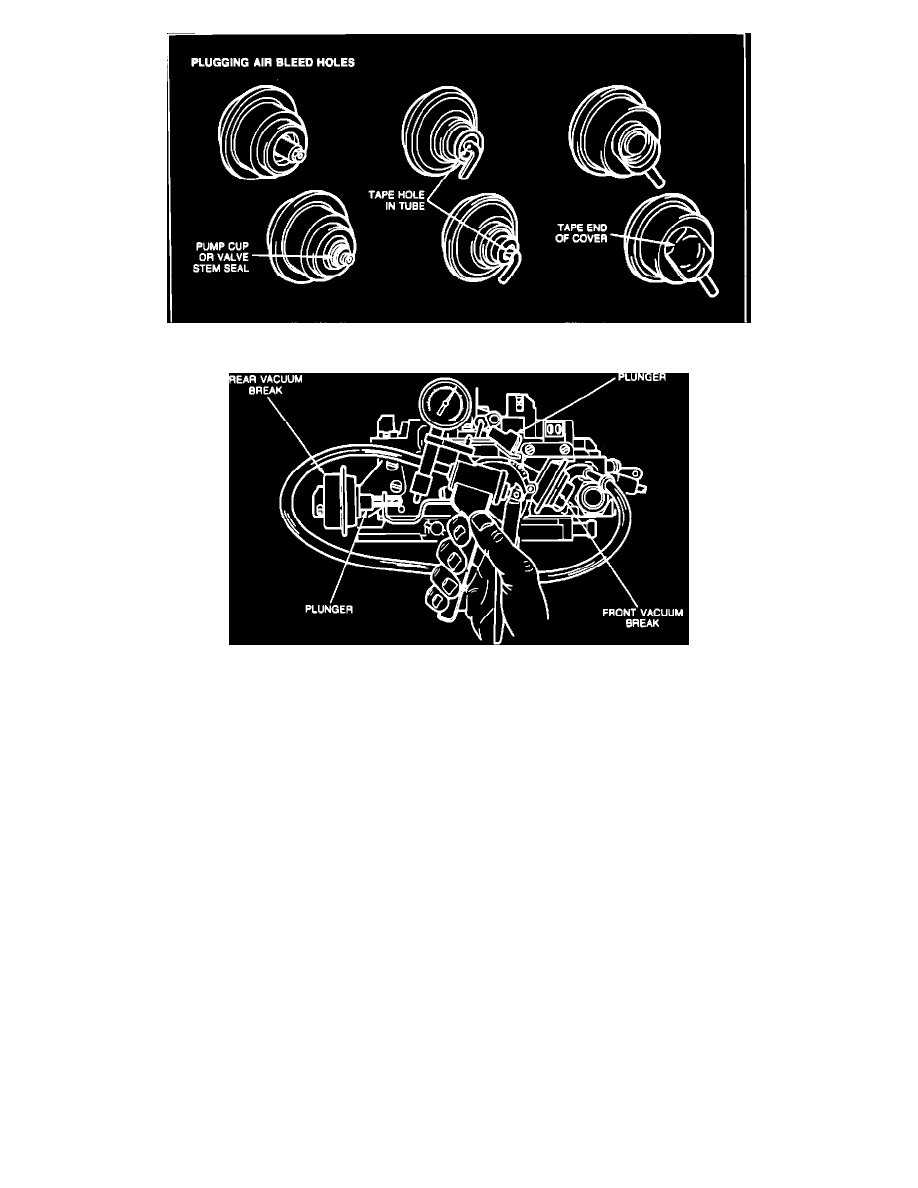
FIGURE 5 - VACUUM BREAK AIR BLEED HOLES
FIGURE 6 - APPLYING VACUUM TO VACUUM BREAK
Testing Procedure:
1.
Determine whether the vacuum brake has a bleed orifice. If it does, it should be plugged as shown. See Fig. 5 for possible locations.
^
Most rear or secondary side units have a bleed.
^
Most front or primary side units do not.
2.
Use hand-held vacuum pump to apply 15" Hg (51kPa) vacuum to the vacuum brake, (Fig. 6).
A.
The vacuum break plunger should move full travel. Apply finger pressure to plunger to see that it has
moved through full travel. If not, replace the vacuum break and adjust to specification. The labor operation time for replacing the vacuum break unit
includes adjustment.
B.
The vacuum break diaphragm should hold vacuum for at least twenty seconds. If it does not, replace the vacuum break and adjust to specification.
REMINDER:
The carburetor vacuum break is covered under the Five-Year/50,000-Mile Emission Control Systems Warranty. Refer to the "Chevrolet
Service Policies and Procedures Manual."
CLAIM INFORMATION
Submit a Product Campaign Claim with the information indicated below:
*
FAILED
PARTS
LABOR
LAB
OTH
REPAIR PERFORMED
PC
PART NO.
ALLOW
FC
0P
HRS
HRS
-
Replace PROM 1 1228652 ** 00 V4360 0.9 0.1
-
Inspect Only - Primary OR
-
Inspect Only - Secondary 1228653
-
Replace PROM 2 1228652 ** 00 V4361 1.4 0.1
-
Inspect Only - Primary OR
-
Inspect/Replace - Secondary 1228653