
S15/T15 Jimmy 2WD V6-262 4.3L VIN Z (1994)
Seal Splice Sequence
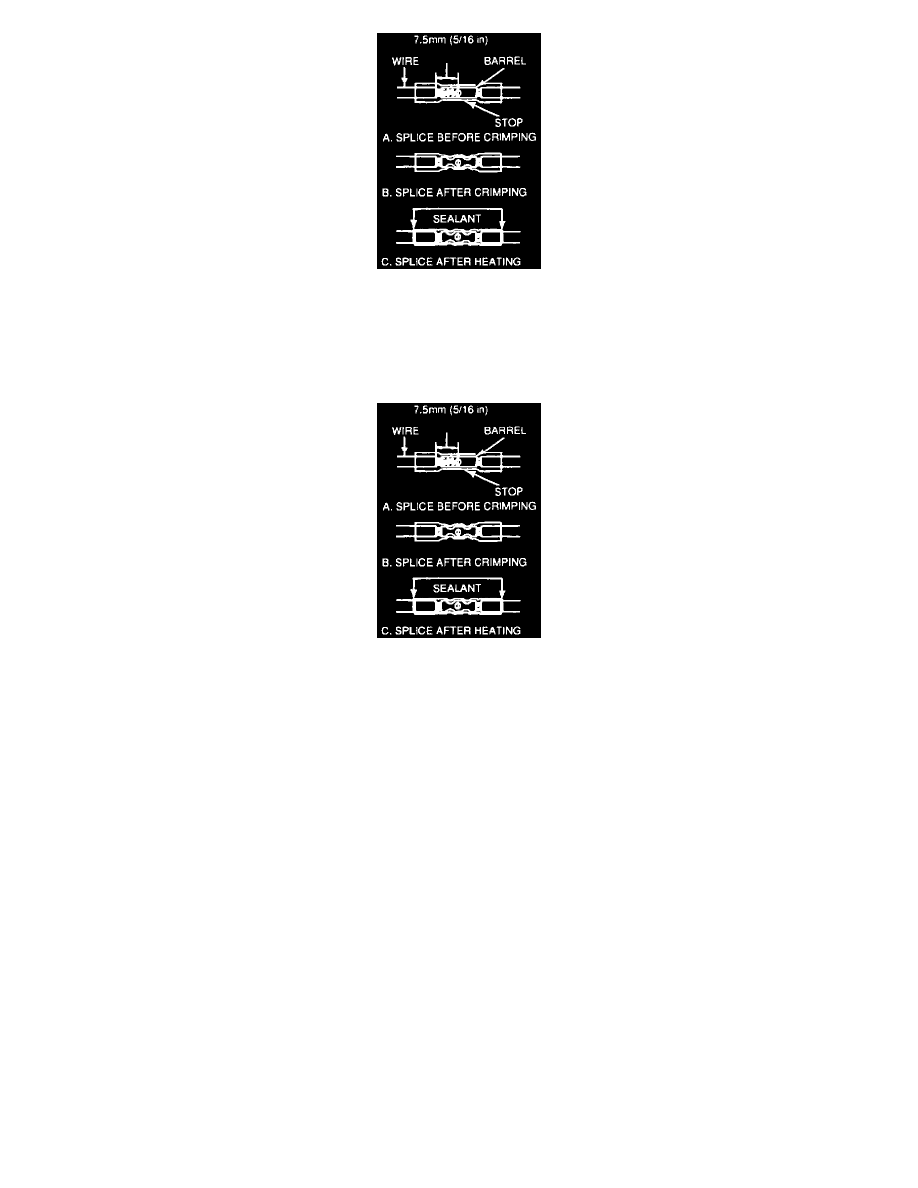
5. Insert the Wires into the Splice Sleeve and Crimp
Insert the wire into the splice sleeve until it hits the barrel stop and close the handles of the crimp tool tightly until the crimper handles open when
released. The crimper handles will not open until the proper amount of pressure has been applied to the splice sleeve. Repeat steps 4 and 5 for the
opposite end of the splice. Figure shows the condition of the splice sleeve after crimping.
Seal Splice Sequence
6. Shrink the Insulation Around the Splice
Using a heat torch, apply heat to the center of the splice sleeve. Gradually move the heat to the open end of the tubing, shrinking the tubing as the
heat is moved along the insulation. A small amount of sealant will come out of the end of the tubing when sufficient shrinking has been achieved.
Figure shows the condition of the splice when the tubing is completely shrunk.
General
Special connectors known as Weather-Pack connectors require special tool J 28742 for servicing. This special tool is required to remove the pin and
sleeve terminals. If removal is attempted with an ordinary pick, there is a good chance that the terminal will be bent or deformed. Unlike standard
blade-type terminals, these terminals cannot be straightened once they are bent.
Make sure that the connectors are properly seated and all of the sealing rings (1) are in place when connecting the leads. The hinge-type flap (4) provides
a back-up, or secondary locking feature for terminals. They are used to improve the connector reliability by retaining the terminals if the small terminal
lock tangs are not positioned properly.
Molded-on connectors require complete replacement of the connection. This means splicing a new connector assembly into the harness. Environmental
connections cannot be replaced with standard connections. Instructions are provided with the Weather-Pack connector and terminal packages.
With the low current and voltage levels found in some circuits, it is important that the best possible bond at all wire splices be made by soldering the
splices.
Use care when probing the connections or replacing terminals in them. It is possible to short between two terminals. If this happens, damage may be
done to certain components. Always use jumper wires between connectors for circuit checking. Never probe through the Weather-Pack seals.
When diagnosing for possible open circuits, it is often difficult to locate them by sight because oxidation or terminal misalignment is hidden by the
connectors. Merely wiggling a connector on a sensor or in the wiring harness may pinpoint the open circuit condition. This should always be considered
when an open circuit is indicated while diagnosing.Intermittent problems may also be caused by oxidized or loose connections.