
S15/T15 Jimmy 2WD V6-262 4.3L VIN Z (1994)
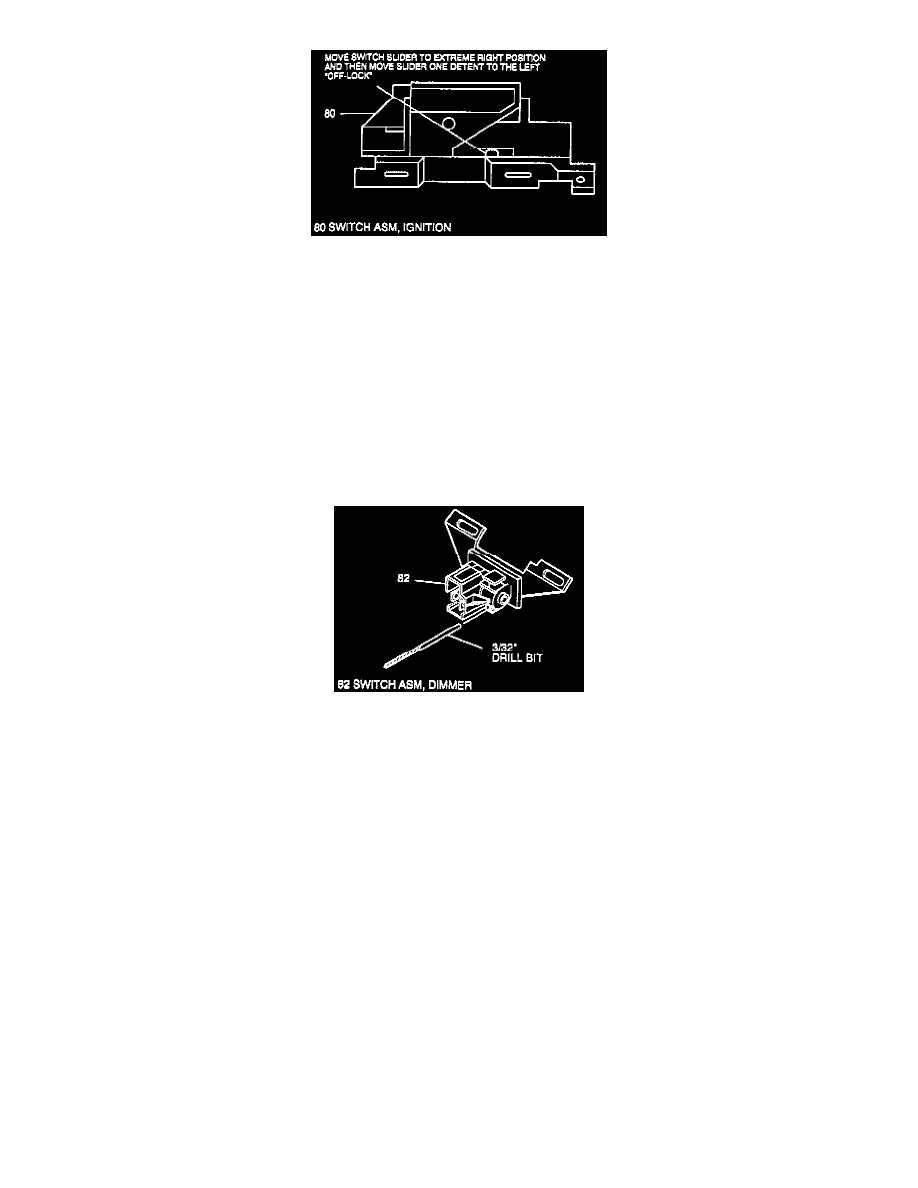
Adjusting Ignition Switch
ADJUST
^
Ignition switch assembly (80).
A. Move switch slider to extreme right position.
B. Move switch slider one detent to left "OFF-LOCK" position.
2. Ignition switch assembly (80) and mounting stud (81).
TIGHTEN
^
Tighten stud (81) to 4.0 Nm (35 lb.in.).
3. Dimmer switch assembly (82).
4. Hex nut (79) and washer head screw (78).
^
Tighten finger tight.
Adjusting Dimmer Switch
ADJUST
^
Dimmer switch (82).
A. Place 3/32-inch drill bit in hole on switch to limit travel.
B. Position switch on column and push against dimmer switch rod (77) to remove all lash.
C. Remove drill bit.
TIGHTEN
^
Tighten nut (79) and screw (78) to 4.0 Nm (35 lb.in.).
5. Vehicle wire harness to ignition switch (80) and dimmer switch (82).
6. Negative (-) battery cable.
ADAPTER & BEARING ASSEMBLY
REMOVE OR DISCONNECT
1. Negative (-) battery cable.
2. Steering column from vehicle.
NOTICE: Once steering column is removed from vehicle, the column is extremely susceptible to damage. Dropping steering column assembly on its
end could collapse steering shaft or loosen plastic injections which maintain column rigidity. Leaning on steering column assembly could cause jacket
to bend or deform. Any of the above damage could impair steering column's collapsible design. If it is necessary to remove steering wheel, use only
the specified steering wheel puller. Under no conditions should the end of shaft be hammered on as hammering could loosen plastic injections which
maintain steering column rigidity.