
S15/T15 Jimmy 2WD V6-4.3L VIN W (1998)
Wheels: Service and Repair
Installation
CAUTION: Before installing the wheels, remove any buildup of corrosion on the wheel mounting surface brake drum or disc mounting
surface by scraping and wire brushing. Installing wheels with poor metal to metal contact at the mounting surfaces can cause wheel nuts to
loosen. This can cause a wheel to come off when the vehicle is moving, causing loss of control and possibly personal injury.
NOTICE: A torque wrench or J 39544 must be used to ensure that wheel nuts are tightened to specification. Never use lubricants or penetrating
fluids on wheel stud, nuts, or mounting surfaces, as this can raise the actual torque on the nut without a corresponding torque reading on the torque
wrench. Wheel nuts, studs, and mounting surfaces must be clean and dry. Failure to follow these instructions could result in wheel, nut, and/or stud
damage.
^
Tools Required:
-
0-300 Nm (0-200 ft. lbs.) Torque Wrench
-
J 39544 Wheel Nut Torque Adapters
1. Install the wheel and the tire assembly in position on the hub/rotor. Loosely install the wheel nuts.
2. Tighten one nut securely, but do not torque.
NOTICE: Always use the correct fastener in the proper location. When you replace a fastener, use ONLY the exact part number for that
application. The manufacturer will call out those fasteners that require a replacement after removal. The manufacturer will also call out the
fasteners that require thread lockers or thread sealant. UNLESS OTHERWISE SPECIFIED, do not use supplemental coatings (paints, greases, or
other corrosion inhibitors) on threaded fasteners or fastener joint interfaces. Generally, such coatings adversely affect the fastener torque and joint
clamping force, and may damage the fastener. When you install fasteners, use the correct tightening sequence and specifications. Following these
instructions can help you avoid damage to parts and systems.
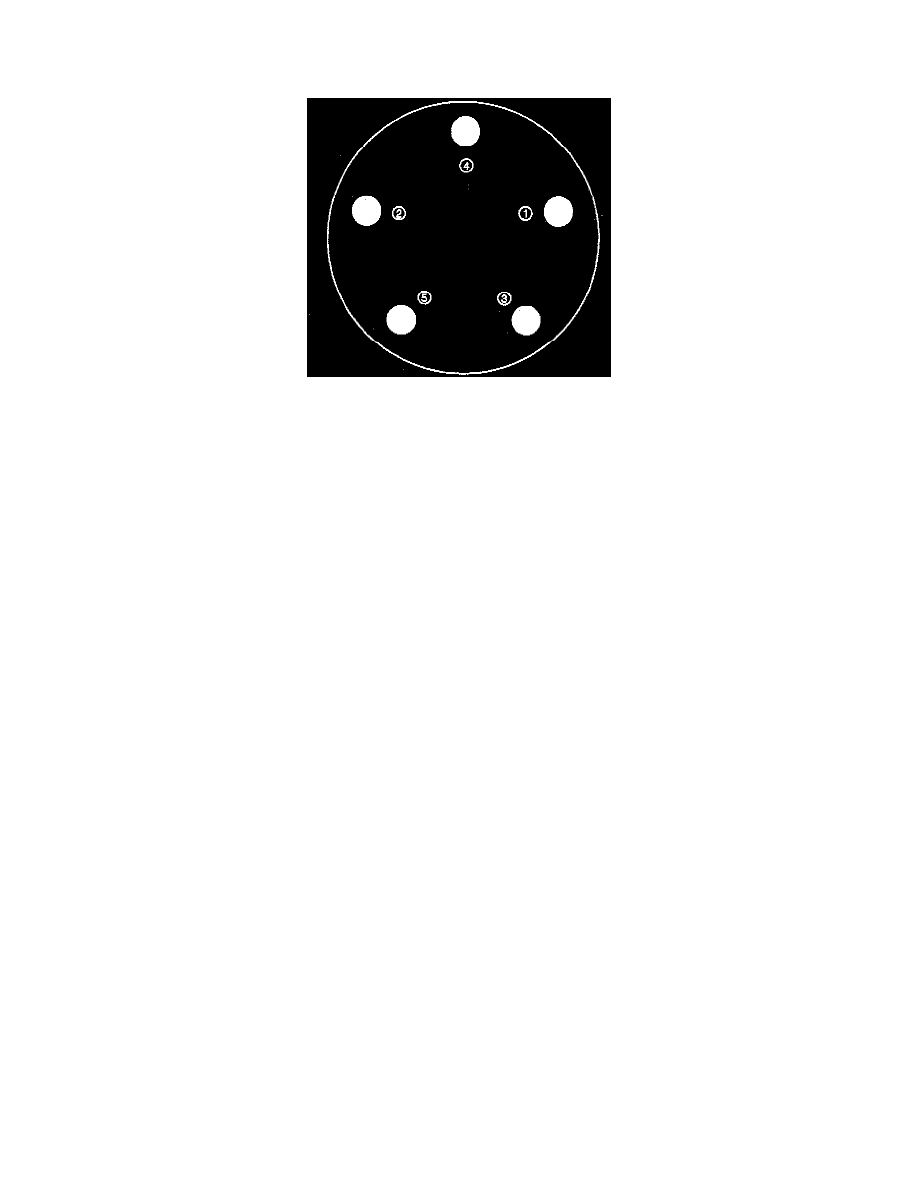
3. Loosely tighten the remaining nuts in a criss/cross pattern in order to minimize runout.
^
Tighten the nuts to 140 Nm (103 ft. lbs.), using J 3954415.
^
Tighten the nuts evenly, and tighten the nuts alternately to avoid possible brake rotor distortion.