
S15/T15 Sonoma P/U 2WD L4-2.2L VIN 4 (1995)
Distributor: Testing and Inspection
INSPECT
1. Distributor cap for cracks or tiny holes. Replace the cap if it is damaged or worn.
2. Metal terminals in the distributor cap for corrosion. Scrape them clean with a knife or replace the cap.
3. Rotor for wear or burning at the outer terminal. The presence of carbon on the terminal indicates rotor wear and the need for replacement.
4. Distributor shaft for shaft-to-bushing looseness. Insert the shaft in the distributor housing. If the shaft wobbles, replace the distributor housing
and/or shaft.
5. Distributor housing for cracks or damage.
MEASURE
Tools Required
J 24642-F Module Tester.
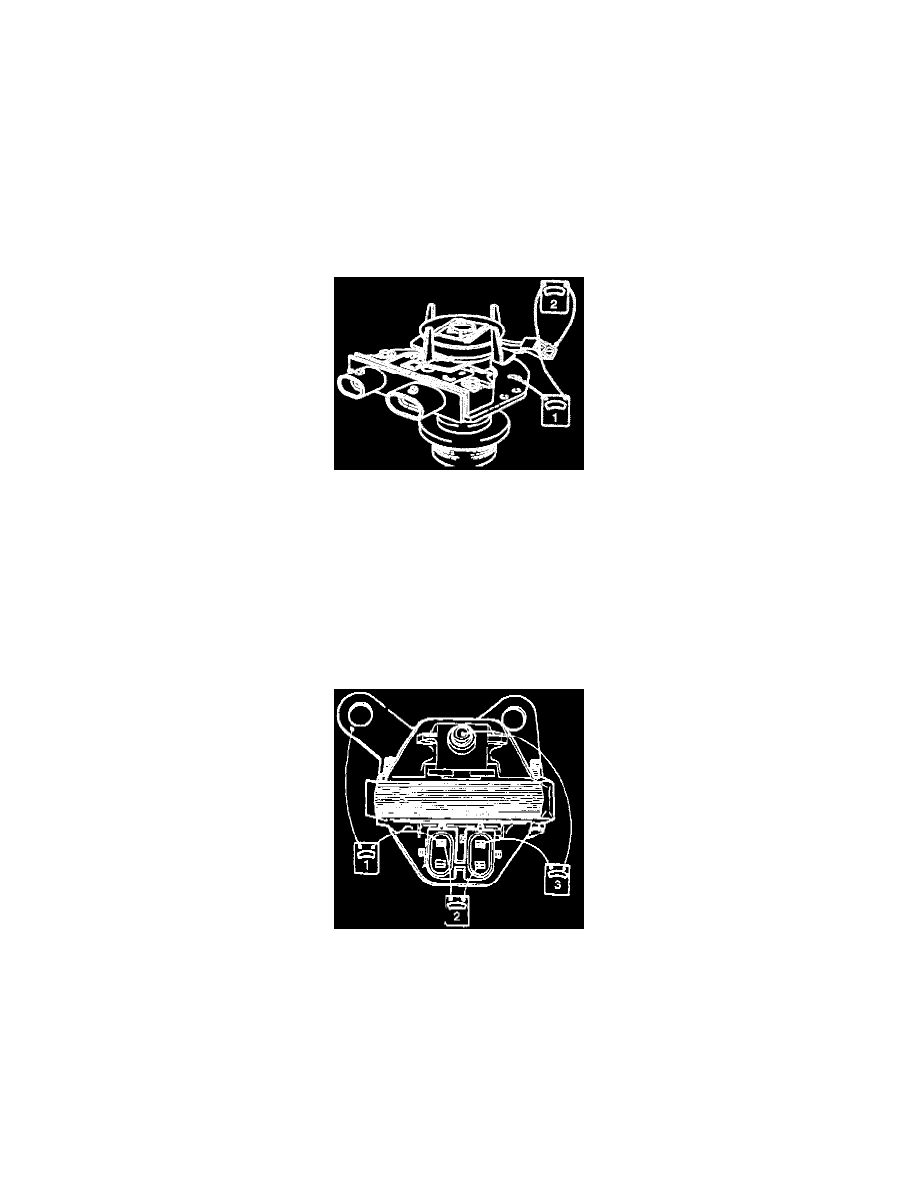
Testing The Pickup Coil
1.
Resistance of the pickup coil with an ohmmeter.
A. Connect an ohmmeter to either pickup coil lead and the housing as shown in image, step 1. The reading should be infinite. If not, replace the
coil.
B. Connect an ohmmeter to both pickup coil leads as shown in figure 7, step 2. Flex the leads by hand at the coil and the connector to locate any
intermittent opens. The ohmmeter should read a constant value in the 500 to 1500 ohm/range. If not, replace the coil.
2. Electrical performance of the module. The module can only be tested with an approved module tester, such as J 24642-F. Follow the directions
that come with the tester.
Ignition Coil Testing
3. Resistance of the ignition coil with an ohmmeter.
A. Connect the ohmmeter as shown in image, step 1. Use the high scale. The reading should be infinite. If not, replace the coil.
B. Connect the ohmmeter as shown in step 2. Use the low scale. The reading should be 0.2 - 1.5 ohms. If not, replace the coil.
C. Connect the ohmmeter as shown in step 3. Use the high scale. The meter should read 5K to 25K ohms. If not, replace the coil.