
S15/T15 Sonoma P/U 2WD L4-2.2L VIN 5 Flex Fuel (2001)
Compressor Clutch: Service and Repair
Compressor Clutch Plate/Hub Assembly Install
TOOLS REQUIRED
^
J 33013-B Hub and Drive Plate Remover/Installer
^
J 33017 Pulley and Bearing Assembly Installer
^
J 33027-A Clutch Hub Holding Tool
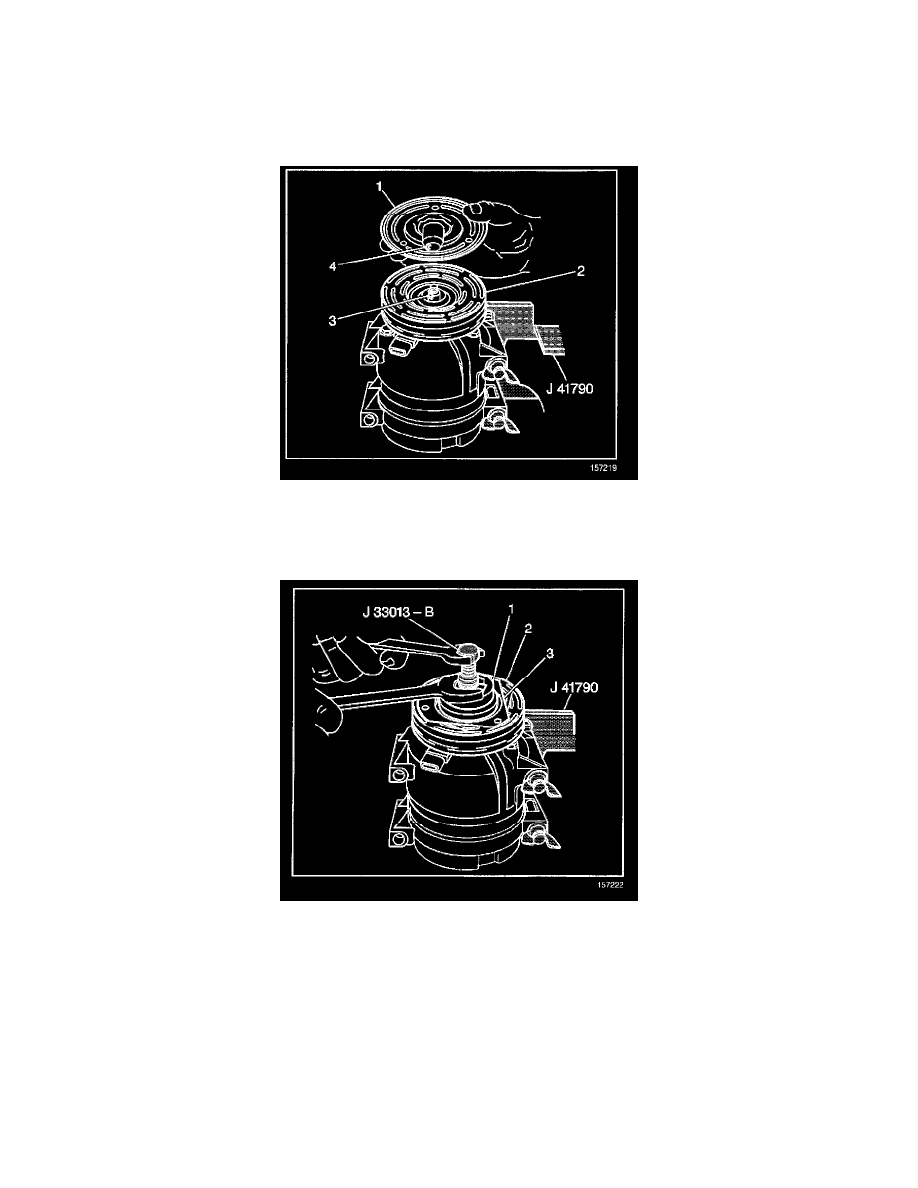
1. Install the shaft key into the hub key groove (4) approximately 3.2 mm (1/8 in) out of the keyway.
The shaft key is curved slightly to provide an interference fit in the hub key groove.
2. Clean the surfaces of the clutch plate (1) and the clutch rotor (2) before installing the clutch plate and hub assembly.
3. Align the shaft key with the shaft keyway in the clutch plate and the hub assembly and place onto the A/C compressor shaft (3).
4. Remove the J 33013-B.
4.1. Remove the center screw from the body of the J 33013-B.
4.2. Install the center screw into the opposite end of the J 33013-B.
5. Install the J 33013-B and bearing tools (1) onto the clutch plate (3) and the hub assembly (2).
5.1. Back the body of the J 33013-B off enough to allow the center screw to be threaded onto the end of the A/C compressor shaft.
5.2. Thread the center screw several turns onto the end of the A/C compressor shaft.
Do not tighten the center screw on the A/C compressor shaft.
6. Hold the center screw with a wrench.
6.1. Tighten the hex portion of the J 33013-B body several turns.
6.2. Remove the J 33013-B from the clutch plate and hub.
6.3. Make sure that the shaft key is still in place in the keyway.
7. Reinstall the J 33013-B.