
S15/T15 Sonoma P/U 2WD V6-262 4.3L VIN W CPI (1994)
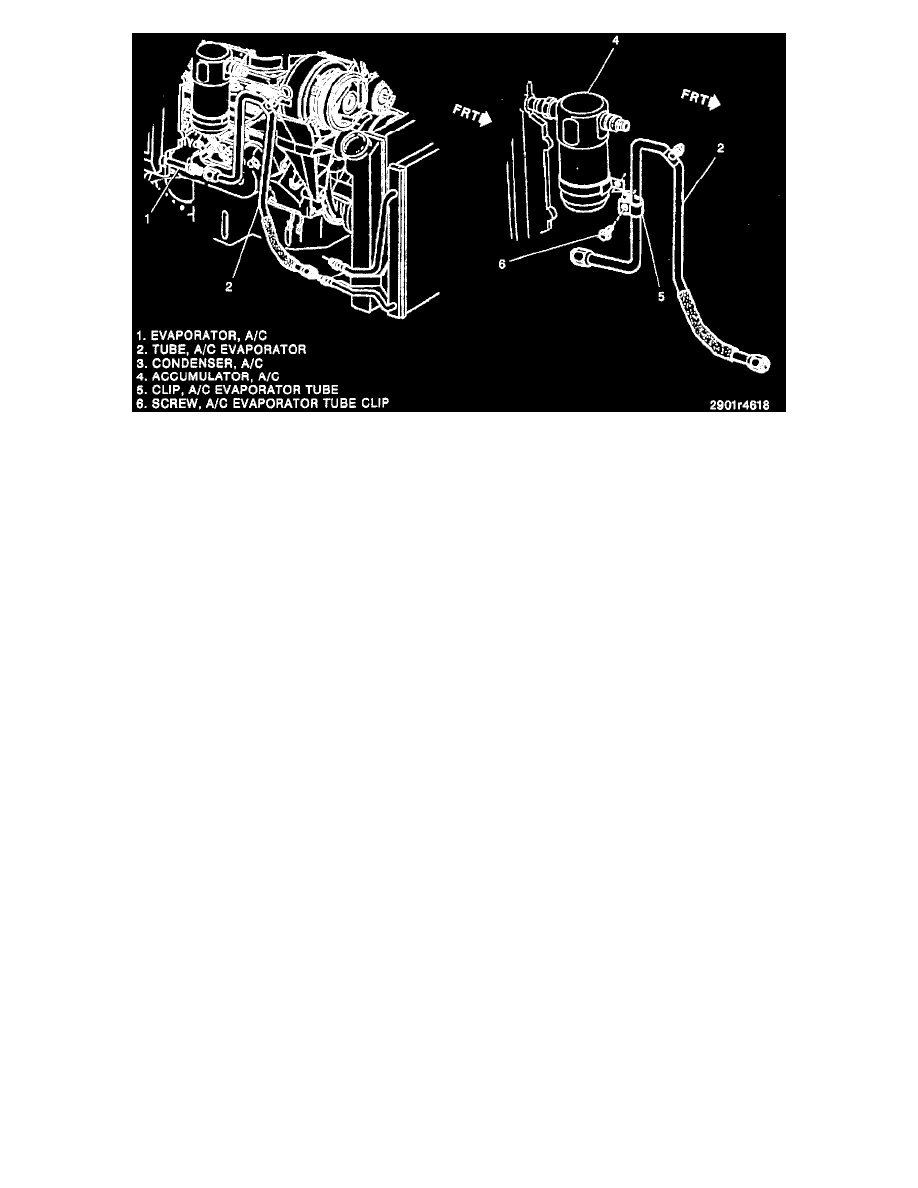
Figure 49: Evaporator Tube
REMOVE OR DISCONNECT
1. Negative battery cable.
2. Discharge and recover refrigerant from the system.
3. Blower motor resistor. Figure 52: (35)
4. Electrical connectors, as necessary.
5. Evaporator tube from evaporator. (Figure 49)
6. Accumulator.
-
See: Accumulator HVAC
7. Evaporator and blower module screws and nuts.
8. Evaporator and blower module from the vehicle.
9. Case Screws.
10. Case sections.
11. Core.
INSTALL OR CONNECT
1. Core. Refer to "Refrigerant Oil Distribution," if replacing core. See: Service and Repair
2. Case sections.
3. Case Screws.
4. Evaporator and blower assembly to the vehicle.
5. Evaporator and blower module screws and nuts.
TIGHTEN
-
Bolts and stud to 4.5 Nm (40 lbs. in.).
-
Screw and nuts to 2.5 Nm (22 lbs. in.).
6. Accumulator.
7. Evaporator tube to evaporator.
8. Electrical connectors, as necessary.
9. Blower motor resistor.
10. Negative battery cable.
11. Refrigerant to the system.
-
See: Service and Repair
-
Check the system for leaks.