
Safari Van 2WD V6-4.3L VIN X (2003)
4. Pull out on the top edge of the escutcheon and pivot down in order to clear the tab at the trim panel and remove the upper corner trim if equipped.
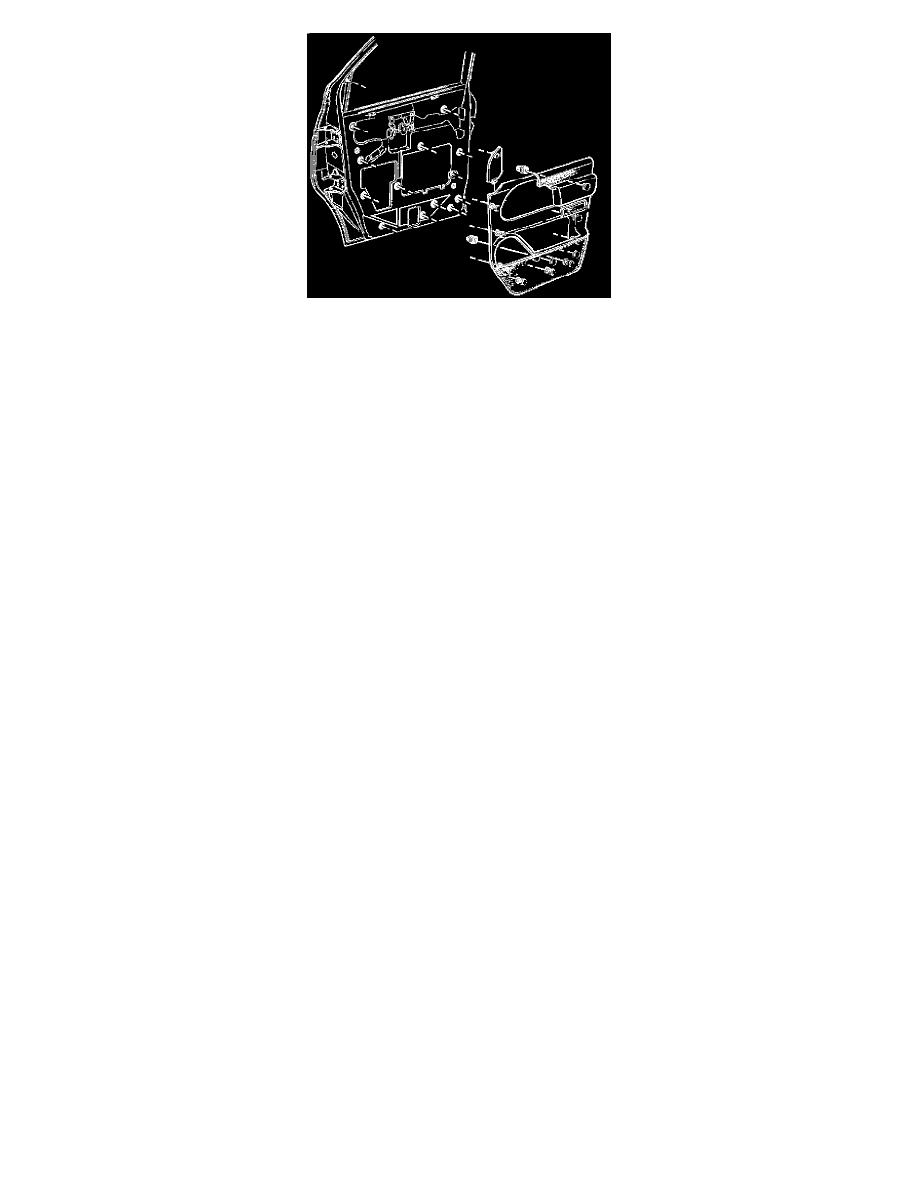
5. Remove the caps that cover the screws retaining the assist handle.
6. Remove the screws that retain the handle to the door.
7. Remove the one screw at the front edge of the accessory switch mount plate.
8. Remove the plate from the trim panel.
9. Disconnect the electrical connectors from the switches on the plate, as needed.
10. Remove the door courtesy lamp from the door panel, if equipped.
11. Use J 38778 to release the door trim panel retainers.
12. Remove the trim panel from the door.
INSTALLATION PROCEDURE
IMPORTANT: Replace any trim panel retainers that were damaged during removal.
1. Position the trim panel to the door.
2. Secure the trim panel retainers to the door by pressing into the door until fully seated.
3. Place the window seal portion of the panel over the door frame in order to install the trim panel to the door.
4. Install the door courtesy lamp to the door panel.
5. Connect the electrical connectors to the switches on the accessory switch mounting plate, as needed.
6. Install the plate to the trim panel.
7. Install the one screw at the front edge of the accessory switch mount plate.
NOTE: Refer to Fastener Notice in Service Precautions.
Tighten
Tighten the one screw at the front edge of the accessory switch mount plate to 2 N.m (18 lb in).
8. Install the handle to the door with screws.
Tighten
Tighten the handle to the door with screws to 5 N.m (44 lb in).
9. Install the caps that cover the screws on the assist handle.