
Safari Van 2WD V6-4.3L VIN X (2003)
1. Set the steering wheel in the straight ahead position.
2. Loosen the clamp bolts at each end of the steering tie rod adjustable sleeves.
Important: The tie rod adjuster often becomes rusted in service.
3. If the torque needed to rotate the adjuster tube exceeds 9 Nm (80 inch lbs.), perform the following steps:
3.1.
Remove the adjuster tube clamp nuts and the bolts. Discard the nuts and the bolts.
3.2.
Apply the penetrating oil between the adjuster tube and the tie rod threads.
3.3.
Rotate the adjuster tube until the tube moves freely.
3.4.
Install the new bolts and the nuts with the correct part number. The nut must be towards the front of the vehicle.
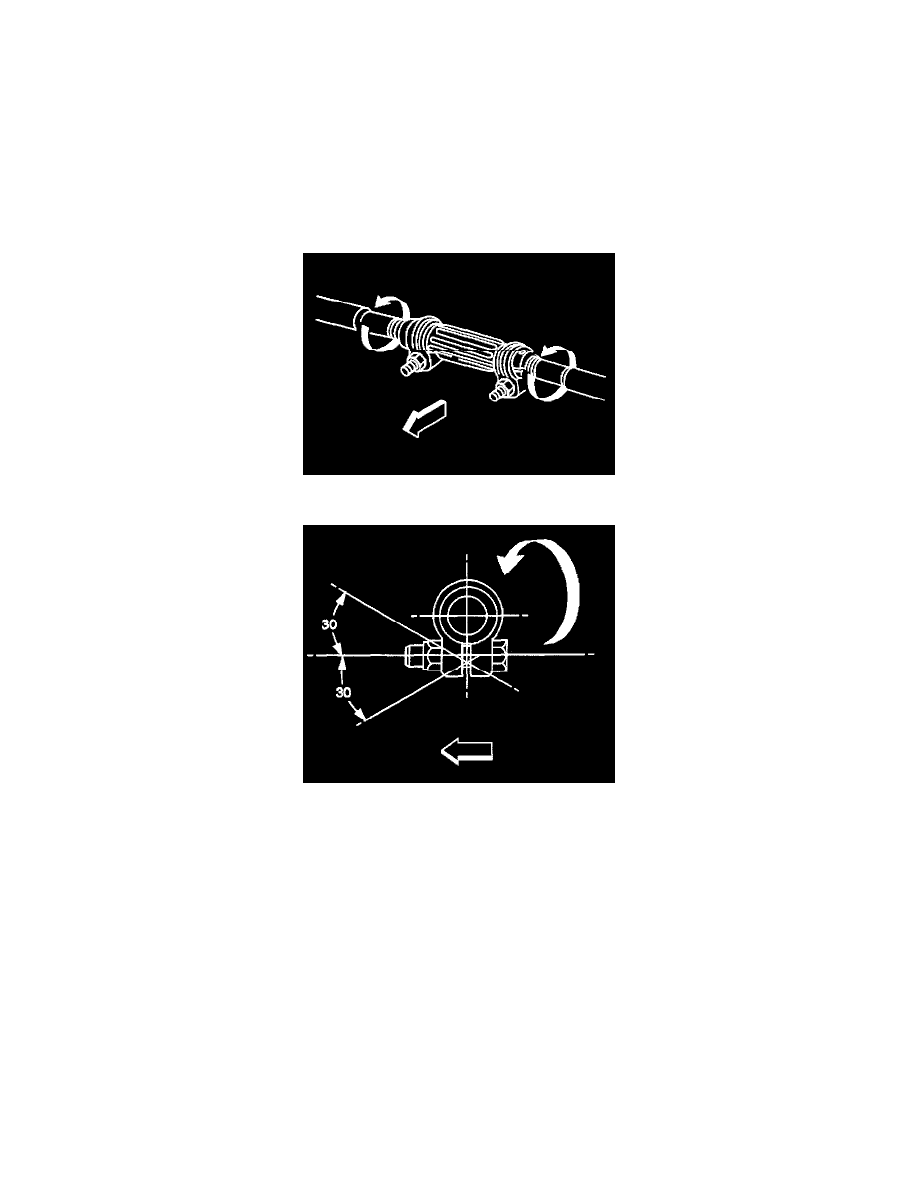
4. Rotate the inner and the outer tie rod sockets rearward to the limit of the ball stud travel.
5. Turn the tie rod adjusting sleeves to set the toe-in to specifications.
Notice: Refer to Fastener Notice in Service Precautions.
Important: Before tightening the adjuster tube nuts, do the following:
-
Check the number of threads on each tie rod within the adjuster tube.
The tie rod threads within the adjuster tube must be equal to within 3 threads.
-
Check the relationship of the adjuster tube to the clamp. The adjuster tube slot and the clamp opening must not be in the same position.
The position of the adjuster tube clamp must not exceed 30 degrees in either direction.
-
The adjuster tube clamp must be on the inside of the adjuster tube dimple.
6. Tighten the adjuster tube clamp nuts.
-
Tighten the adjuster tube clamp nuts to 25 Nm (18 ft. lbs.).
The clamp ends may touch when the nuts are tightened to specification.
7. Rotate the tie rod sockets to the centered position.
Ensure that the outer socket is square with the stud.