
Safari Van 2WD V6-4.3L VIN X (2003)
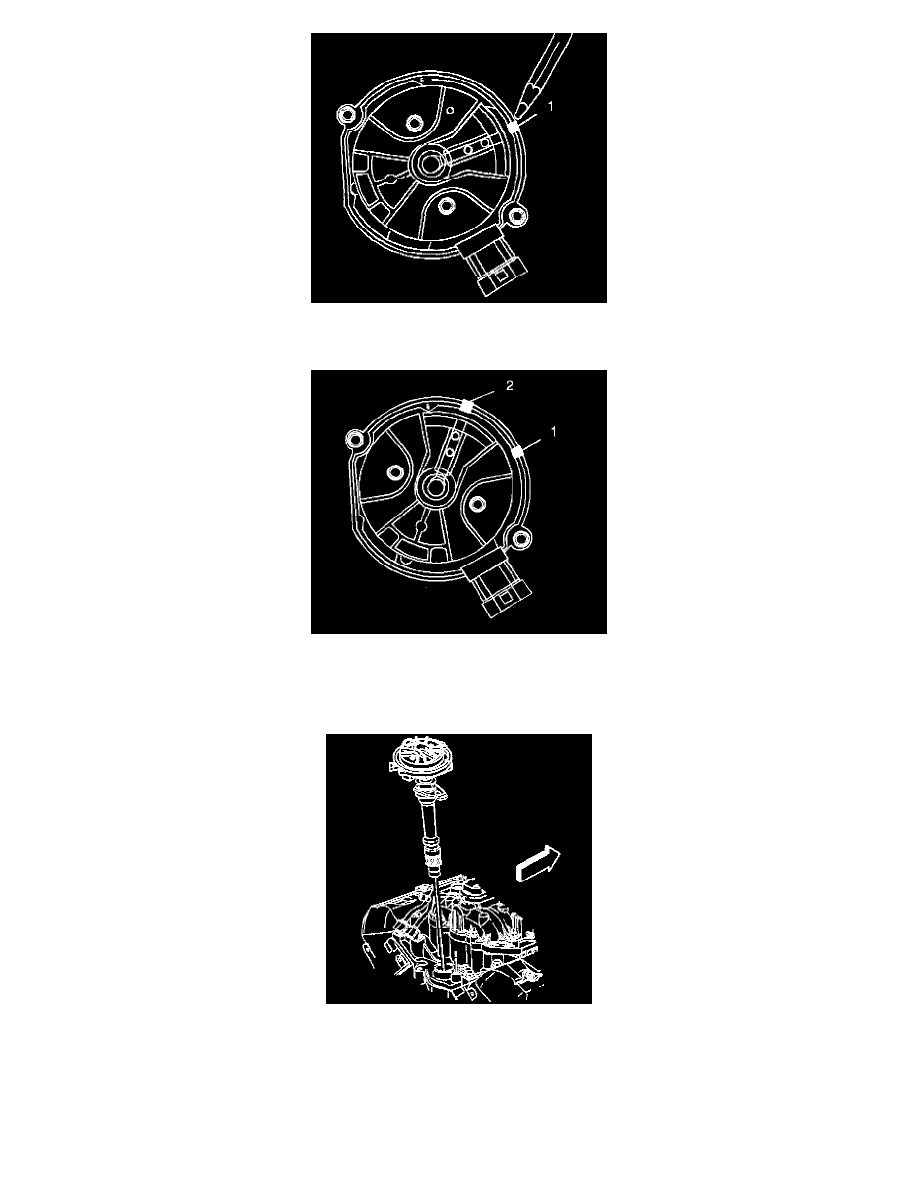
10. Use a grease pencil in order to mark the position of the rotor in relation to the distributor housing (1).
11. Mark the distributor housing and the intake manifold with the grease pencil.
12. As the distributor is being removed from the engine, watch the rotor move in a counter-clockwise direction about 42 degrees. This will appear as
slightly more than one clock position.
13. Note the position of the rotor segment.
14. Place a second mark on the base of the distributor (2). This will aid in achieving the proper rotor alignment during the distributor installation.
15. Remove the mounting clamp hold-down bolt.
16. Remove the distributor.
INSTALLATION PROCEDURE 1